A Step by Step guide to how we built our Citroen Relay camper van

A Step by Step guide to how we built our Citroen Relay camper van

First up we had no experience and no idea where to start on how to build a camper van!  That’s where YouTube came in handy.  We spent hours sifting through hundreds of YouTube videos on how to build a camper van.  Some of it was relevant to us and our van, but so much of it wasn’t.  Our logic told us to start from the floor up.  After all you’d never start building a home without putting some foundations in first!  

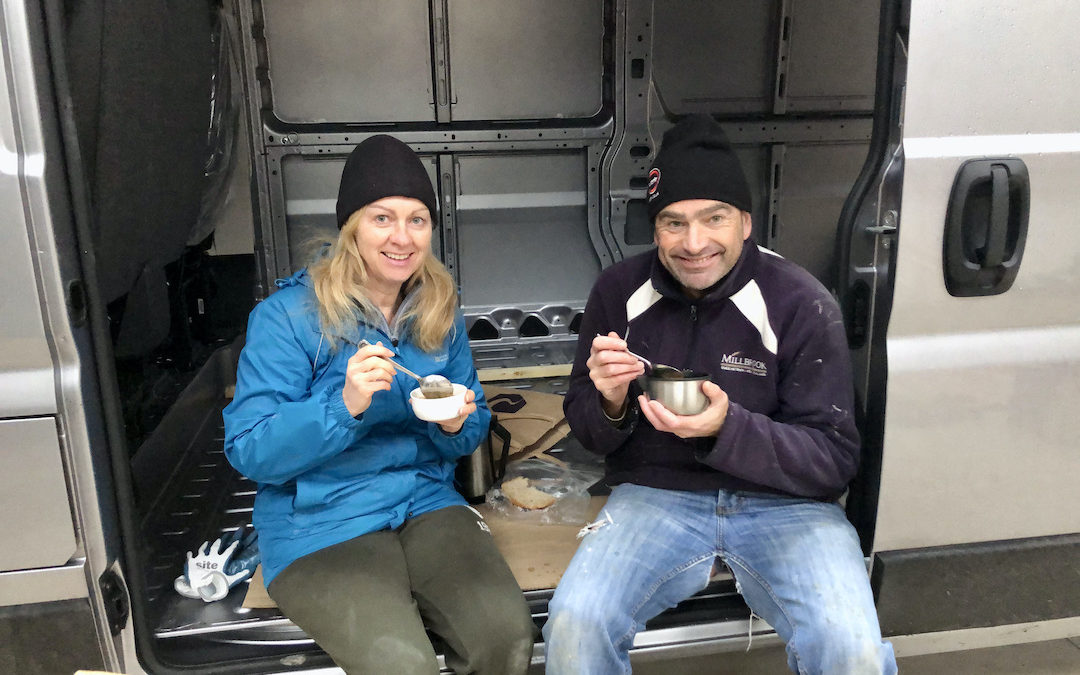
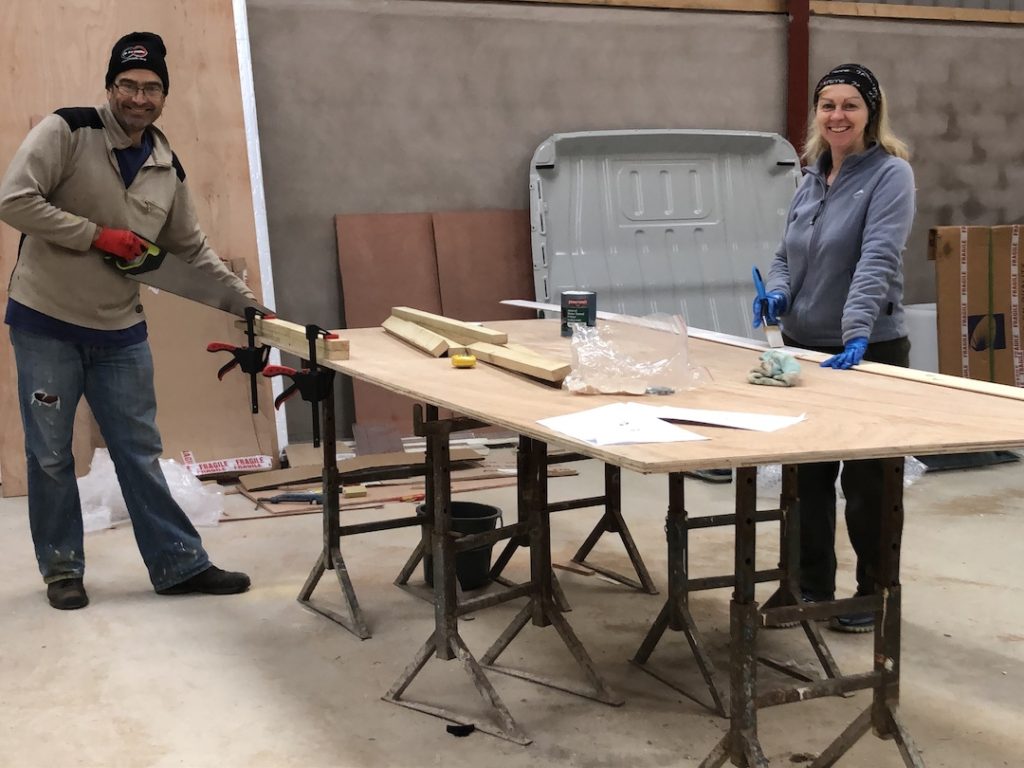
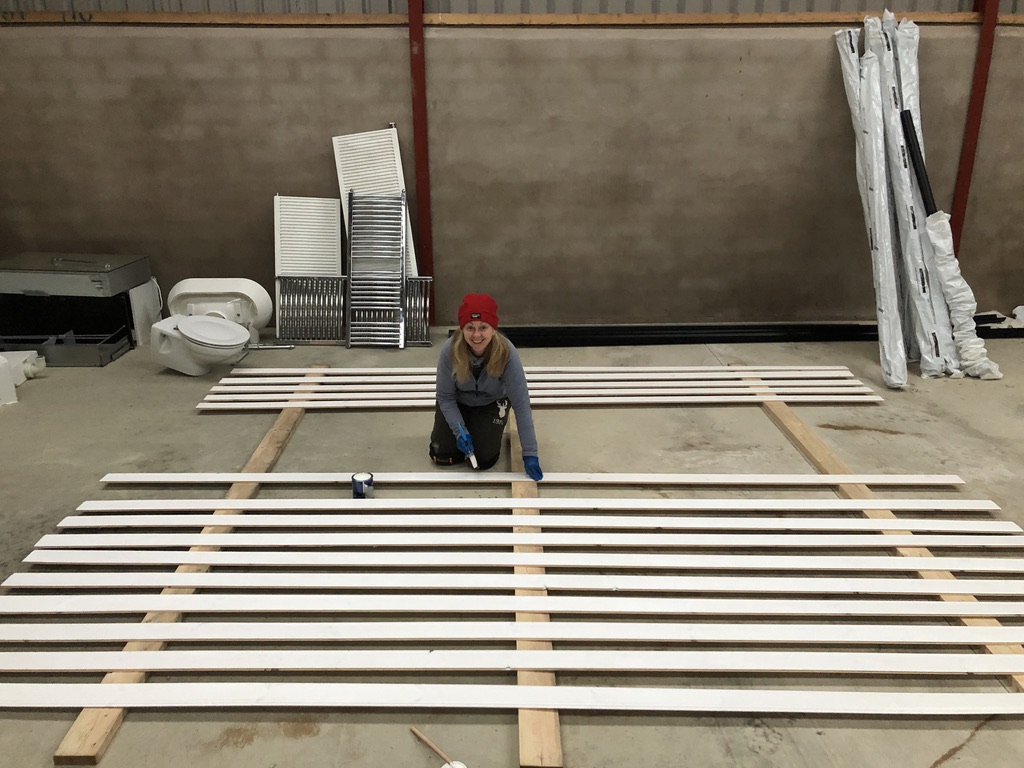
Secondly we had no garage to work in!  That’s where friends come in handy.  A friend very kindly gave us the use of his brand new shed to work in.  It was less of a shed, and more of a barn the size of a 5-a-side football pitch!  We had oodles of space to spread out, and we could work on the build whatever the weather.  And we can tell you it was cold!  We take our hats off to anyone who managed to build a camper van in their driveway or on the street, especially if, like us, they built it during the winter.

Armed with the internet and a roof over our heads we started our camper van build the first week of December 2020.  Here follows the very rough step-by-step process we used to convert a Citroen Relay panel van into a camper van.  There is no guarantee that the same process would work for you, but it might give you a starting point. 

Dave and Sharon Schindler at a workbench

It’s worth saying here that we did have at least a vague design of the layout we wanted before we started the build!  We’d gone as far as creating a mock layout of the main features using cardboard boxes to get a feel for how it would all fit.   Keep in mind our Citroen Relay van was brand new so we didn’t have to degrease it or treat any rust spots in preparation for the build.

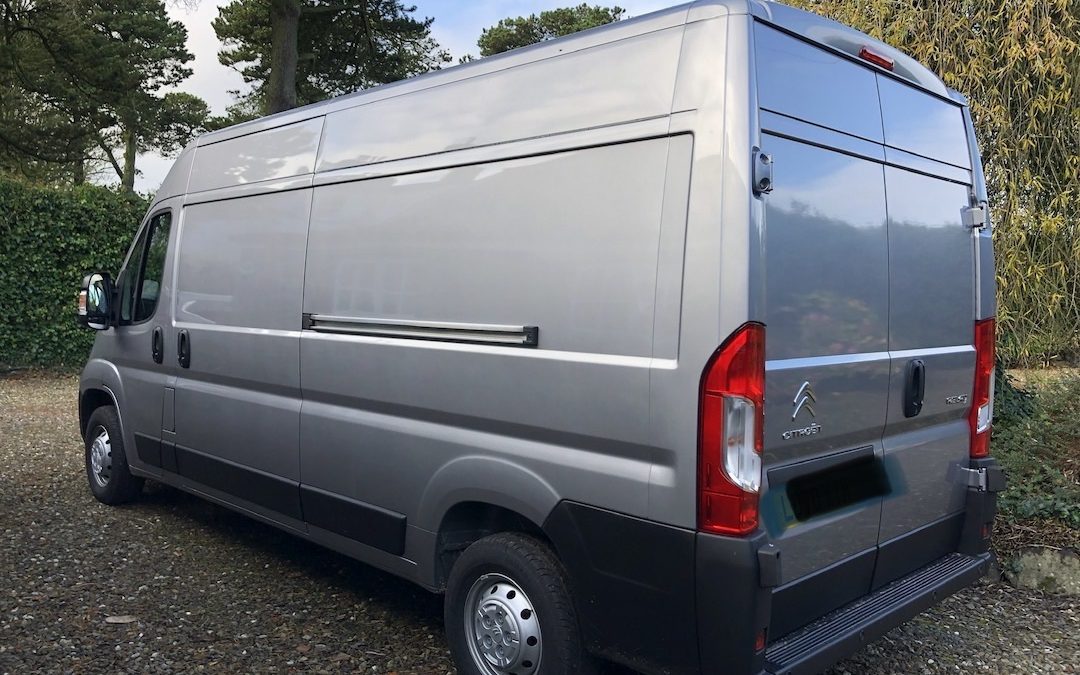
If you want to know why we chose a Citroen Relay van for our camper van build then head over to this blog post.

This post may contain affiliate links.  As an Amazon Associate we earn from qualifying purchases.  More info in our Privacy Policy.

Our step by step guide to building our campervan

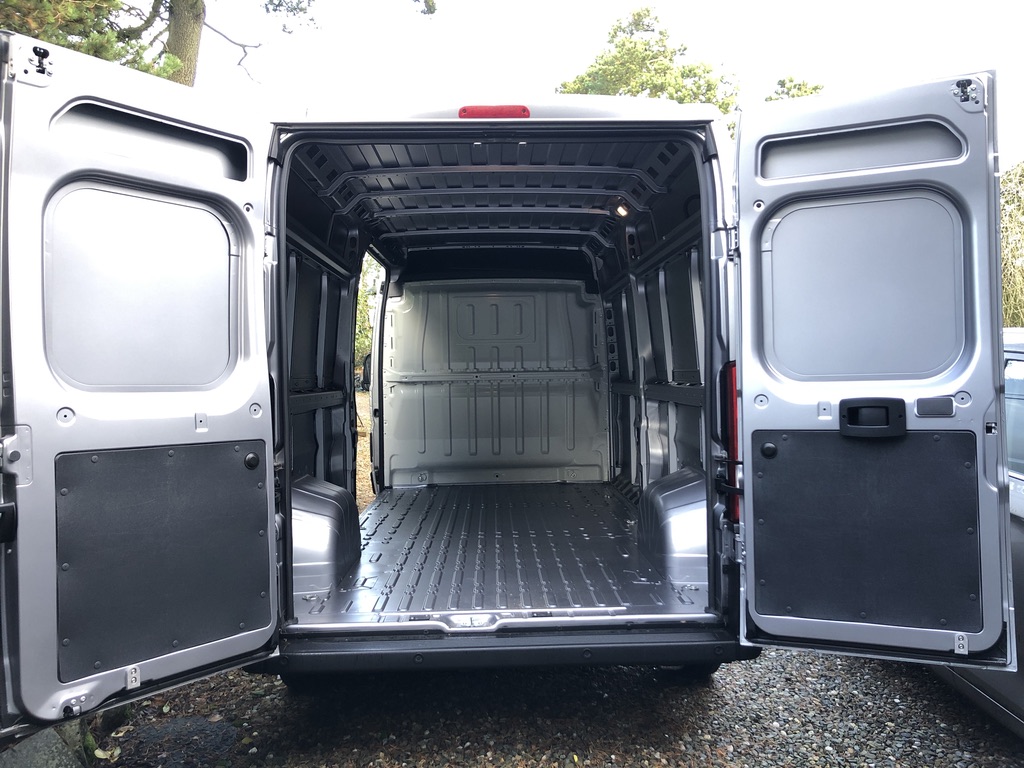
Removing the bulkhead

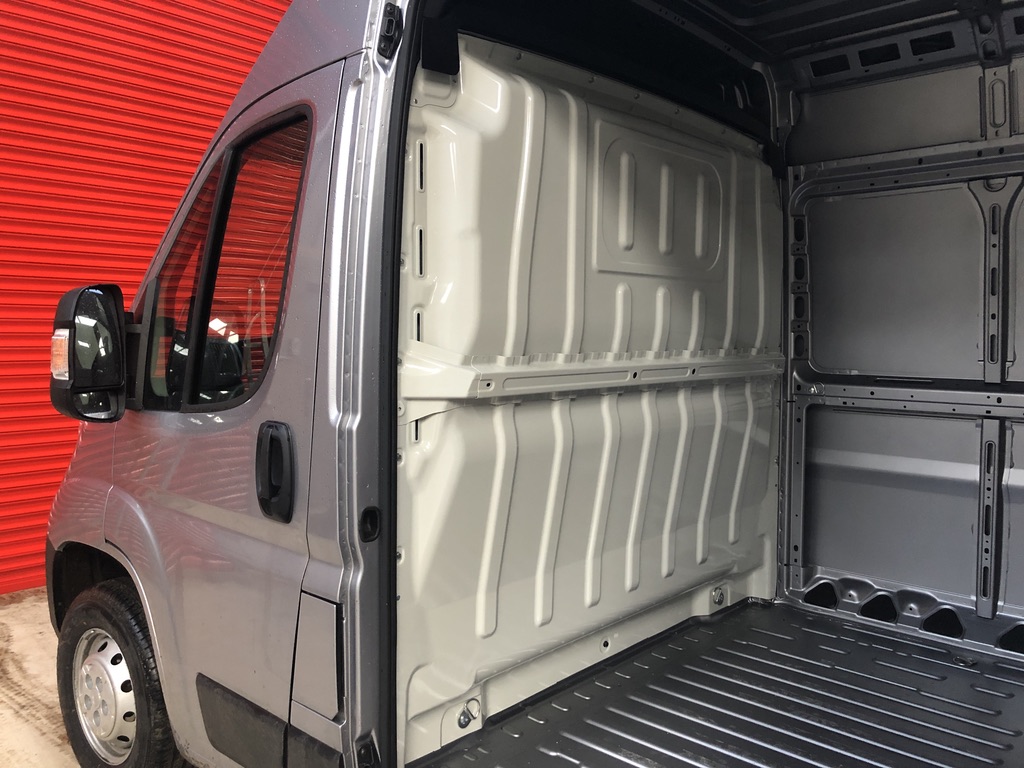
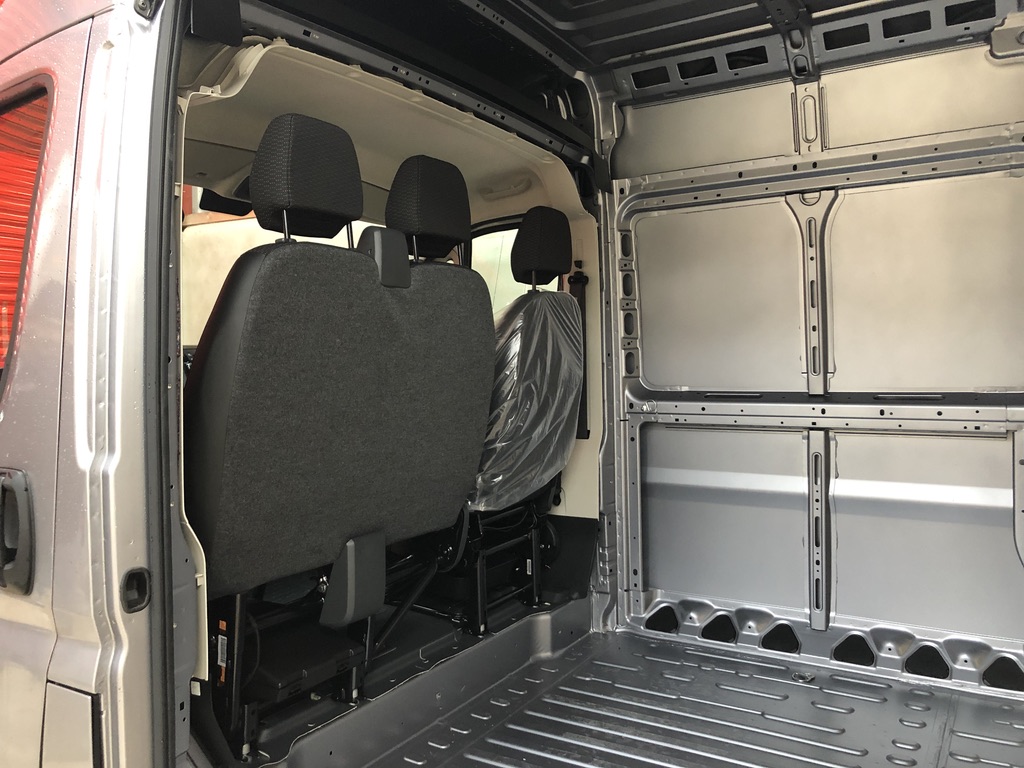
The first thing we did was we removed the bulkhead – the divider between the cab and the rear of the van.  In our van design we wanted the area between the cab and the rest of the van to be open so that eventually we could have a walk-through area.  This would mean on a rainy day (of which there are many in the UK) we could walk from the cab into the back of the van without having to open the side doors.

It also means you have quick access to the cab should you need to drive away from a park up in the case of an emergency, particularly at night time.  Plus it gives you more space to work in during the build process!
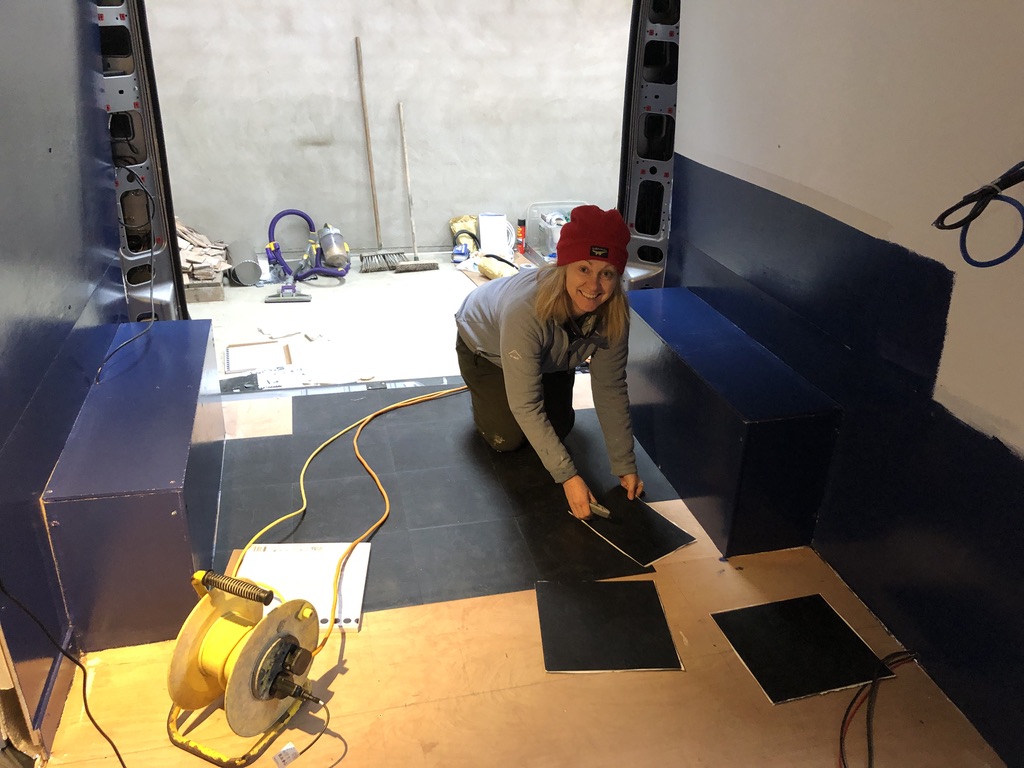
Laying the floor

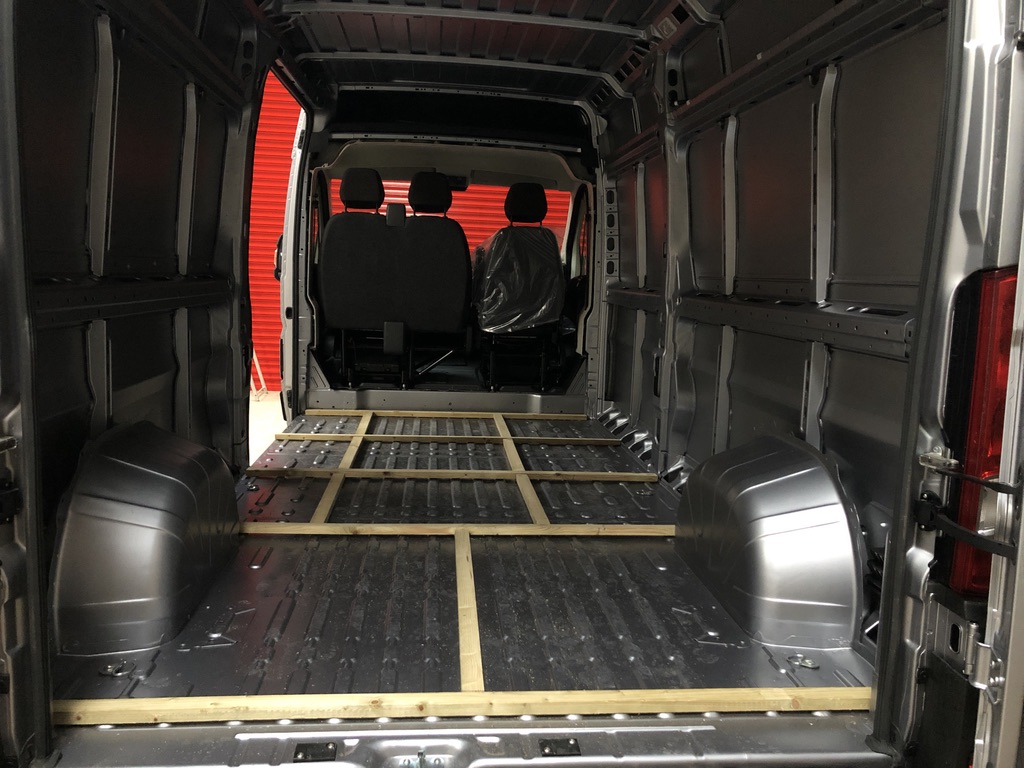
Next up for us was laying the plywood floor – having a level and insulated floor to work on rather than the cold metal corrugated van floor made sense to us.  Plus it made it much easier to stand on in winter!

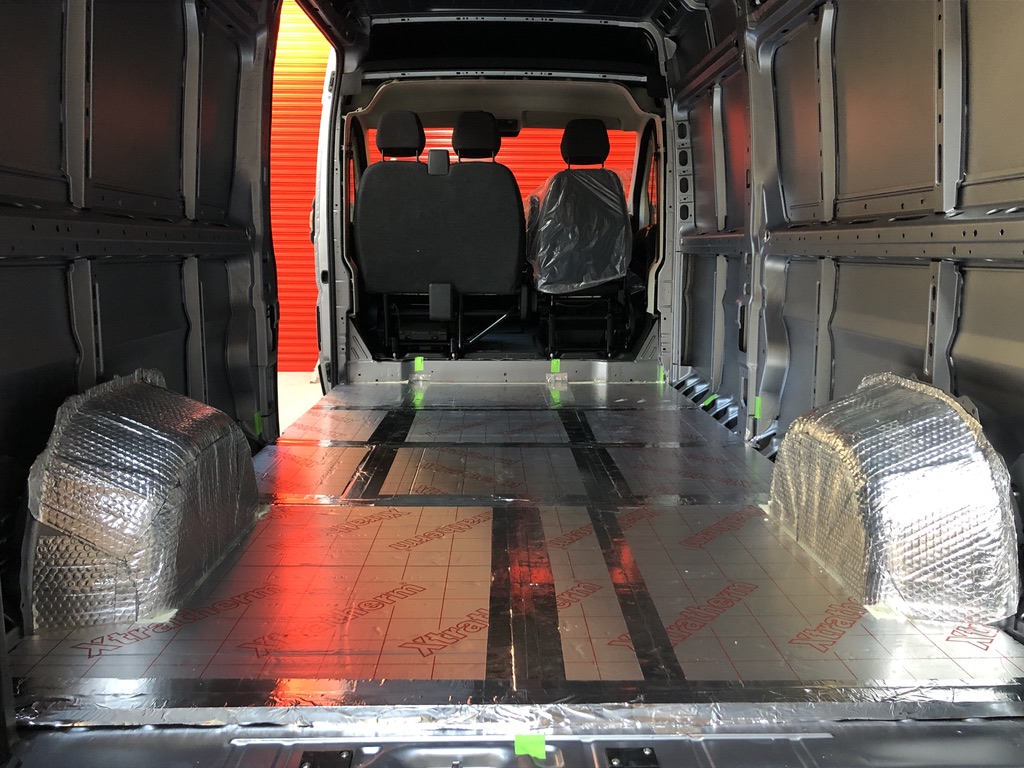
We laid a grid of 2×1 battens using Sikaflex 552 adhesive to fix them to the floor (we didn’t want to drill any unnecessary holes in the floor).  We filled the floor grid with rigid insulation boards (25mm thick) and sealed them with aluminium foil tape to create a vapour barrier before we screwed the 12mm ply boards to the battens. 

The top floor covering we left to near the end of the build process for two reasons – 1. it would likely get damaged while we work on the van build, and 2.  it didn’t make logical or economical sense to us to lay a top floor covering the entire length of the van when at the end of the build you would only see a tiny portion of it.  
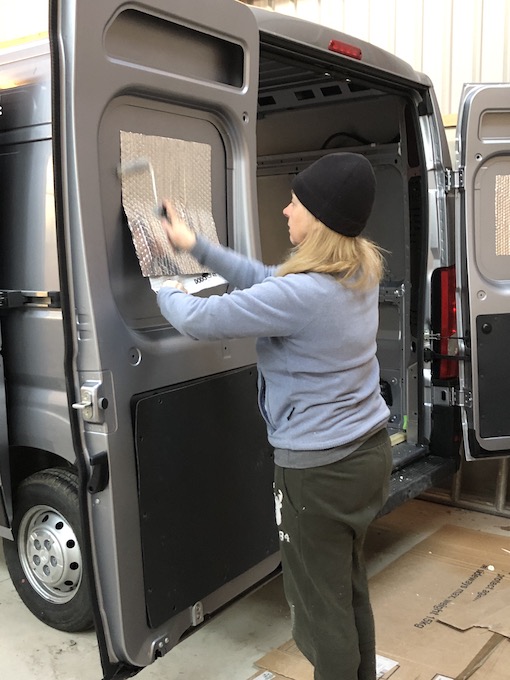
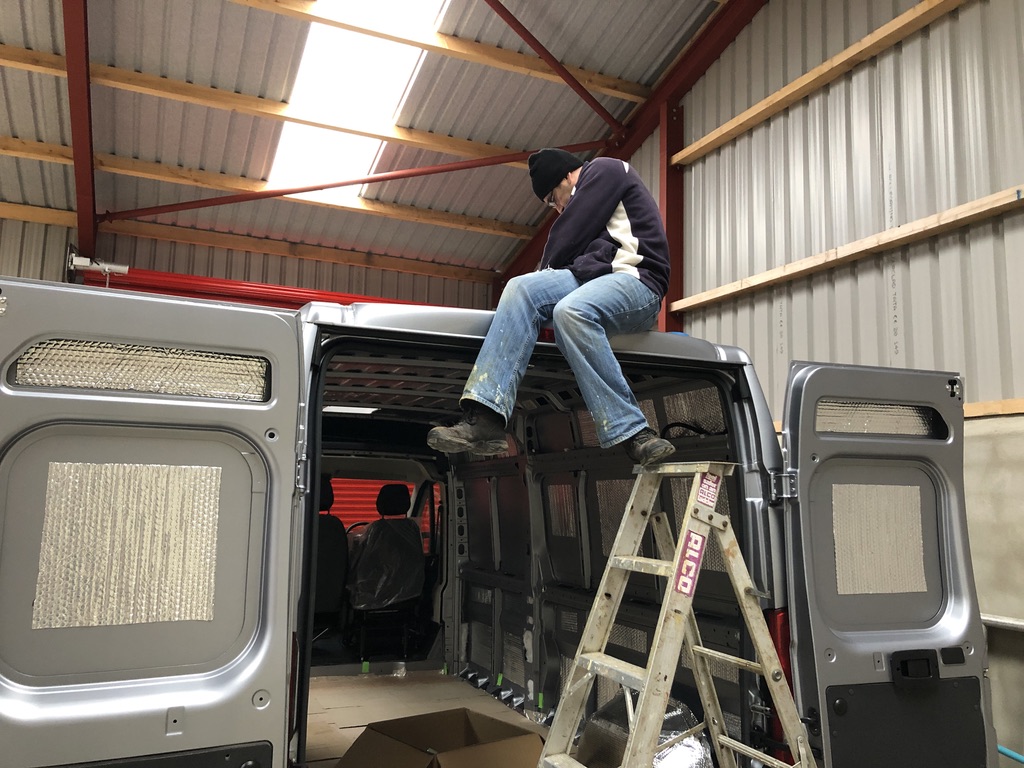
Sound deadening

A tin van is always going to sound tinny, but adding sound deadening mats to the walls can help to reduce some of the noise, and provide a little extra insulation.  We opted for Dodo Mat Sound Deadening and applied it to the wall panels, the overhead cab, the ceiling and the wheel arches.  A relatively cheap and easy job to do, made easier by investing in a long reach mini paint roller to smooth out the mats and get rid of any air bubbles.

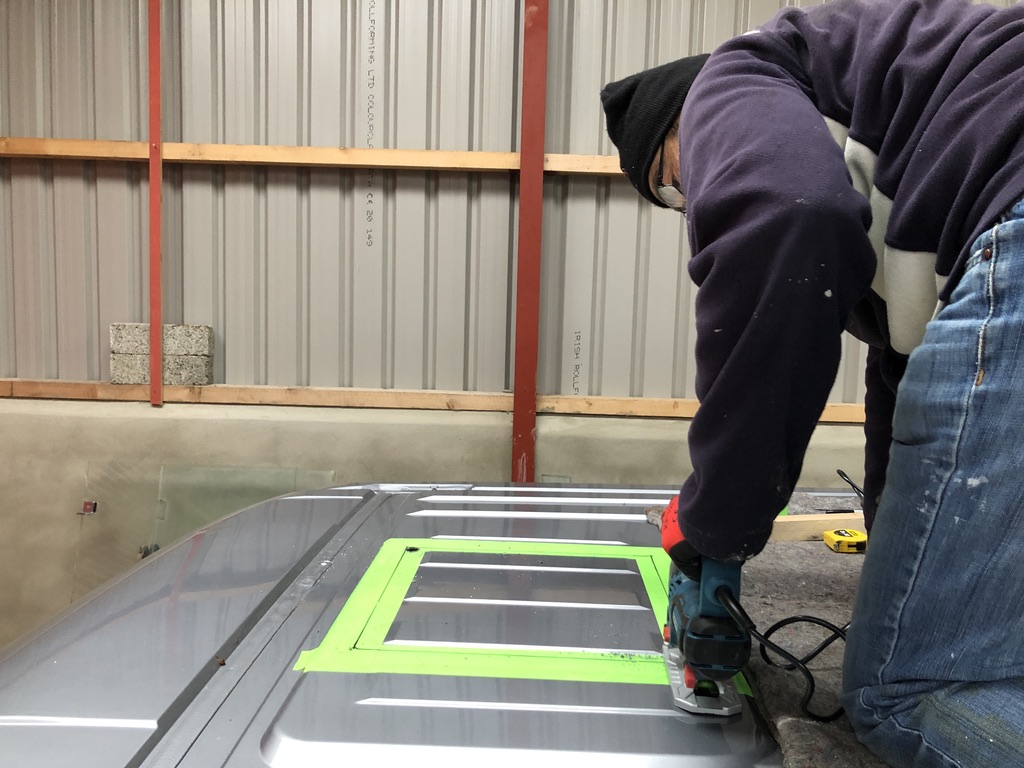
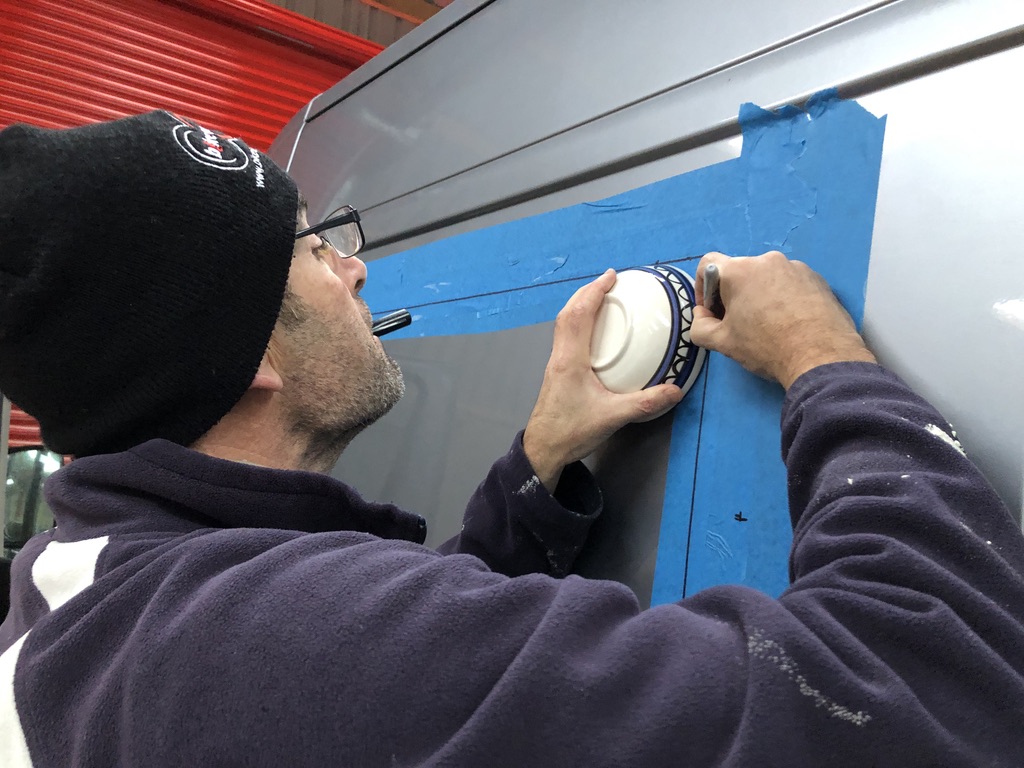
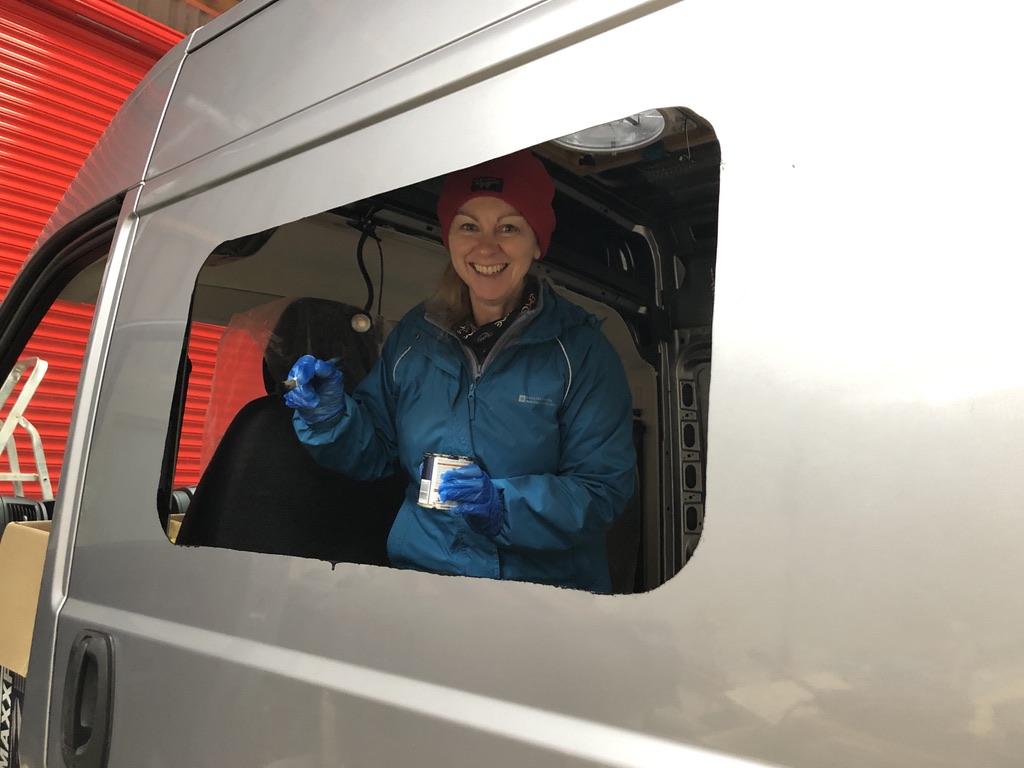
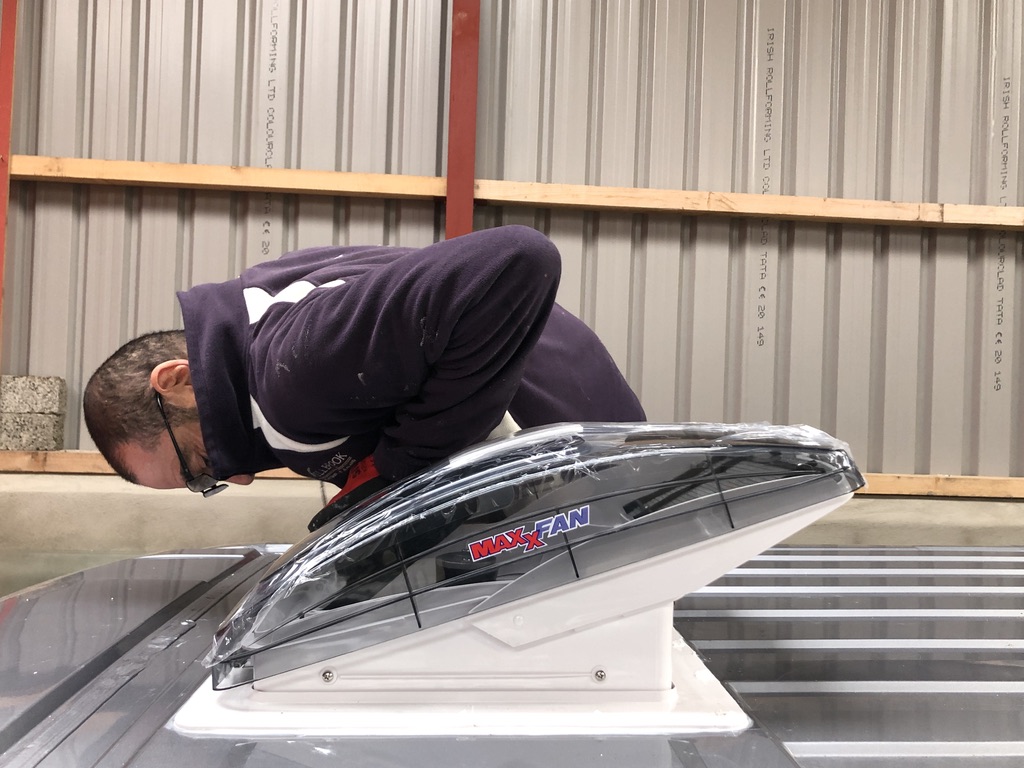
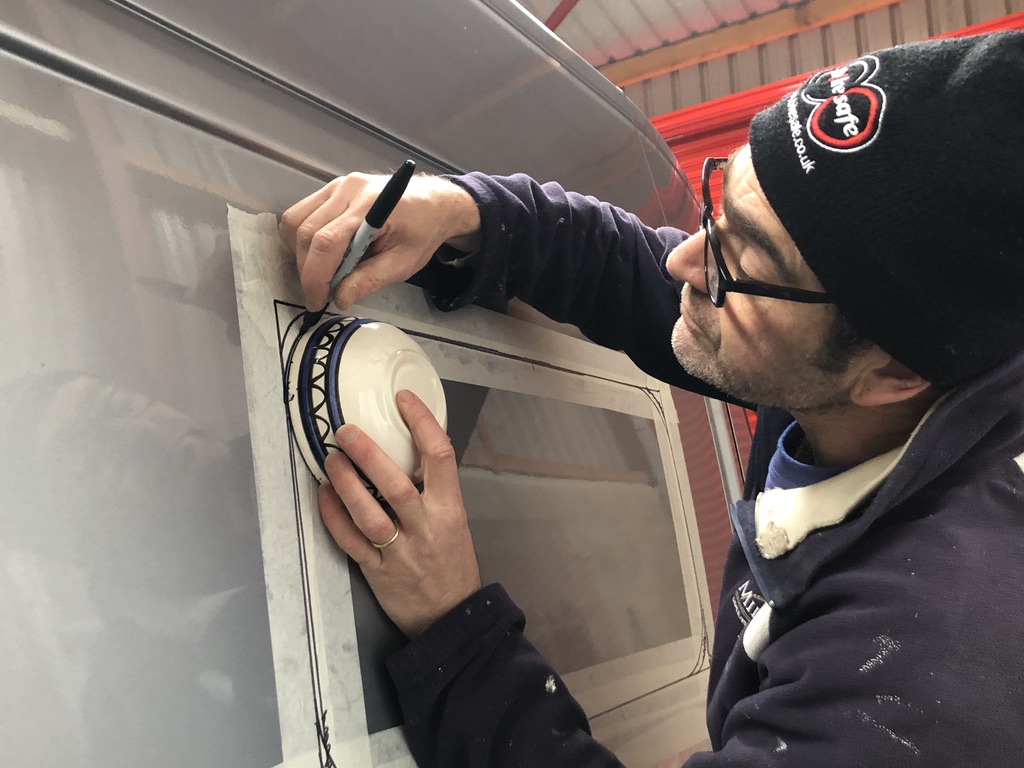
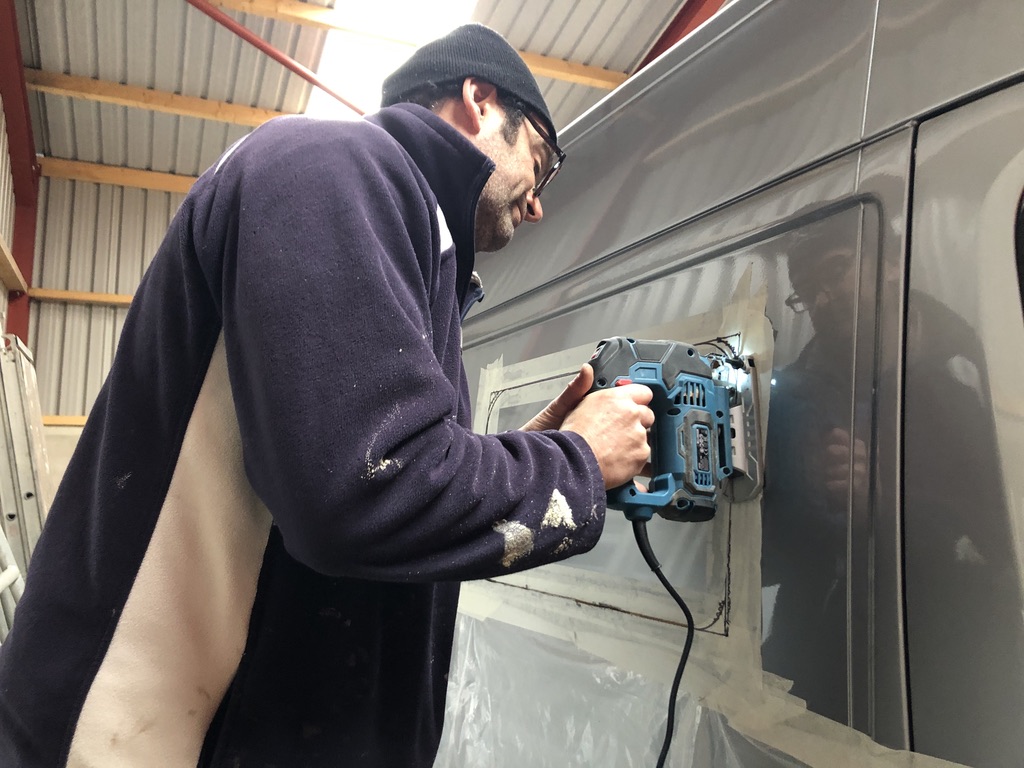
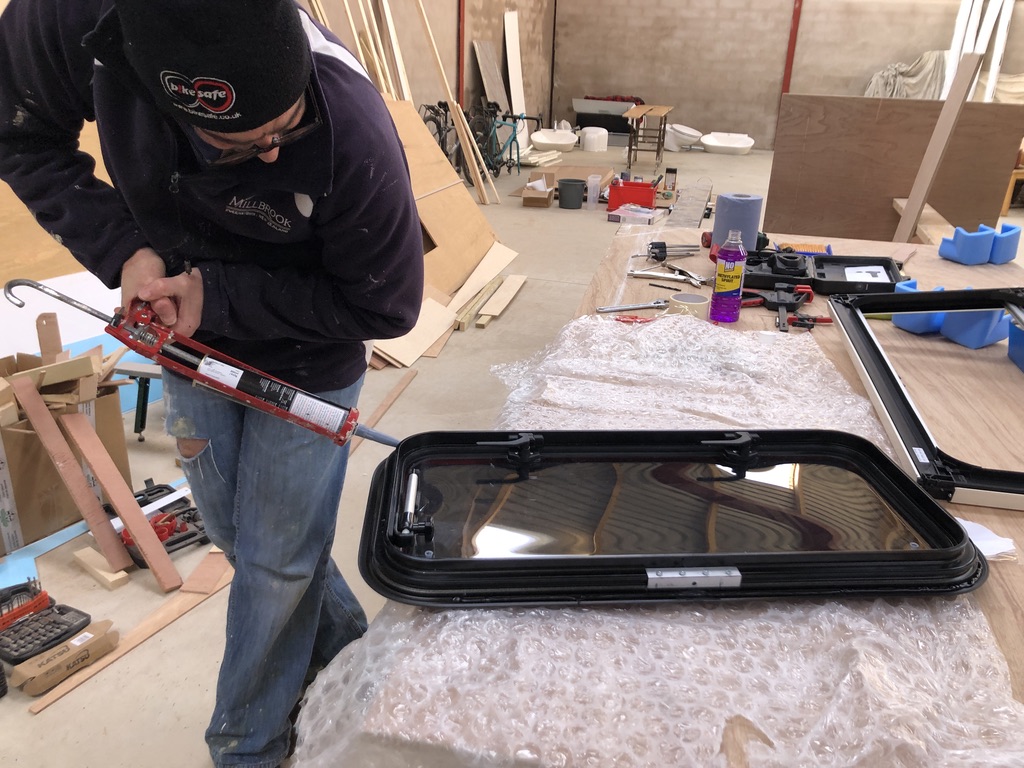
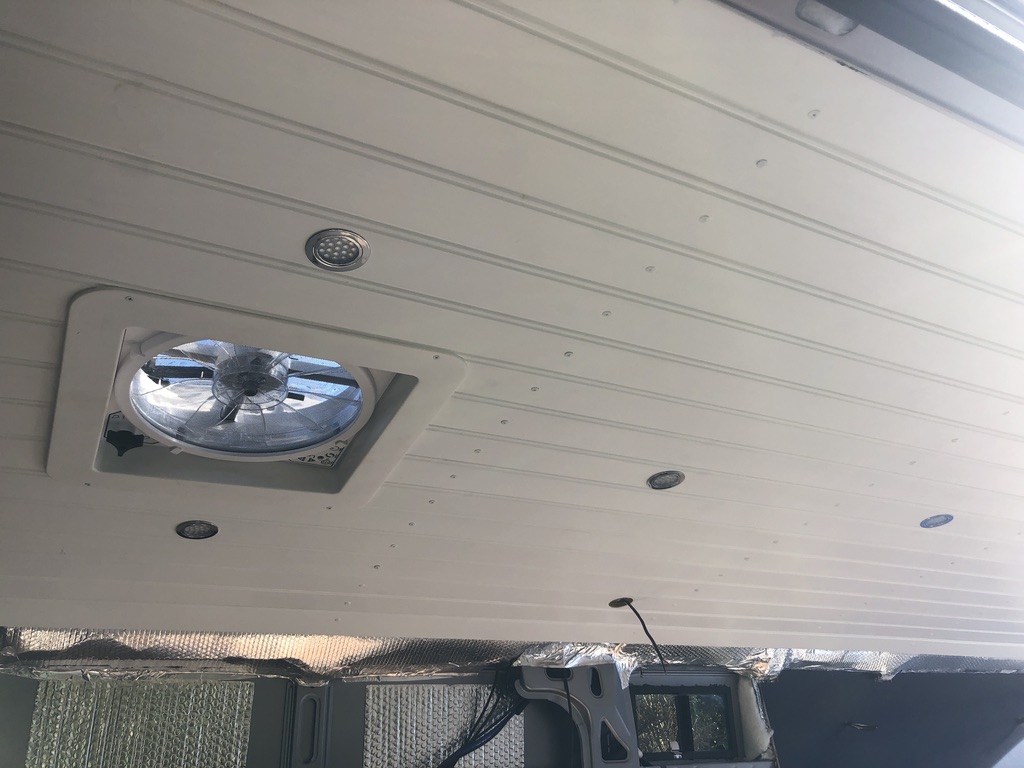
Installing the roof fan, sky light and windows

These jobs were scary!  Cutting that first hole in the van is a tense moment to say the least.  Make sure you measure at least twice as you can only cut once!  We must’ve measured and re-measured a hundred times!

Remember as you cut into the metal, the jigsaw creates loads of tiny metal shards and it is best to clean these up as soon as possible before they create potential rust hazards.

We chose the Maxxair Roof Fan Deluxe 400x400mm with remote control, and the same size Maxxair SkyMaxx sky light with built in blind and flyscreen.

We wanted opening windows rather than glass panels, and shopped around until we found the Polyvision Aero windows we liked.  They weren’t cheap, but are double glazed, tinted, and come complete with mosquito nets and blinds.  We fitted one window (900x450mm) in the sliding door, and the other window (700x350mm) in the opposite wall.

To seal the fan, roof light and windows we used Sikaflex 552 waterproof sealant which comes in either white, black or grey.

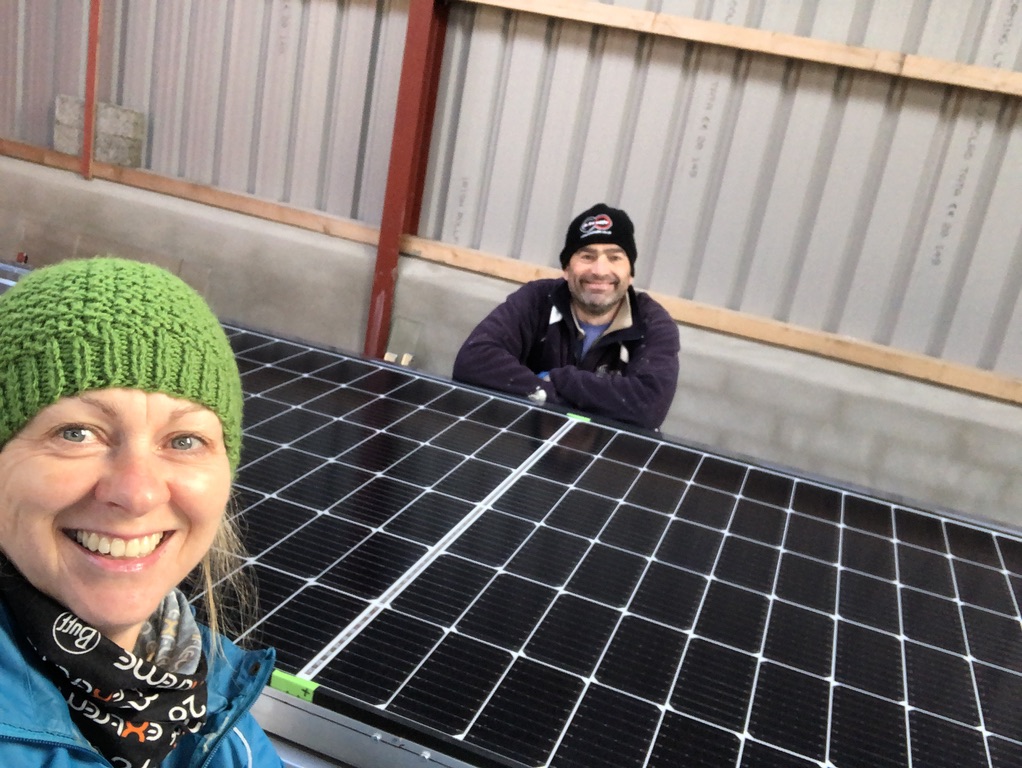
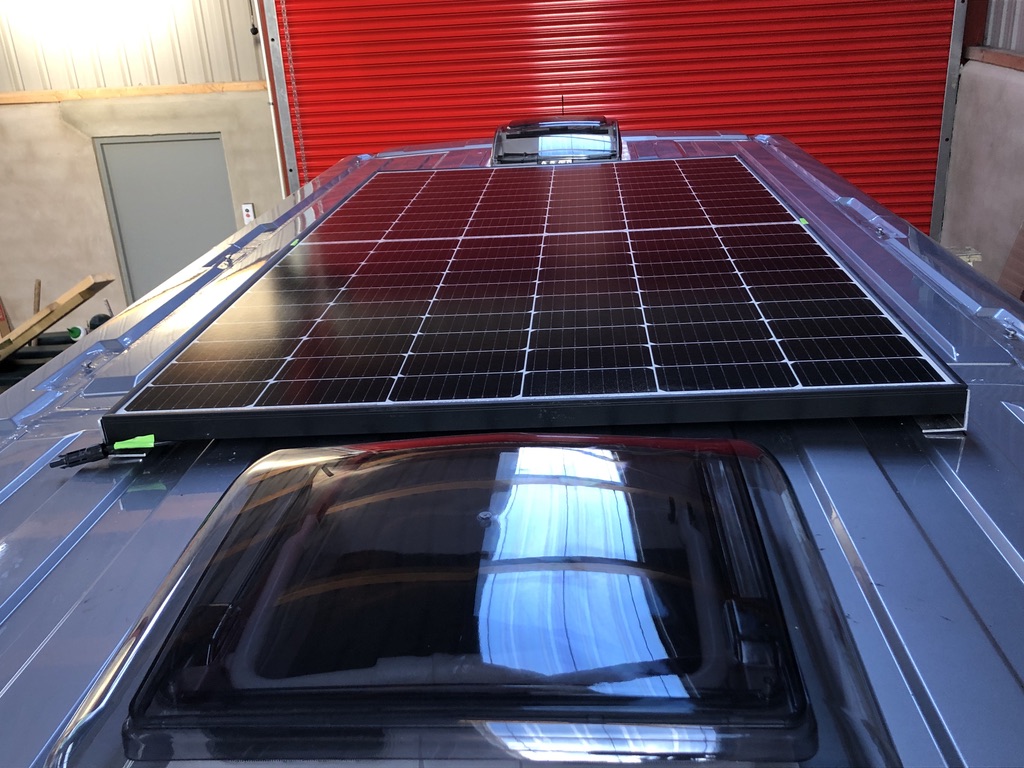
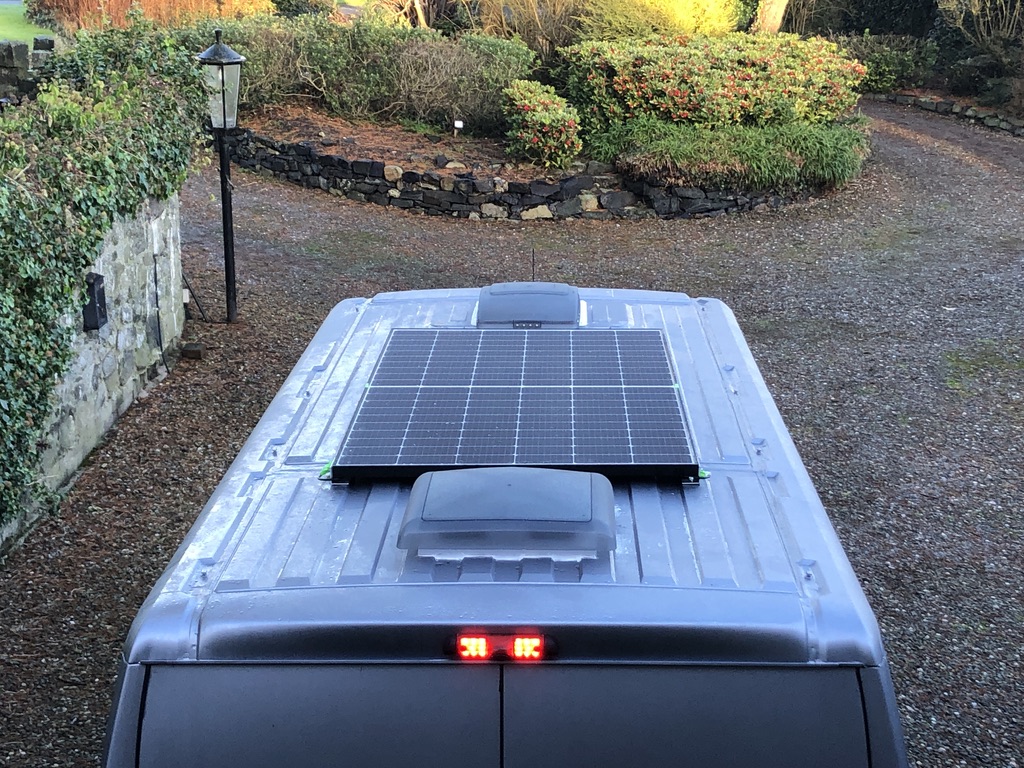
Fitting the solar panel

This was definitely a job for the two of us!  We bolted the solar panel to aluminium quadrant brackets and then used the same Sikaflex 552 waterproof sealant to attach it to the roof.  The panel we fitted was a Longi 370W split cell solar panel from Plug In Solar.

Adding a swivel base to the passenger seat

Our Citroen Relay van came with a fixed double passenger seat, or bench seat as they’re sometimes called.  Ideally we wanted to replace it with a single swivel seat, but finding one at a reasonable price during the lockdown of 2020 was proving impossible.  Instead we opted for a swivel base for the double seat from Custom Shop Designs

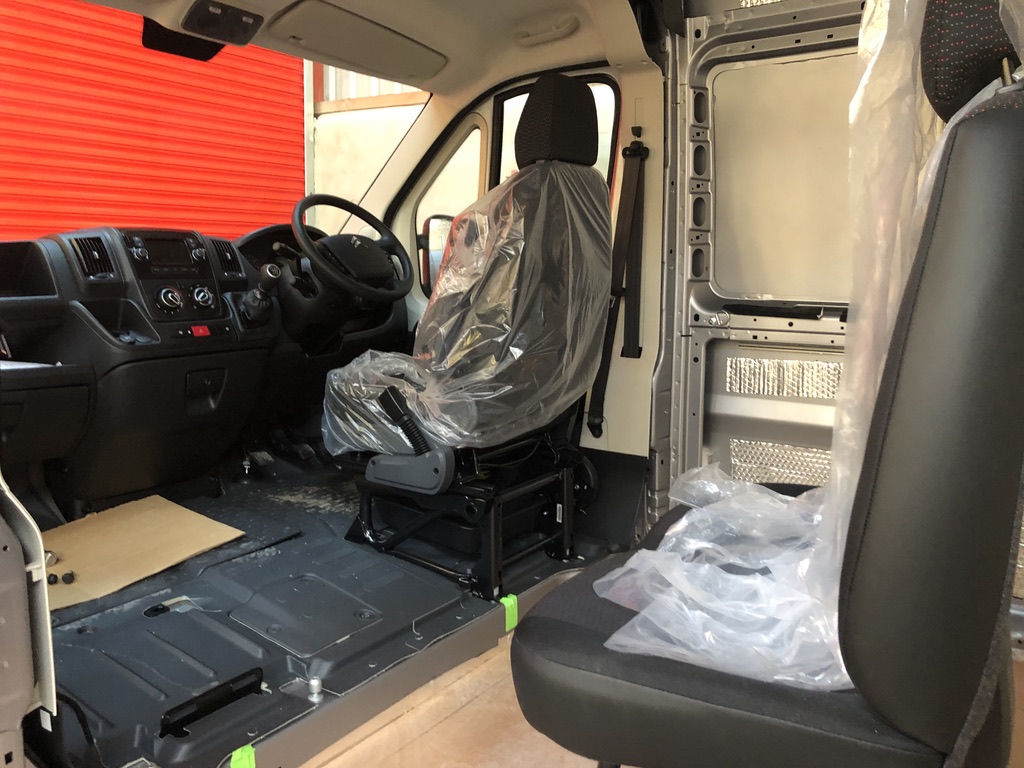
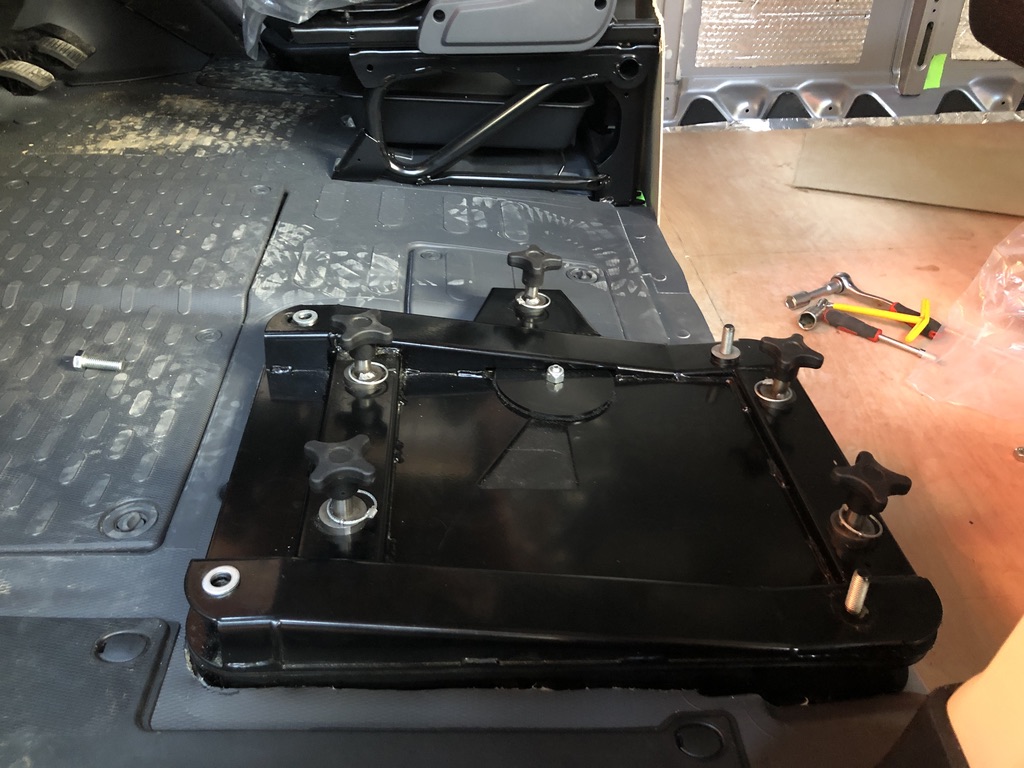
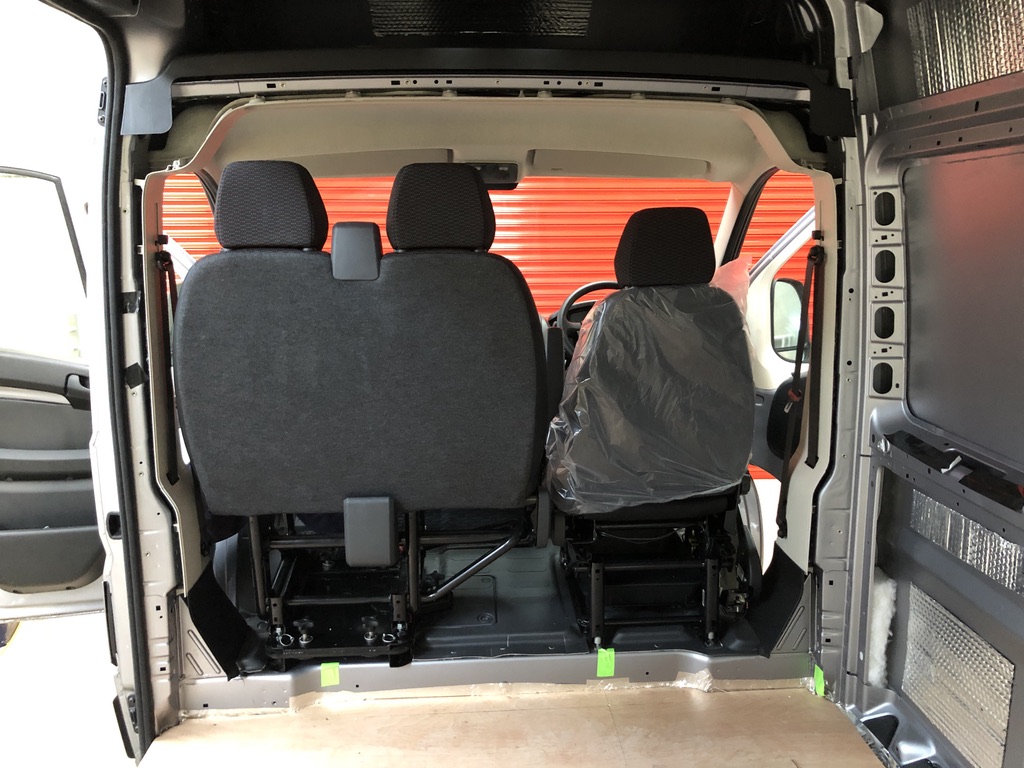
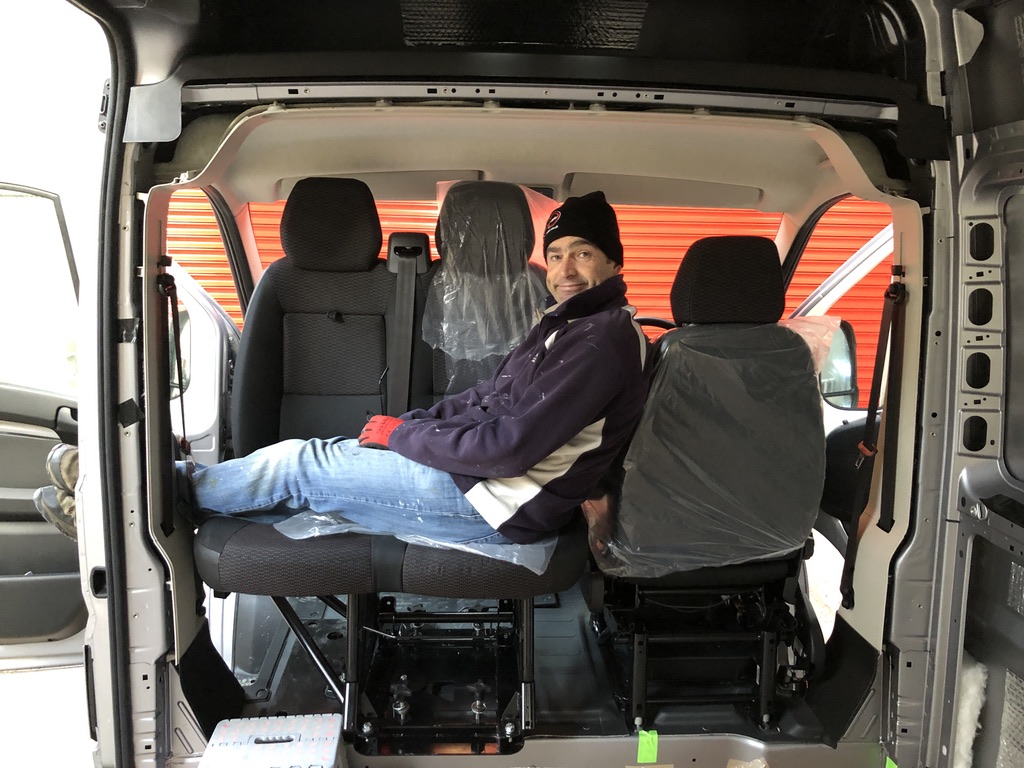
It’s a bit cumbersome and adds a bit of extra height to the passenger seat which means my feet can’t touch the floor, but it will do until we find a replacement single seat we can afford.

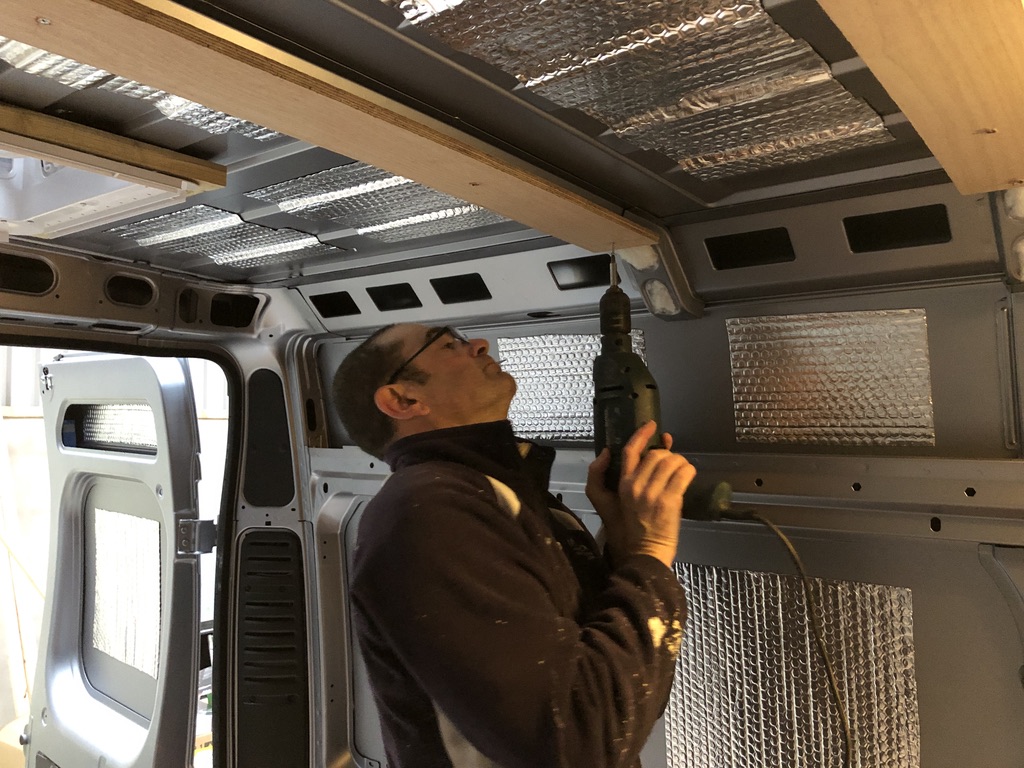
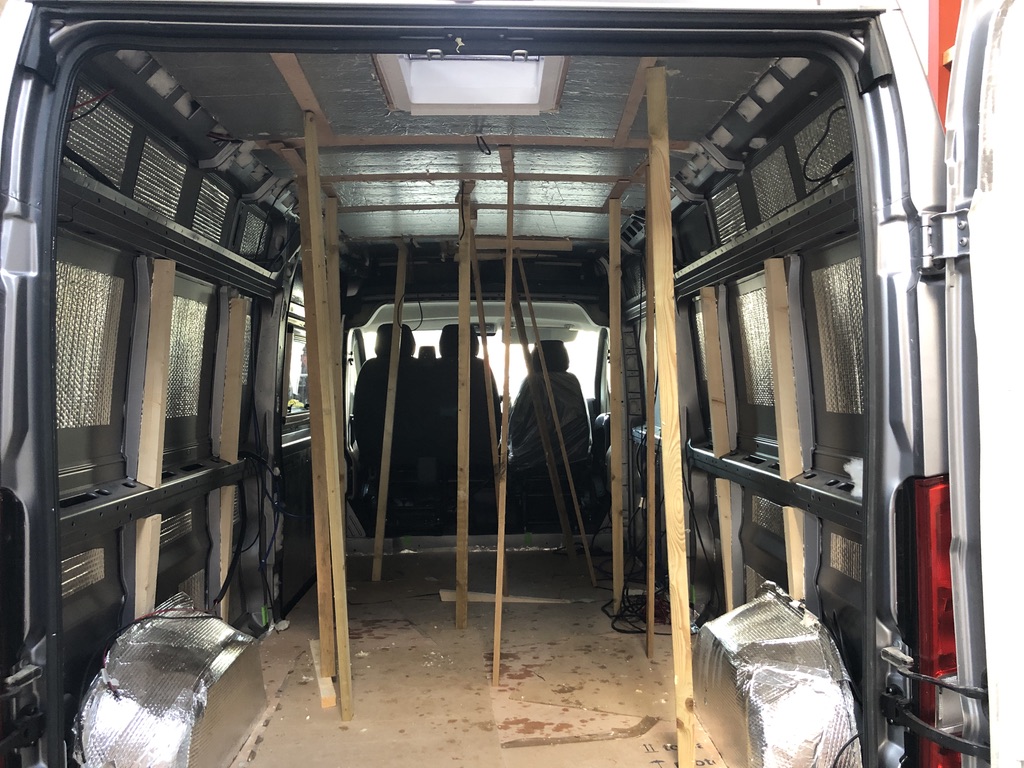
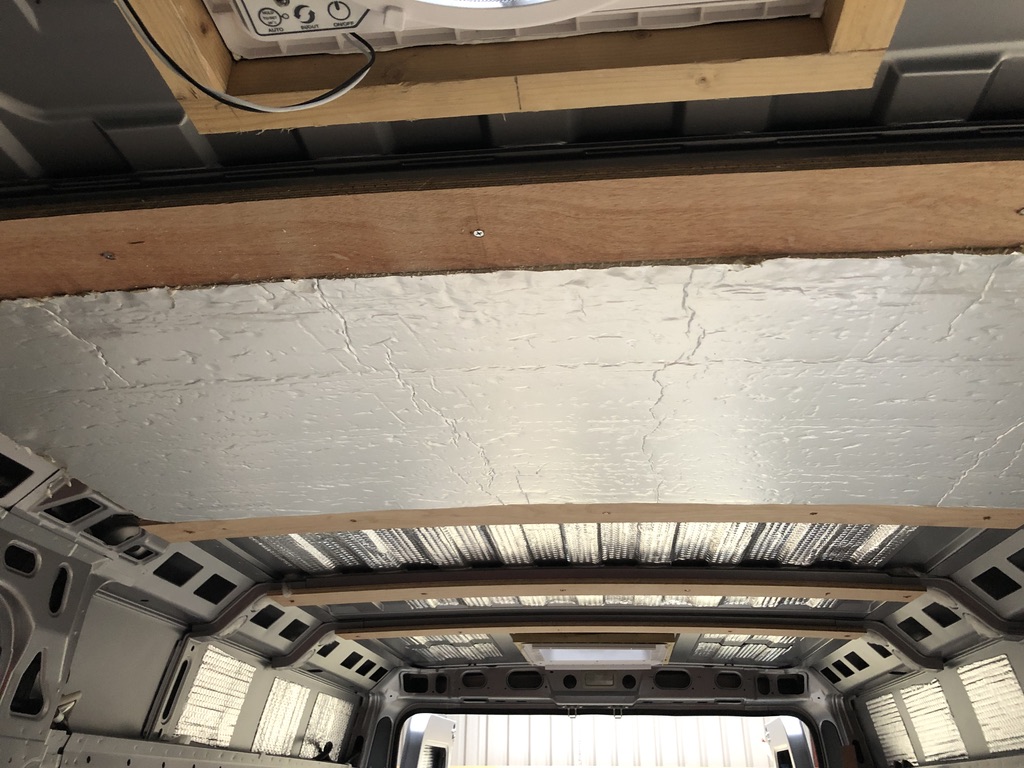
Ceiling battens & insulation

We used 15mm hardboard as battens widthways across the ceiling and glued and screwed them to the ribs of the van.  We filled the ceiling with 40mm rigid insulation boards and sealed it all with aluminium foil tape to create a vapour barrier.

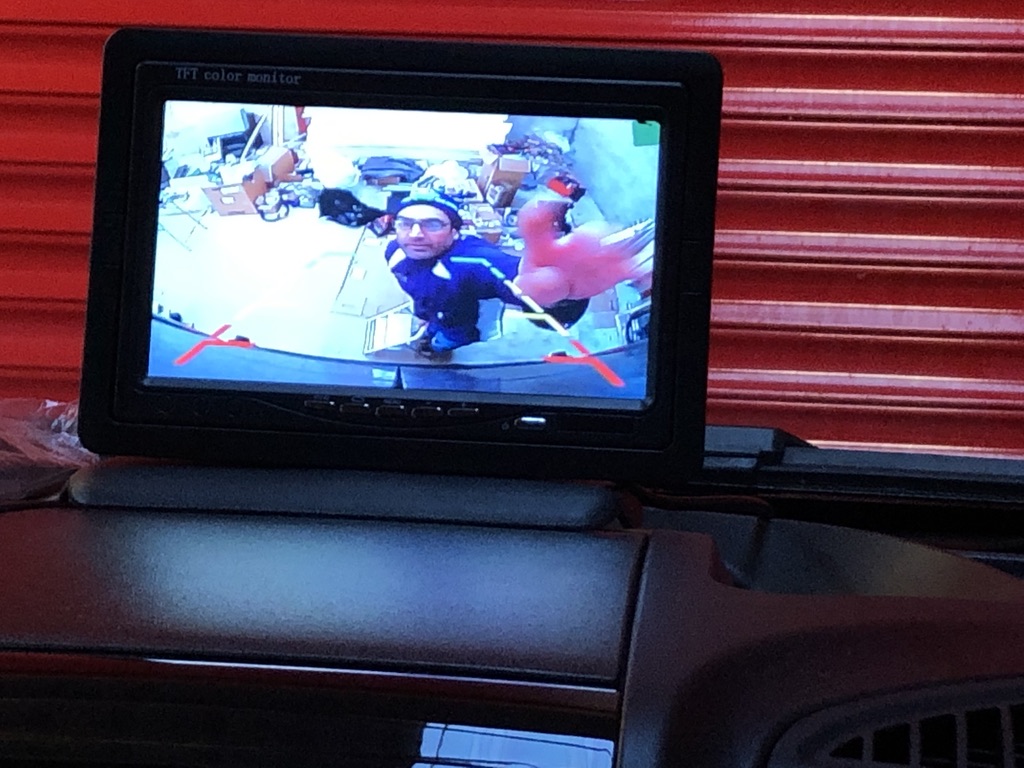
Installing a reversing camera & dash monitor

With no rear view mirror in the van, the reversing camera and dash monitor was an early priority for us.  This was the first of many things we ordered only to find when they arrived they were not the items we ordered!  Anyway when we did eventually receive the right camera, the installation was pretty straight forward.  Although we have to admit it was a little scary when faced with the van fuse box and the decision of which wire to cut!

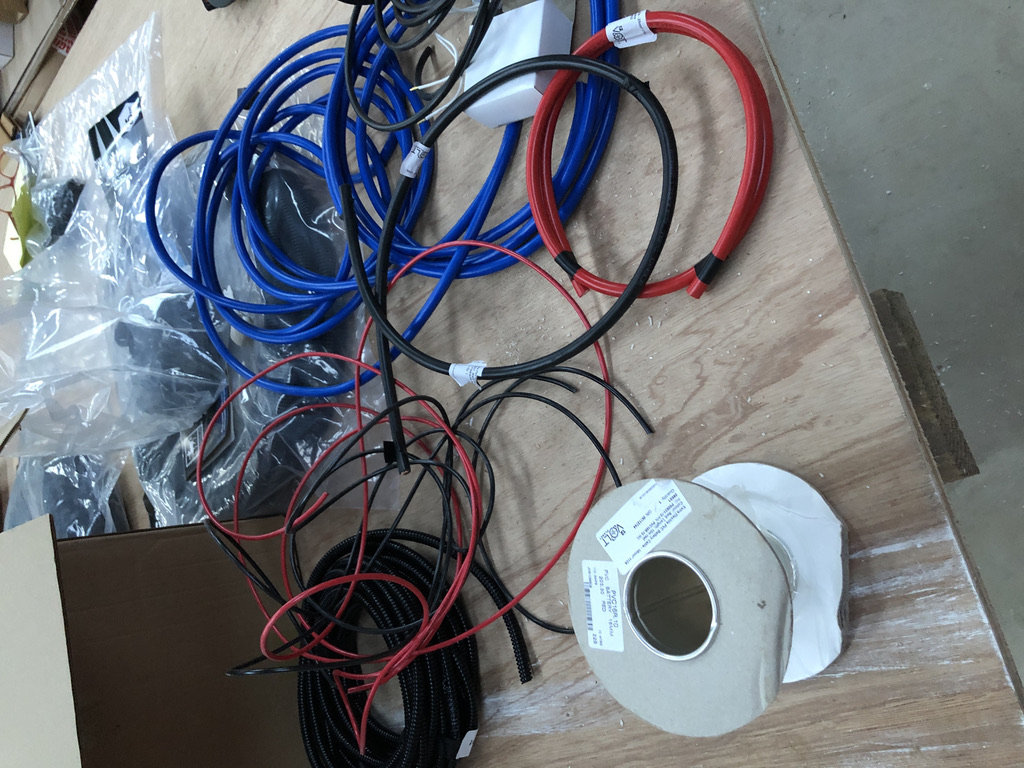
Electrical System – first fix

The next stage in our van build process was to do the first fix electrics so that all the cables and wires could be in place and hidden before we started ply-lining the van.  

Our primary aim was to design and install a 12v and 240v electrical system as well as a solar power system so we could live off-grid.  This is where being members of the Self Build Motor Caravanners Club came into it’s own.  Dave was able to draw up a diagram of our planned electrical system and get feedback from some of the experts in the group before we started running cables and wires through the sides and roof of the van.  

We have to say the folks at 12 volt planet where we bought the majority of our wiring products were also very helpful, and the expertise from Alpha Batteries was invaluable when choosing our lithium battery.
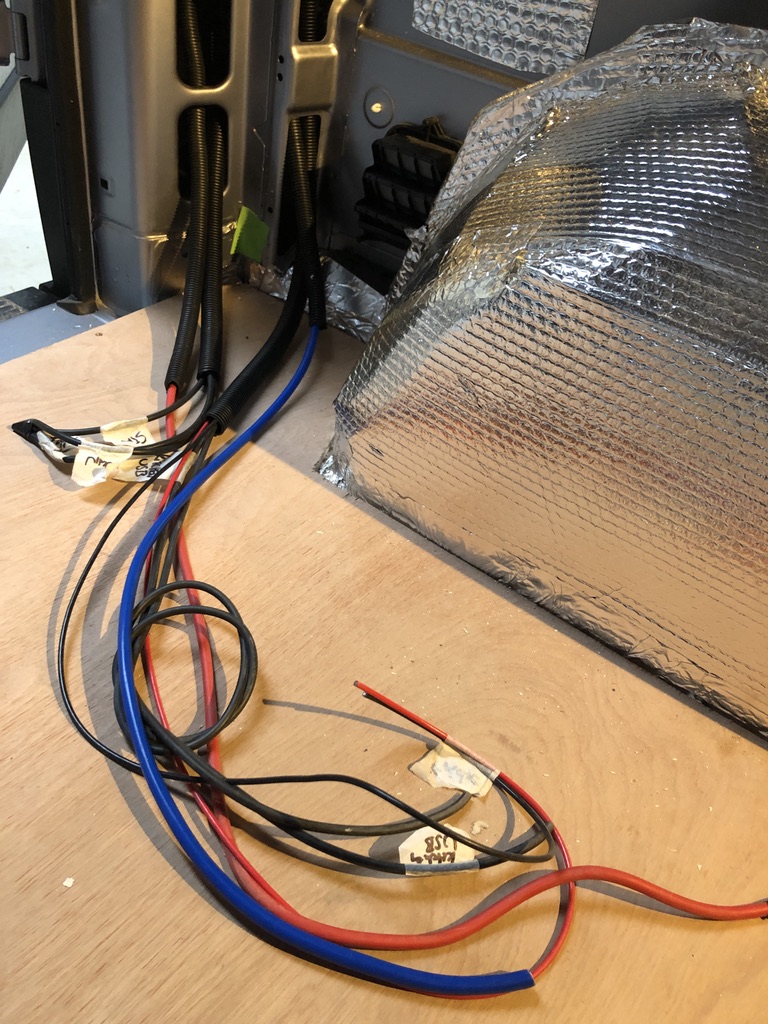
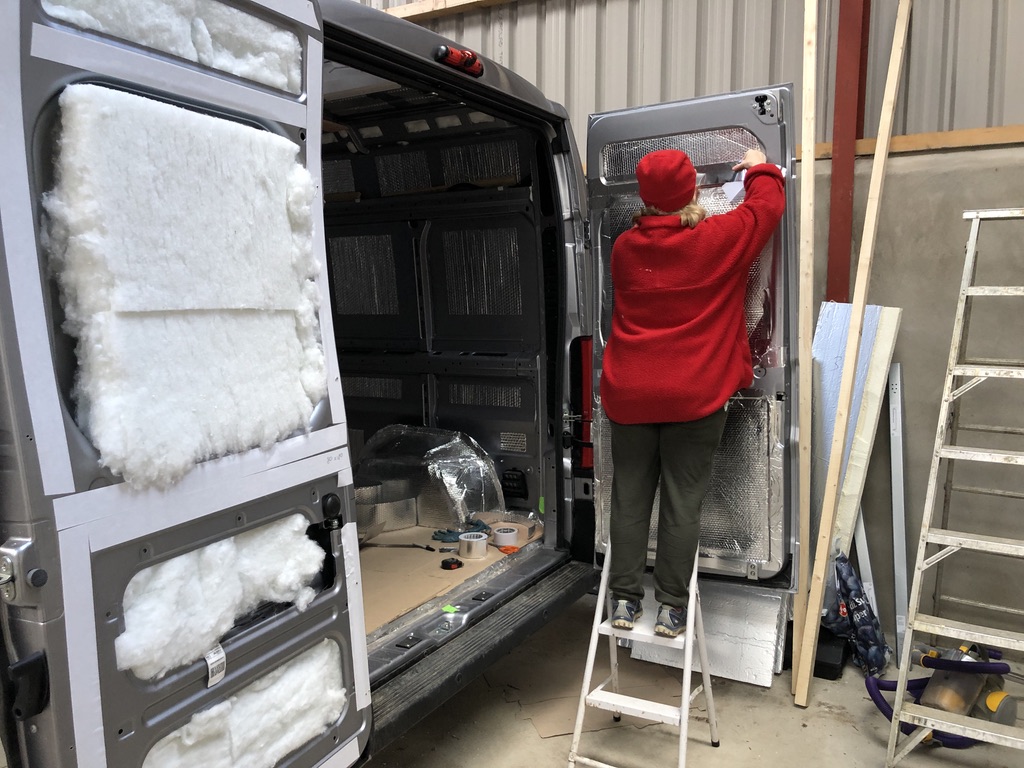
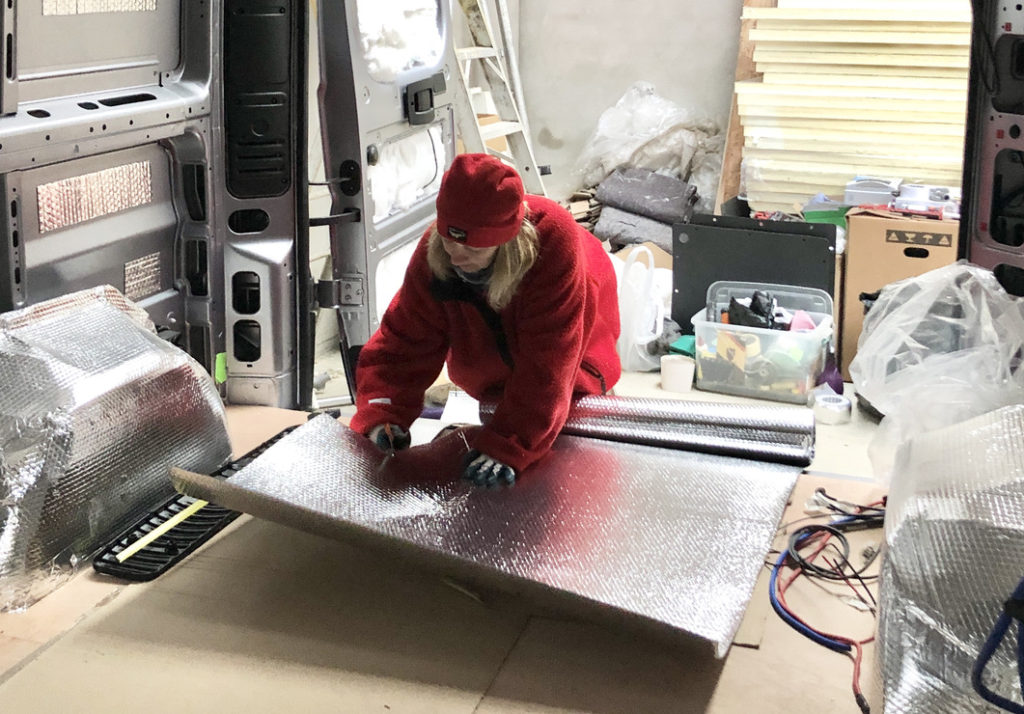
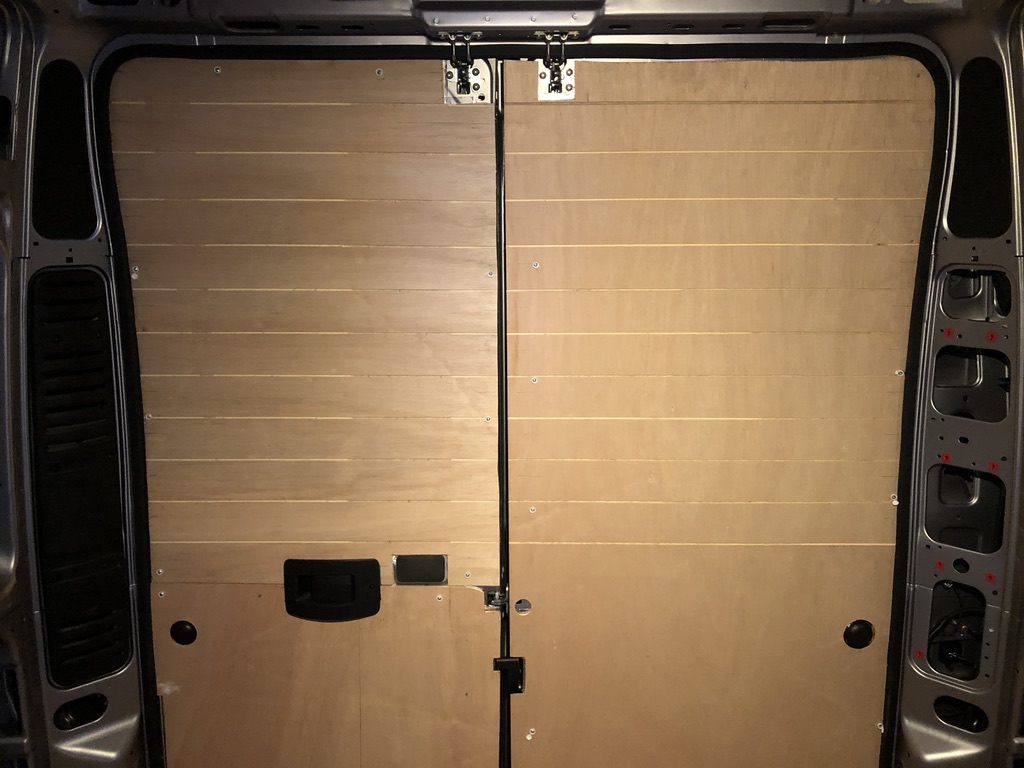
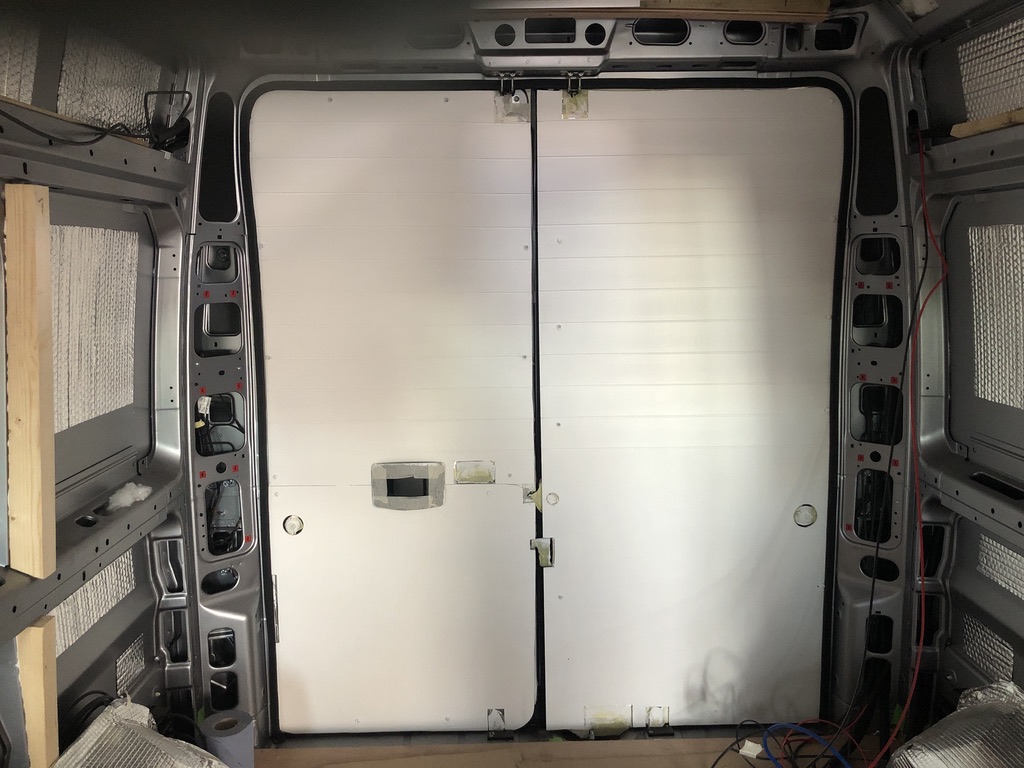
Rear doors 

We used rolls of recycled plastic bottle insulation to fill all the gaps in the doors.  We lined them with Dripex double aluminium bubble foil insulation sealed with silver tape to create a vapour barrier.  We cut the rear door panels from 6mm plywood and used a router to create a tongue and groove effect on the upper half of the panels.
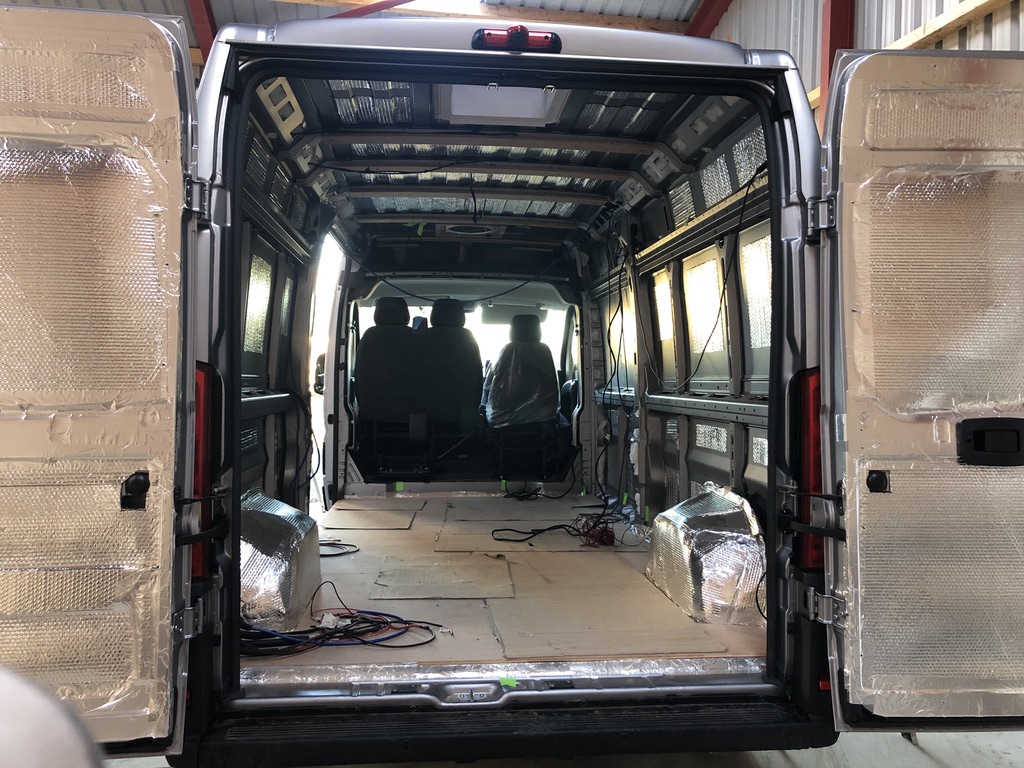
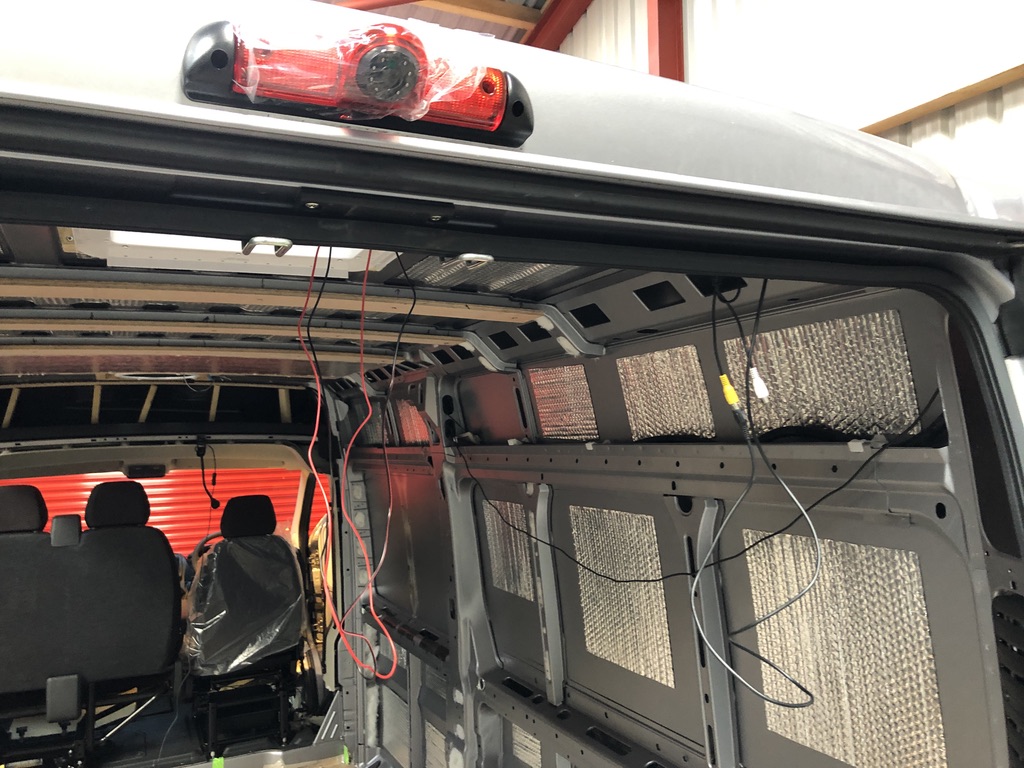
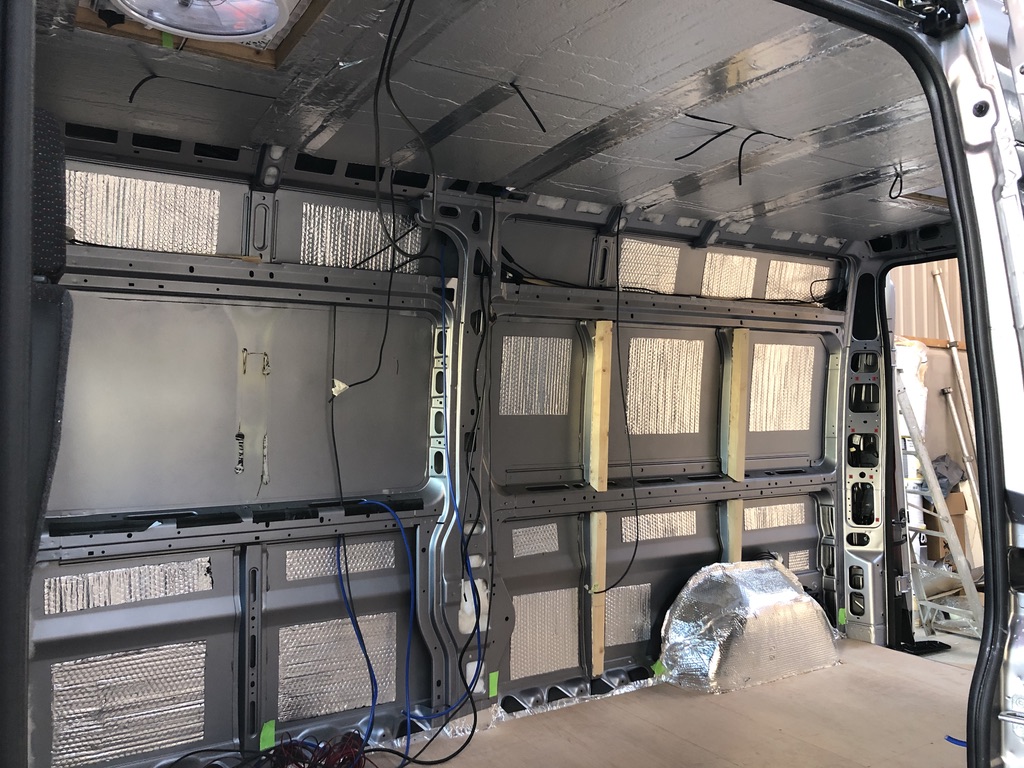
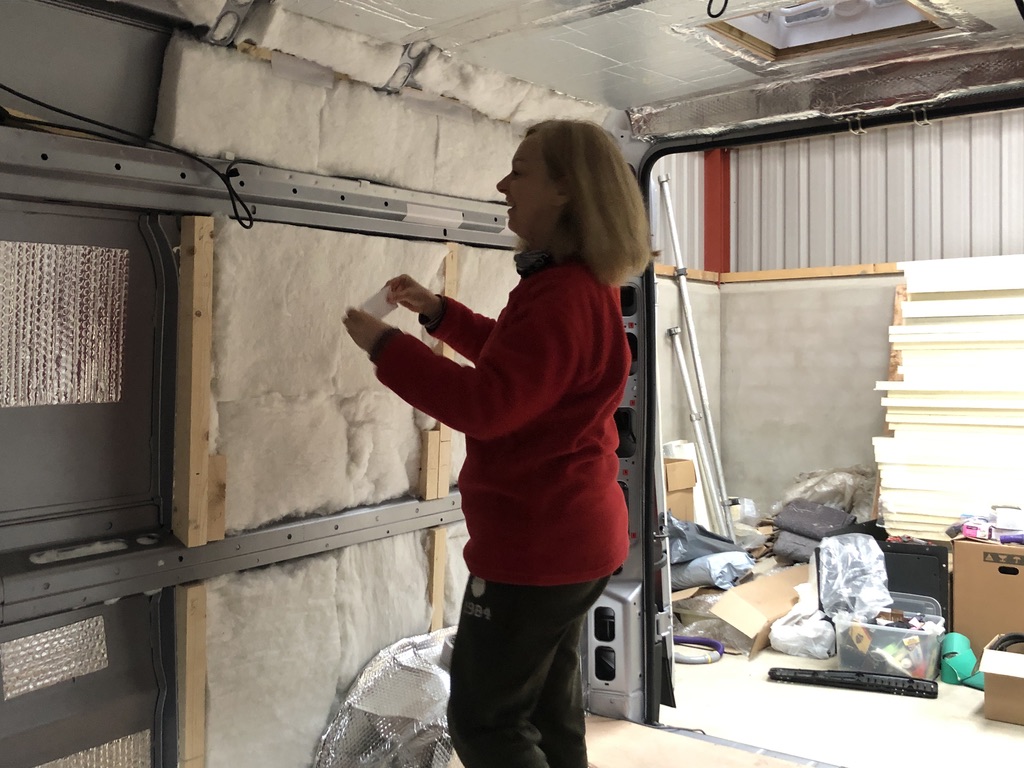
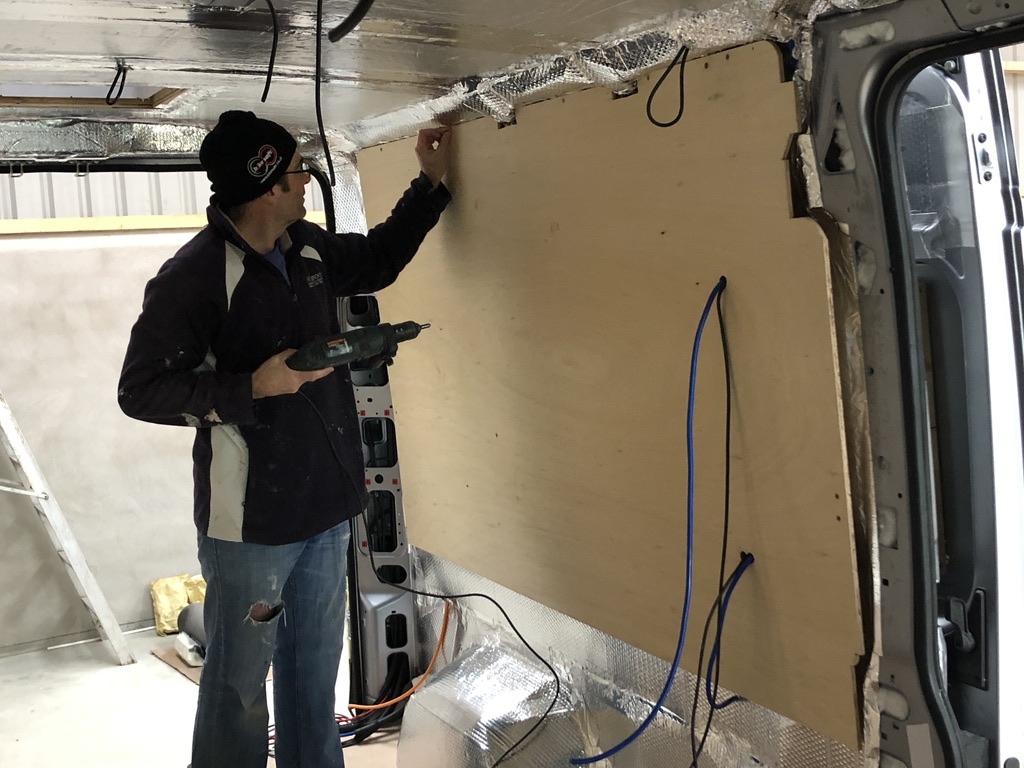
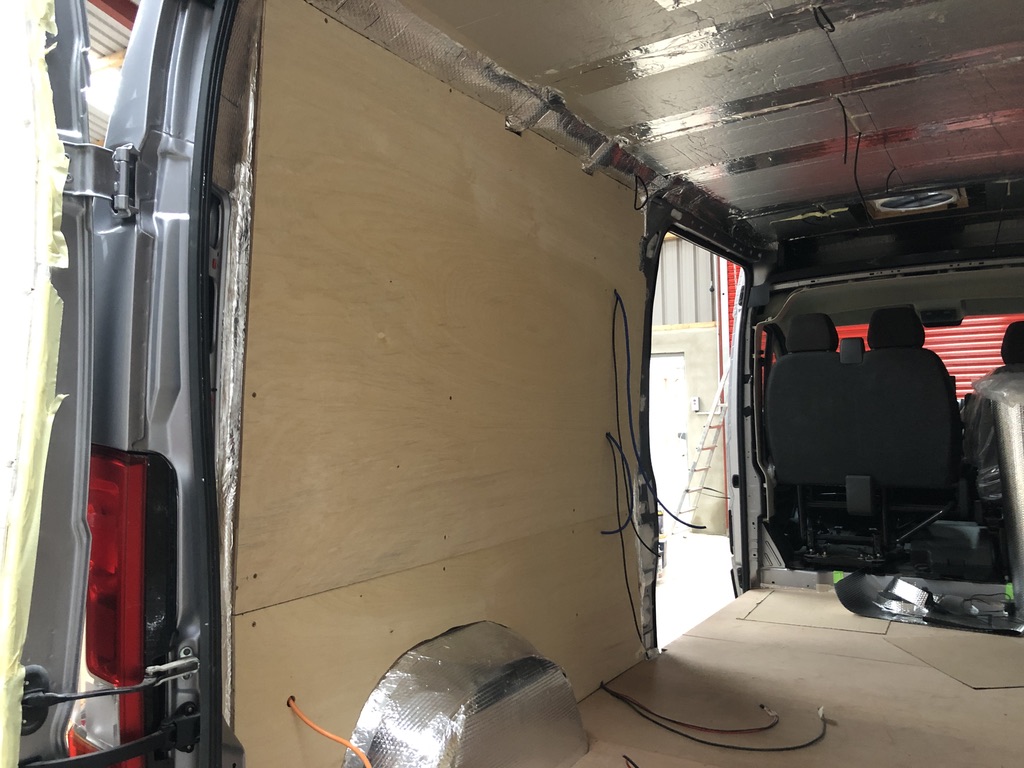
Walls 

The same recycled plastic bottle insulation as in the doors was used to fill the wall cavities before we glued the timber battens to the ribs of the van.  We screwed in extra reinforcements on the bed area – you never know it might see a bit of action!!!  We covered the insulation from top to bottom with the Dripex silver bubble foil and once again sealed that with silver tape to create the vapour barrier.  What was a tin can van was now starting to look more like a silver spaceship!

We cut our wall panels from 9mm plywood, and they took a bit of fitting and refitting after we realised we’d put a couple of the kitchen electrical cables in the wrong spot!
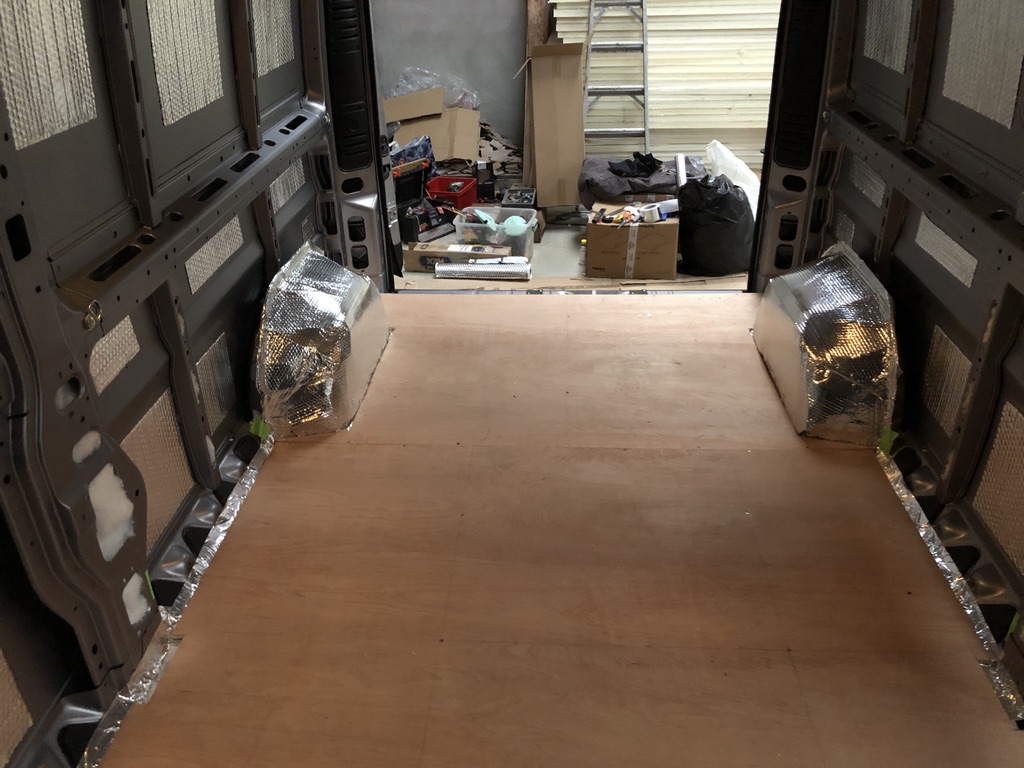
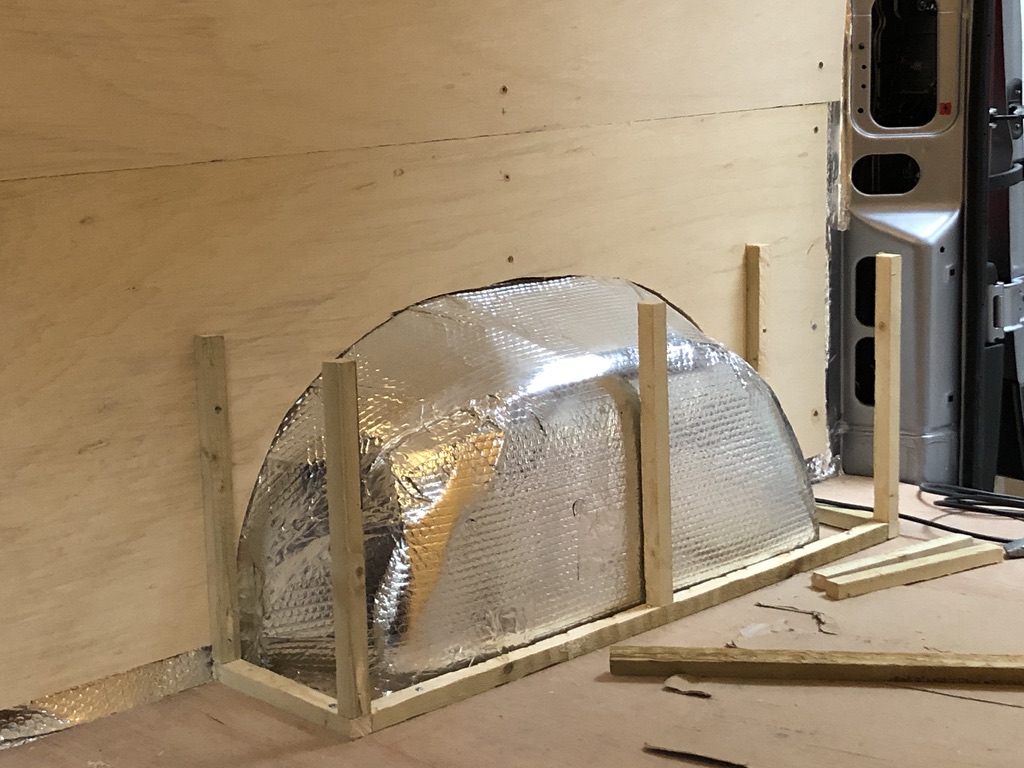
Wheel Arches

A relatively simple job in the scheme of things was to cover the wheel arches and box them in using plywood.  The tops are removable so we can easily access the tyre jack tool kit stored in there.  
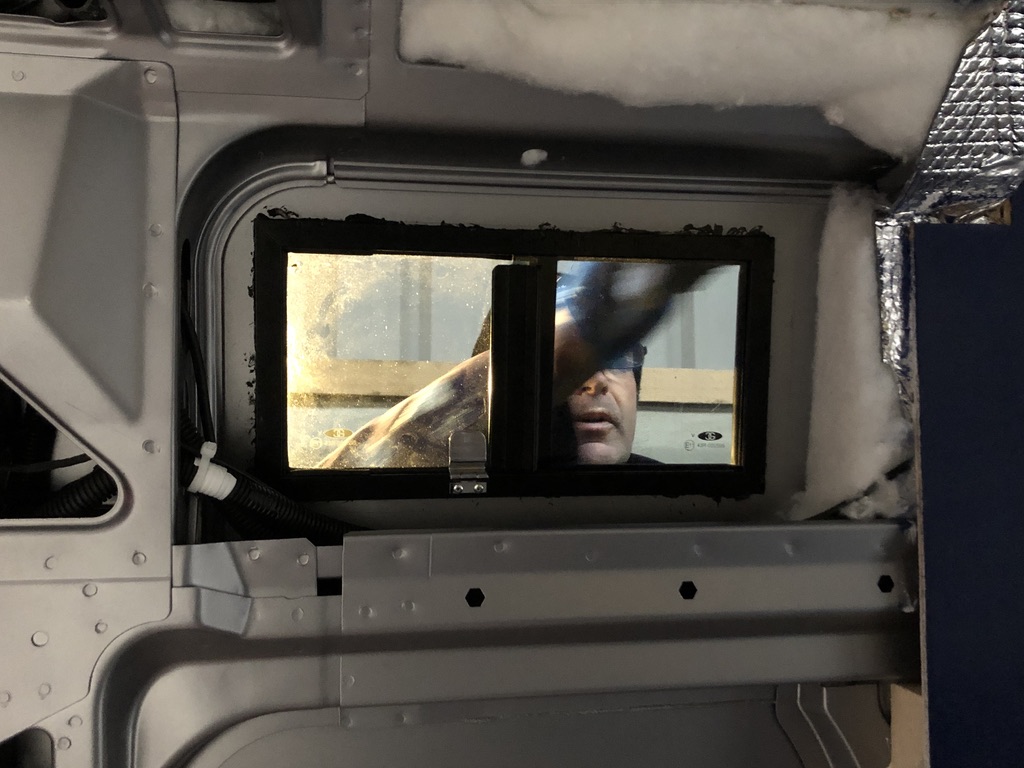
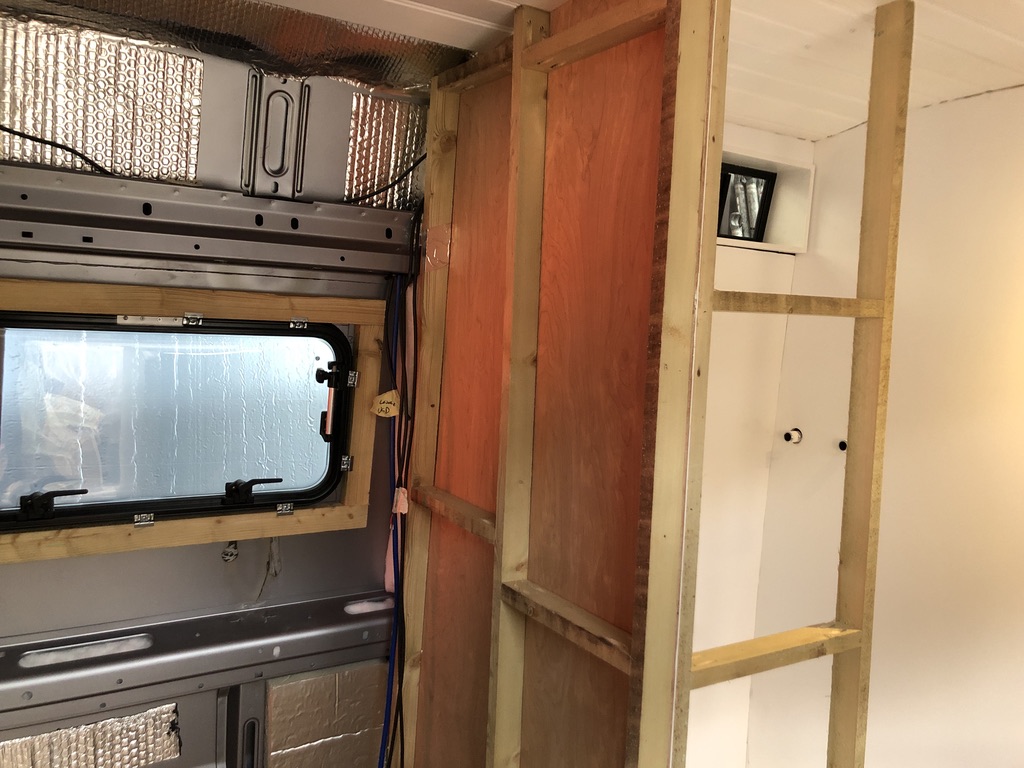
Bathroom window

Time to cut another hole in the van!  Instead of an extractor fan we opted to fit a tinted side slider window for our bathroom.  We had it custom made (350mm x 180mm) by Caldwells Windows.
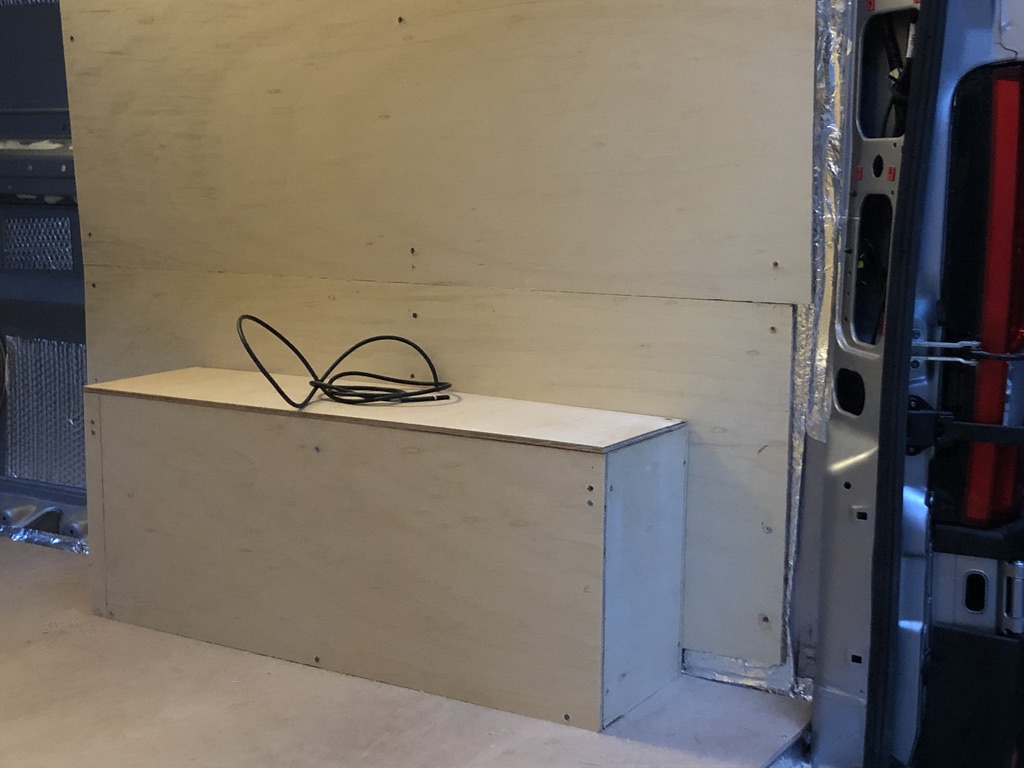
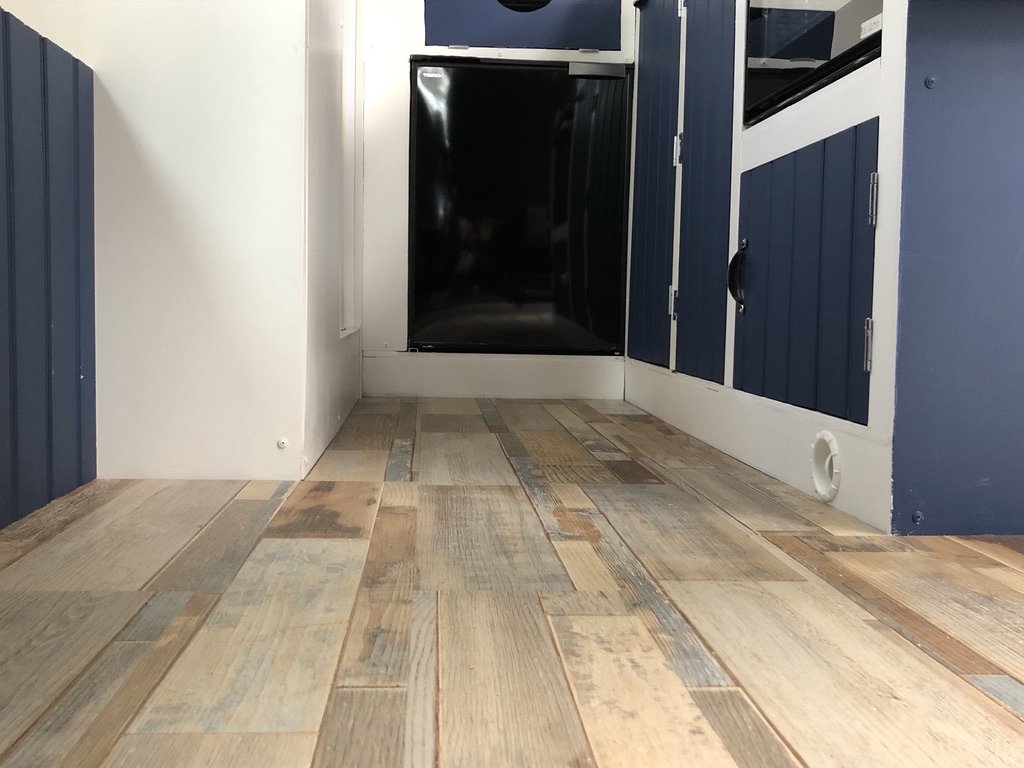
Garage

We laid the top floor in the garage (the storage area under the bed) using vinyl peel and stick tiles from B&Q.  Every millimetre is important when it comes to your van build and these tiles were as thin and practical as we could find.

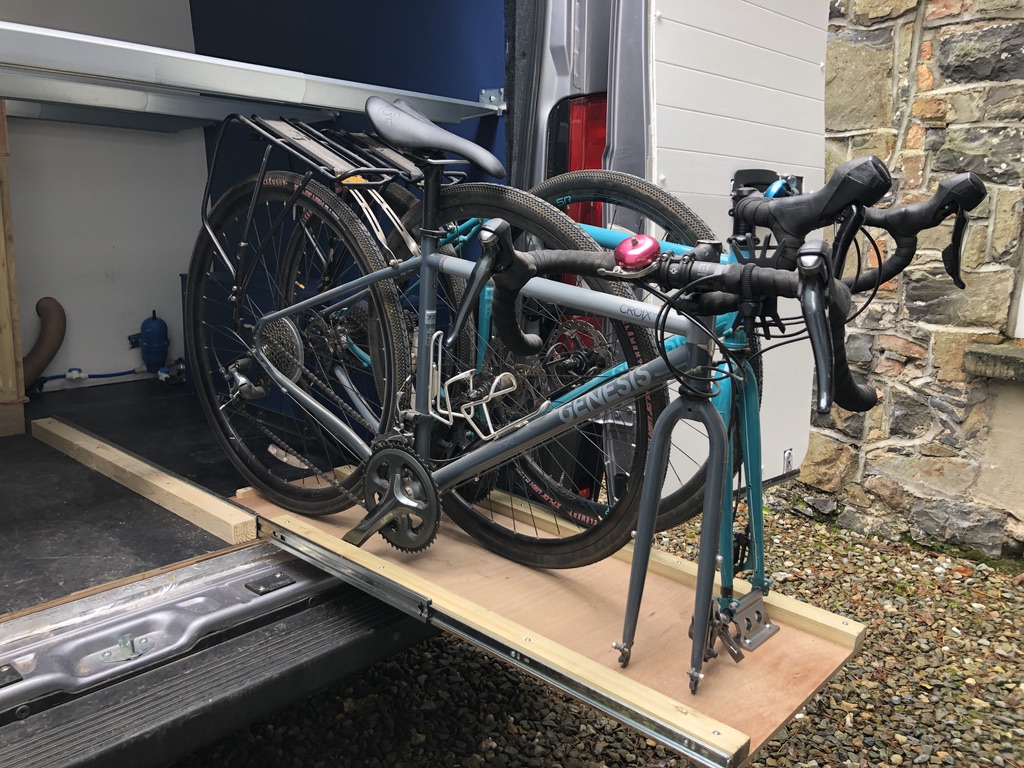
One of our essential requirements for the van build was that our bikes were stored inside the van for security & protection, but be easily accessible.  At a later stage of the build we would add a slide out tray in the garage for the bikes.
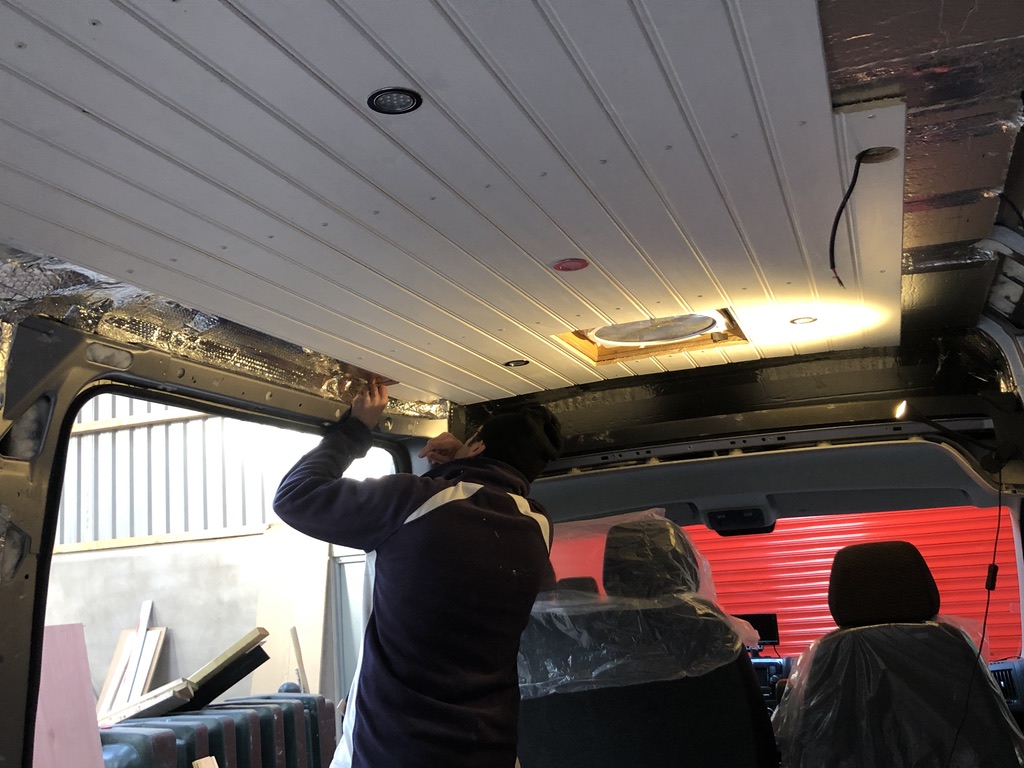
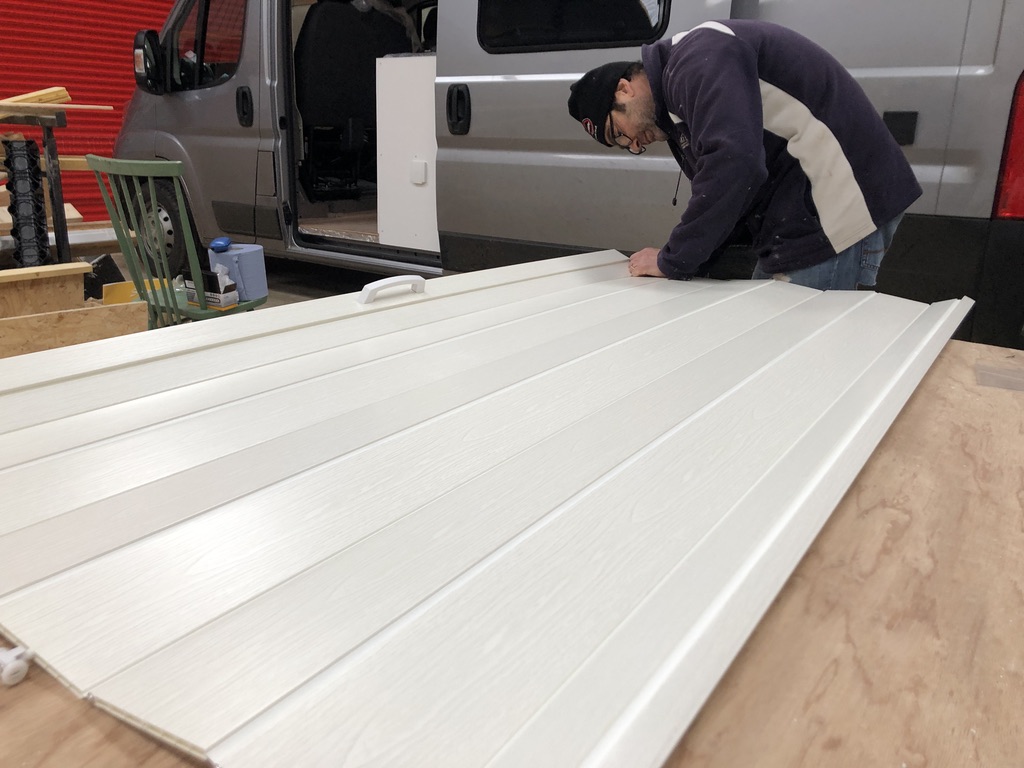
Ceiling cladding 

We’d prepared the tongue and groove boards by sanding, priming and painting them earlier in the build process.  It was much easier to do this in the large open space of the shed rather than try and do it after fitting them.  Doing it once they were fitted would’ve meant so much dust in the van and a lot or arm and shoulder ache from working above your head!  Finding the right size white head screws for fitting the T&G was another task that took hours trawling online.  Once the cladding was secured we were able to fit the covers and trims to the roof fan and sky light.

Lighting

We fitted seven touch sensitive recessed 12v LED lights in the ceiling (3 in the lounge area, 3 in the kitchen and 1 in the bedroom) that we sourced online from Vanwurks.   Plus two 12v LED flexible reading lights above the bed area.
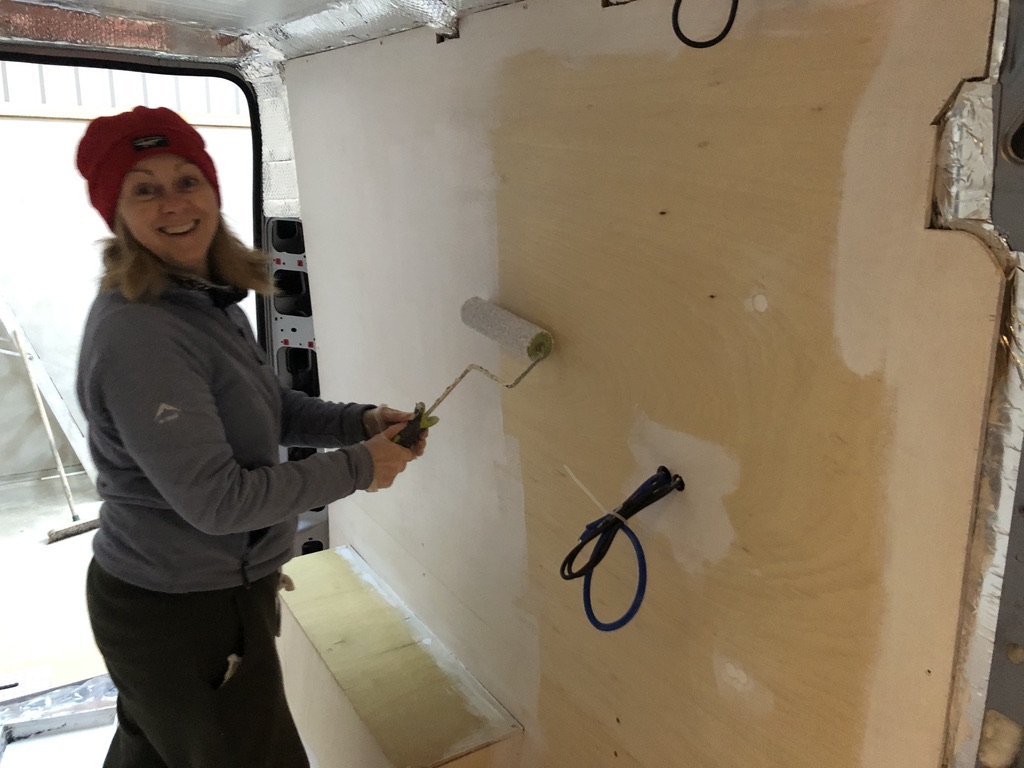
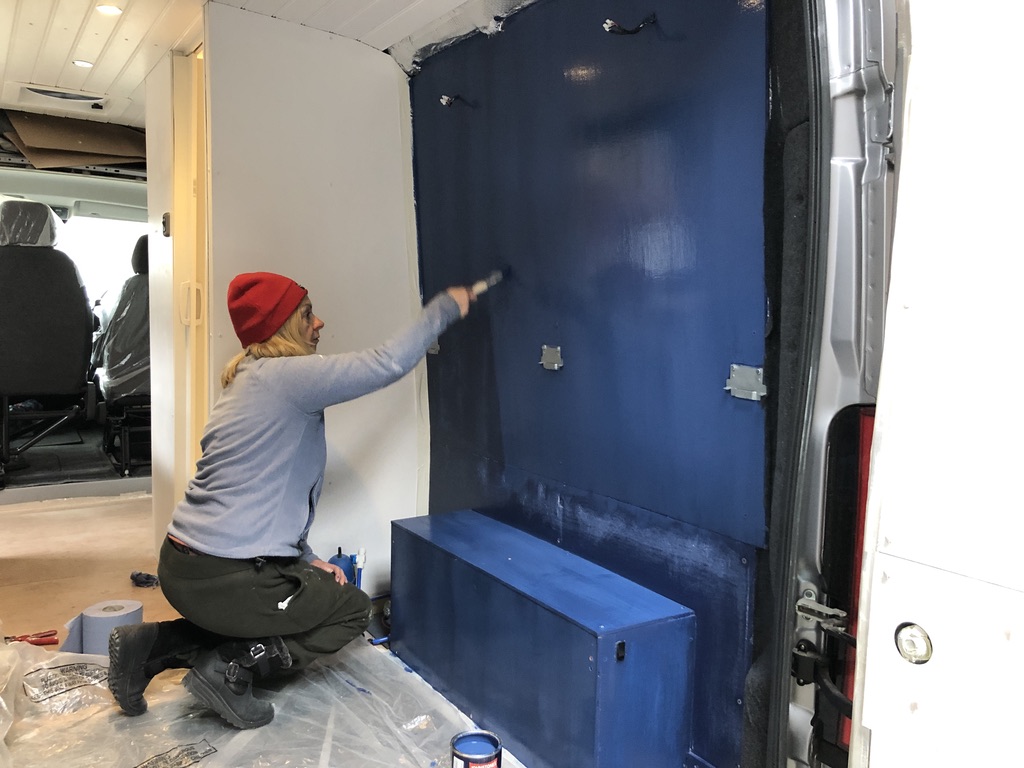
Painting 

This first painting stage gave the van a new lease of life.  We used brilliant white on the walls and ceiling, and Dulux Sapphire Salute as a feature colour on the bed head.

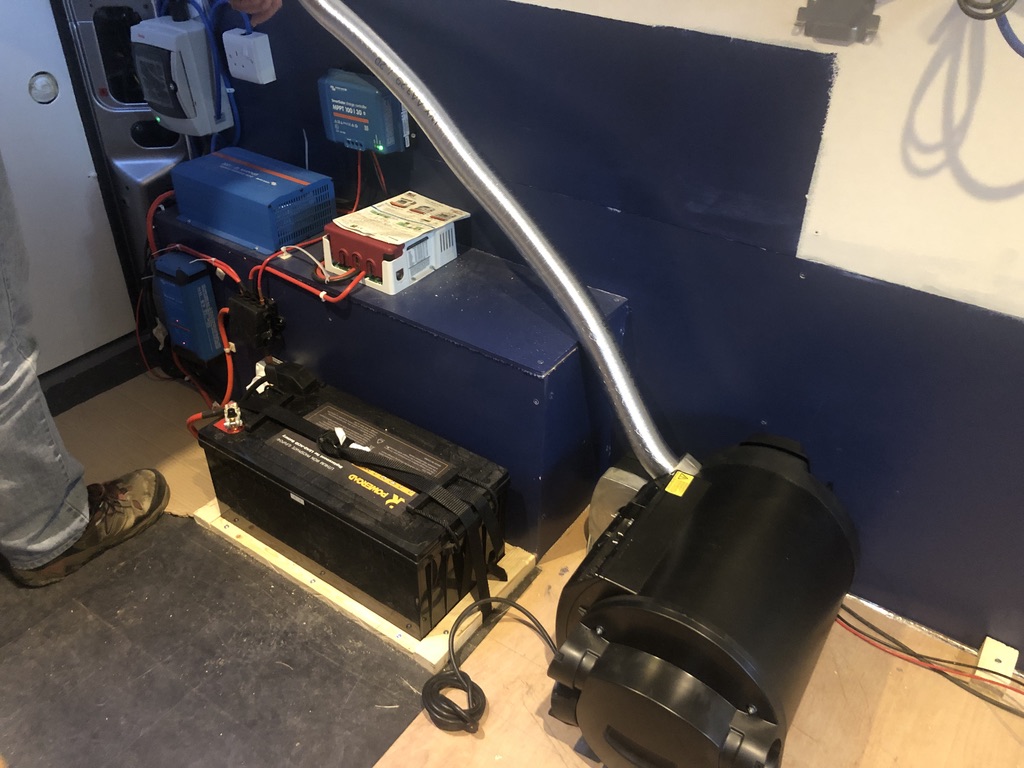
Electrical System – wiring

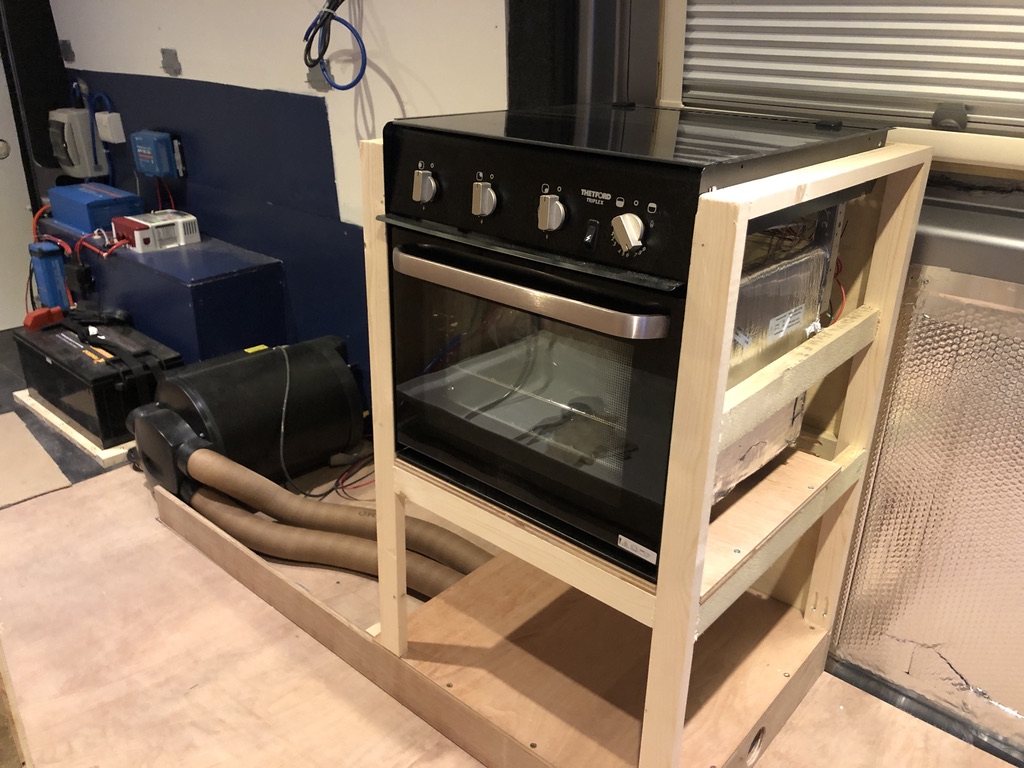
By week 8 of the build we, or rather Dave, was ready to wire up the 12v and 240v electrical system.  Our system components, housed in the garage area, included a 200 amp hours lithium battery, a Victron MPPT solar charger controller, a Sterling battery to battery charger, the 230v hook up, a consumer unit/fuse board, a Victron Blue power battery charger, and a Victron Energy 1200W Inverter.  Plus we had the Longi 370W split cell solar panel already bolted to the roof.

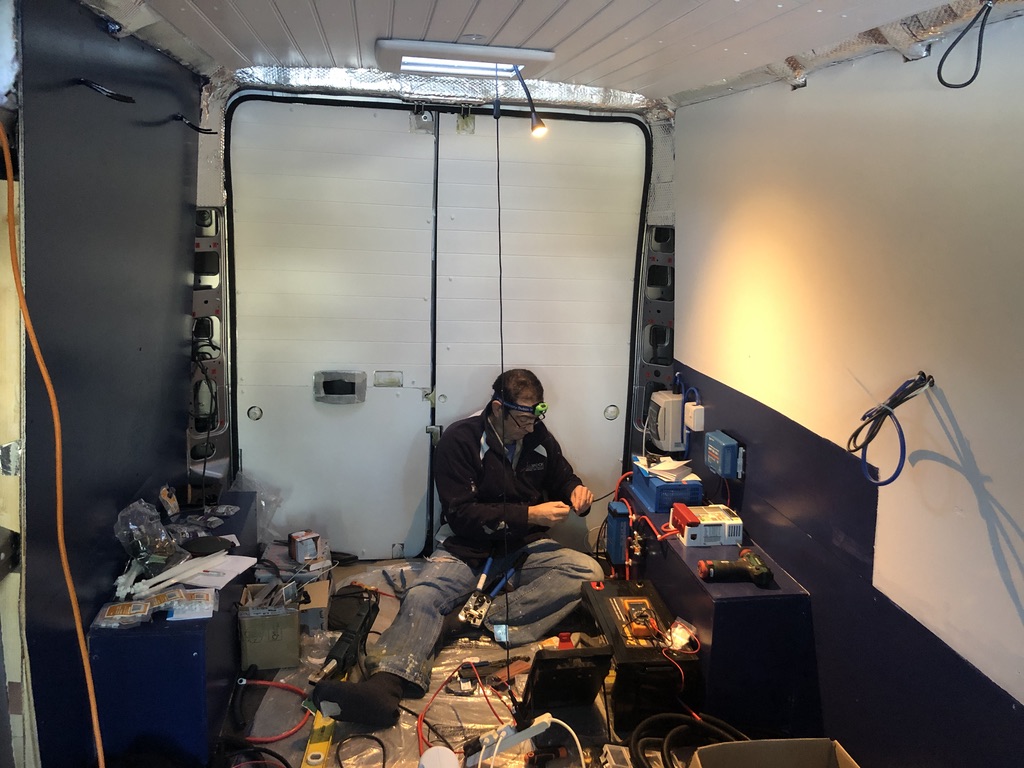
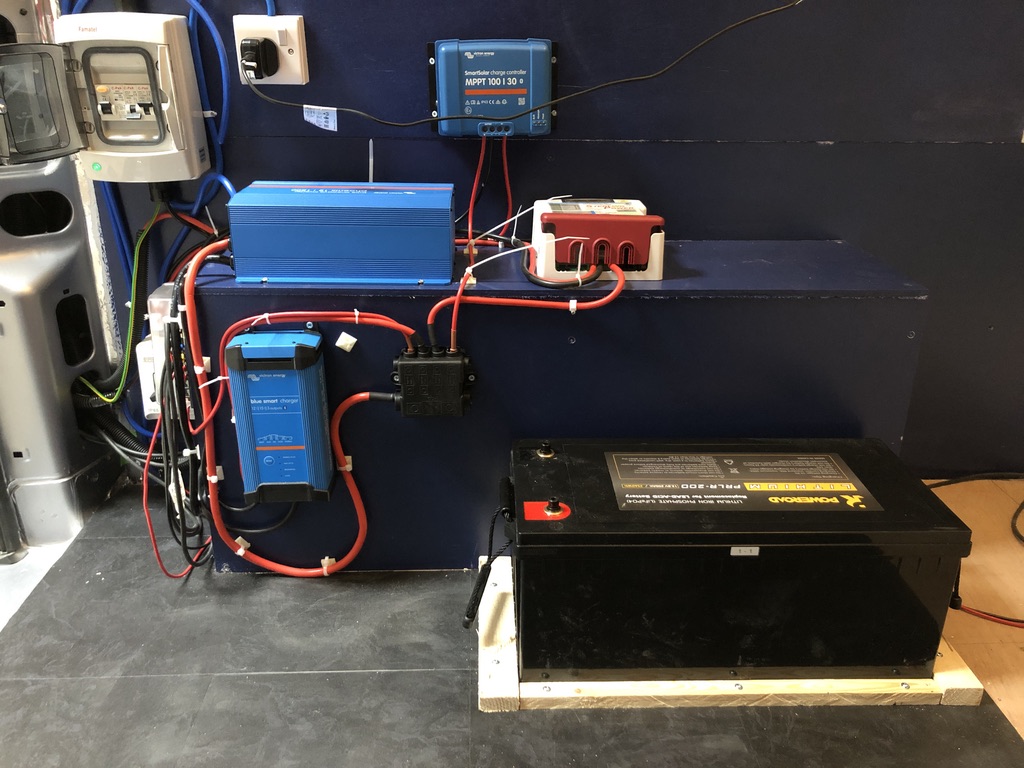
For peace of mind we had a local professional electrician complete a check up and reassure us it was all safe.

Plumbing & Heating

The next step was to get the plumbing and heating system in place.  Earlier in our design process we had made the decision to go for underslung water tanks in order to save as much space on board as possible.  We knew it was a long waiting list to get the custom made plastic tanks (82 litres fresh water tank and 63 litres waste water tank) from the very helpful Shaun at Barratts Tanks.

We ordered in October 2020 and had we been able to travel to England we could have had the tanks fitted in the December.  We couldn’t travel due to Covid restrictions.  Instead we had no choice but to have them delivered to us in Northern Ireland at the end of February 2021.  We fitted them ourselves with full instructions from Shaun.

Before the tanks arrived we fitted the water pump, filter and accumulator, and installed the kitchen and bathroom water pipes and shower tap fitting.  

At this point we also needed to finalise the positioning of our Truma Combi 4E gas boiler which we would use for space and water heating.  We had changed our minds several times on the boiler position, eventually settling on the only really viable option which was under the sink.  We positioned each of the heating vents – one in the bathroom, one in the lounge, one in the kitchen, and one under the bed in the garage. 
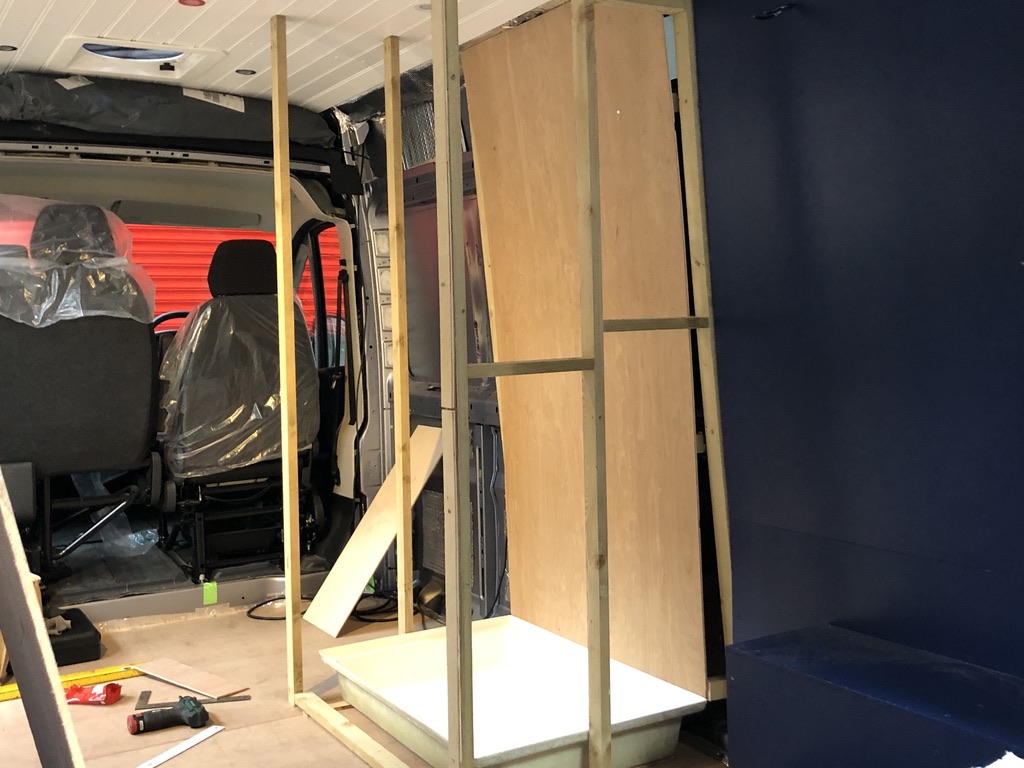
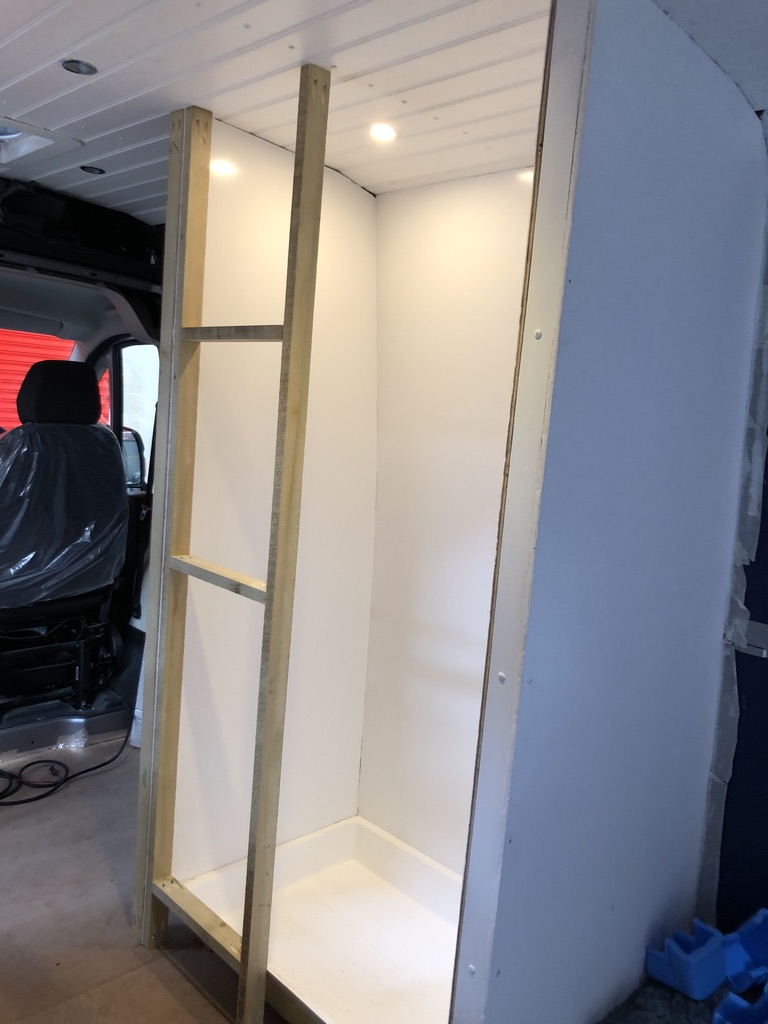
Bathroom

At only 610mm x 915mm the bathroom is not a big space, but a very tricky job to do!  

The first stage was to build the wooden framework for the walls, followed by cutting and shaping 6mm plywood panels for the internal walls, and 9mm panels for the external walls.  

Once the frame was in place we installed the fibreglass shower tray we sourced from Wesley Marine.  The first pilot hole we drilled for the shower waste was not in the most accessible location, so after resealing that we had to drill another before we could connect the waste water pipe.

We covered the walls in white gloss PVC panels, made and fitted the window frame, and installed a waterproof ceiling light we found on E-bay.  Fitting the PVC to the ceiling was a job that tested both of us to our limits.  There are no such things as straight lines in a panel van!

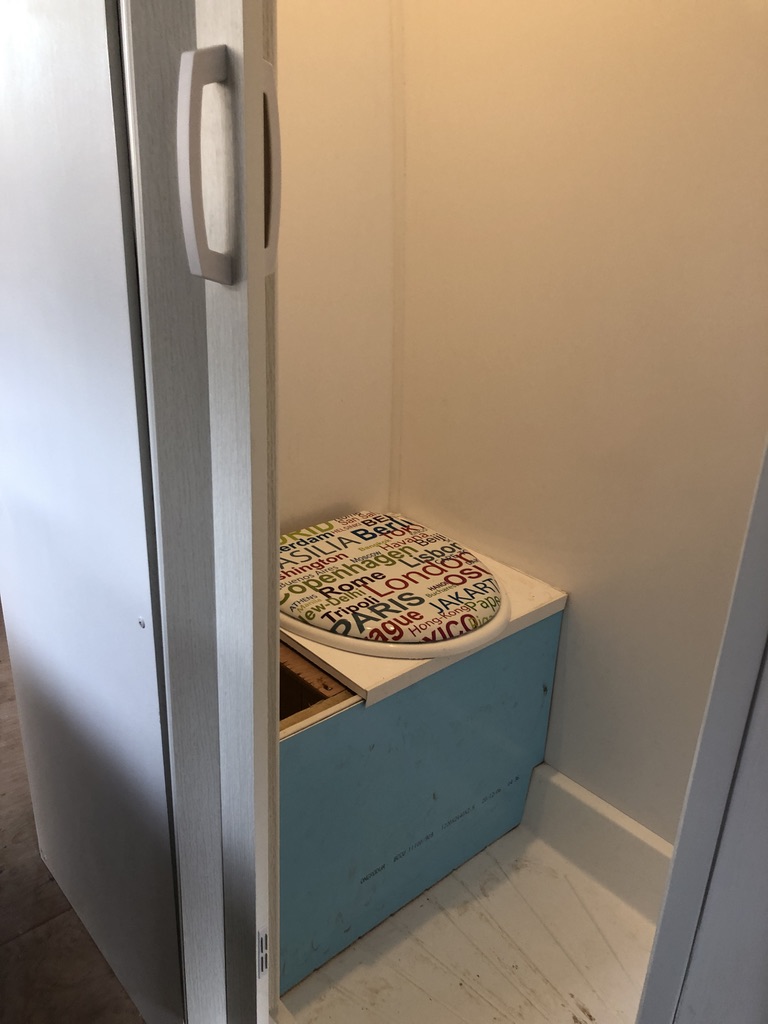
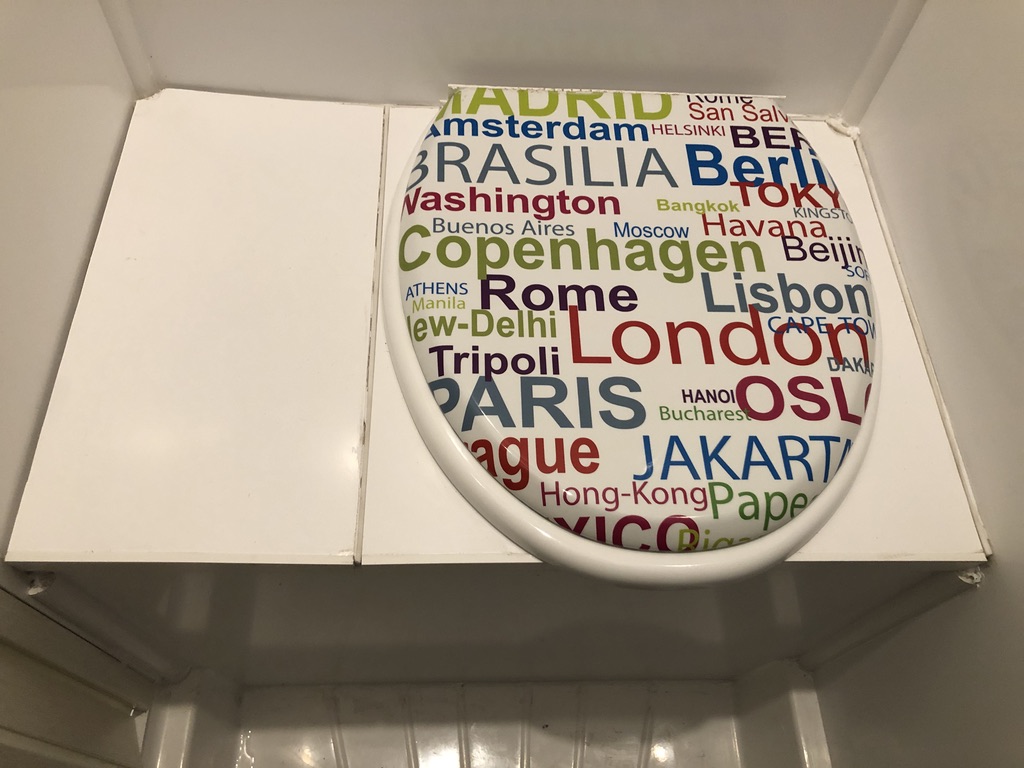
We designed and built a simple separating compost toilet to fit on the shower tray using a wooden box framework with a regular toilet seat on top.  We attached a we-pee urine separator to the underside of the toilet seat.  Inside the box was a bucket for the solids and a 5-litre container for the pee.  We covered the box framework with the same gloss PVC panels as the walls.  

The final piece of the bathroom build was cutting the folding door to size.
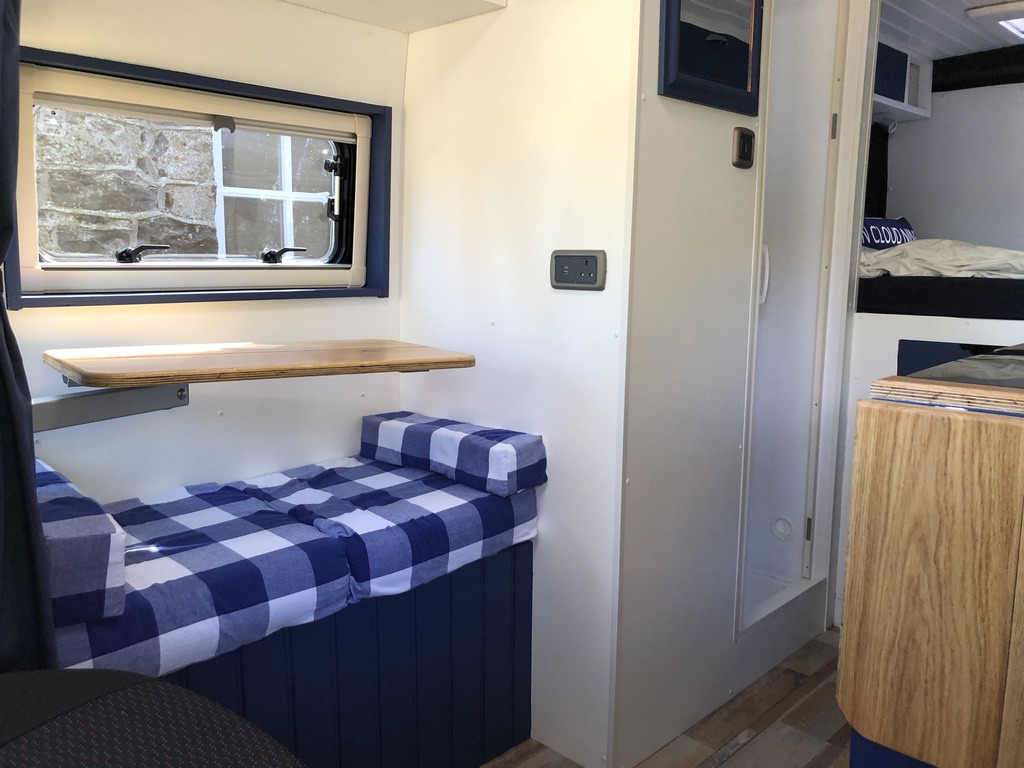
Bedroom 

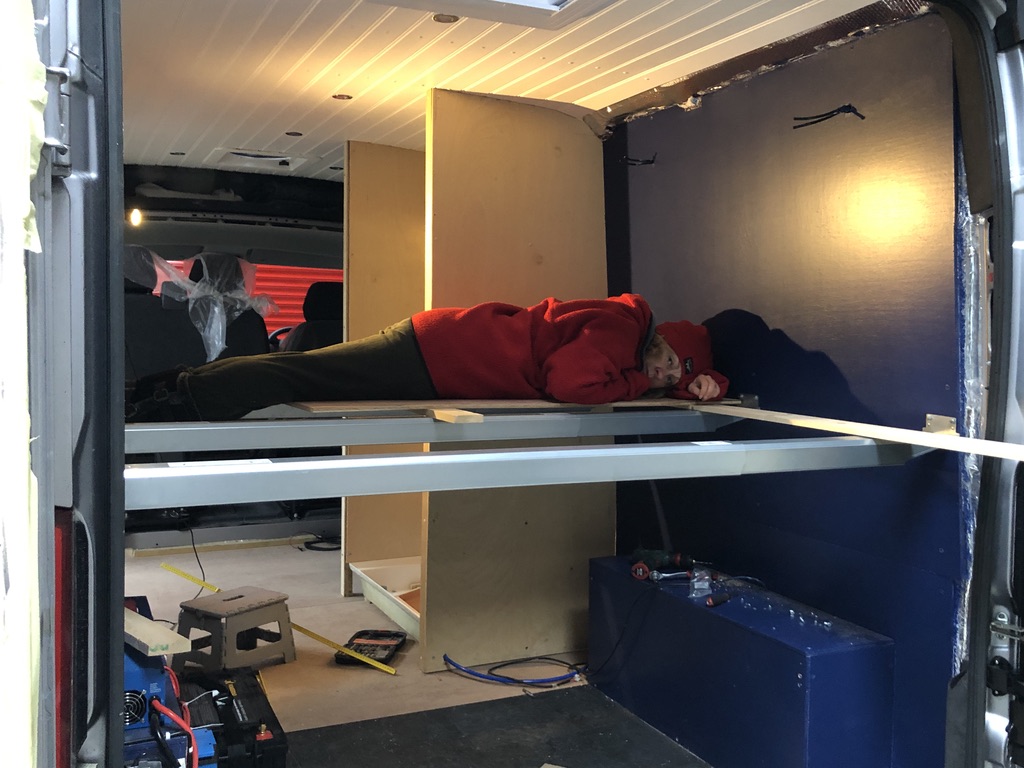
A fixed bed was our number one priority for the van.  The size of the bed was dictated by the size of our bicycles which we wanted to store underneath the bed, hence we have a high and wide bed!  We fixed six Ikea Skorva brackets and three bed beams to the timber wall battens and added the Ikea Luroy king size slatted bed base (we had to remove a couple of the slats to make it fit).  

We both prefer a firm mattress and opted for a supportive reflex foam mattress from Custom Size Beds – the size is 146cm wide x 179cm long x 7cm deep, somewhere in between a double and a king size!  

In addition we added a DRY-Mat breathable mattress underlay as a ventilation layer to protect our mattress from damp and mould.

Kitchen

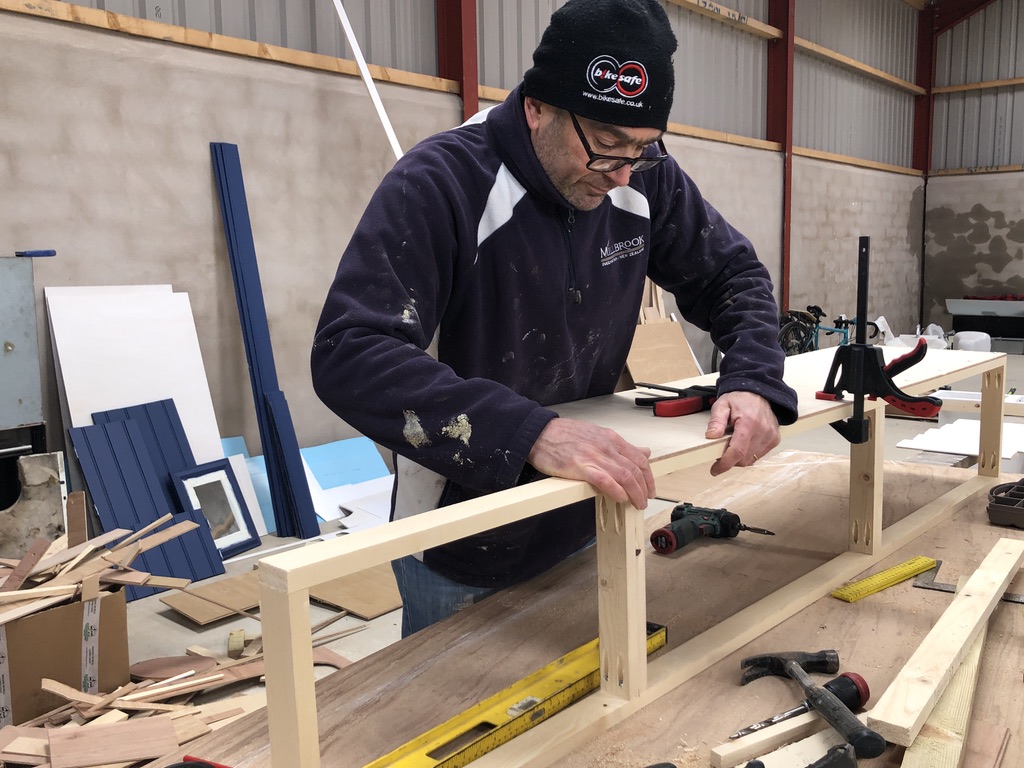
The next stage was building our kitchen framework.  The kitchen design was based around our Thetford Triplex oven, a VitriFrigo 60ltr fridge/freezer, and a decent size kitchen sink!  We’d seen so many camper vans with sinks you can barely fit a plate in. 

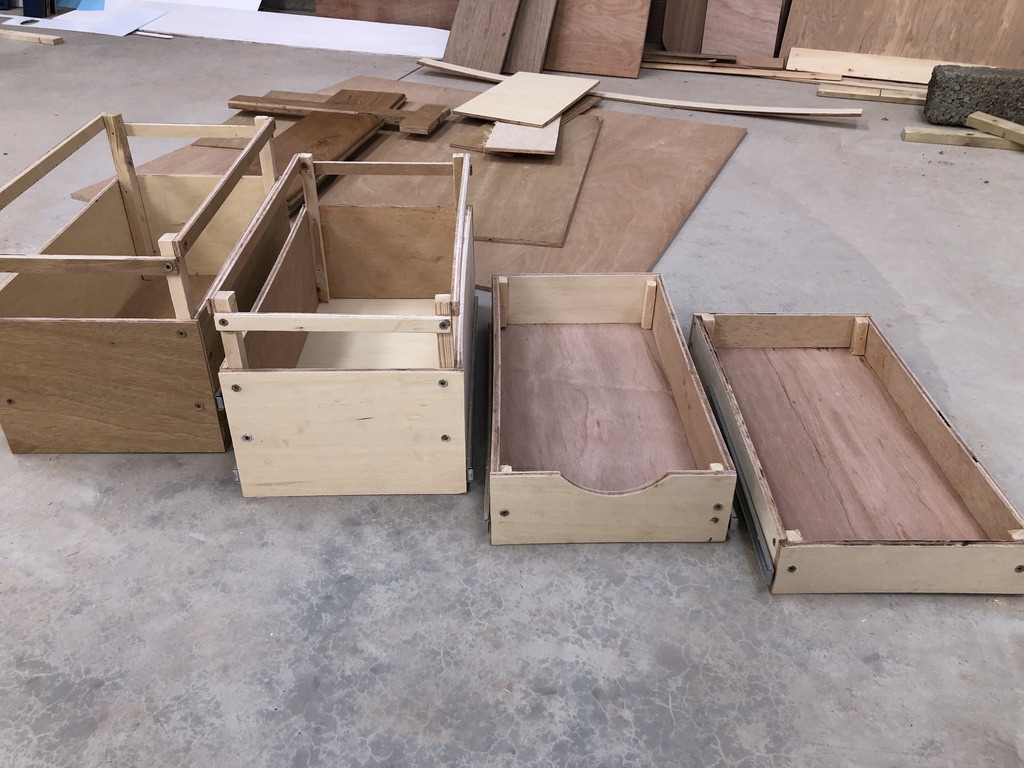
We built the framework using 2×1 battens, and used a mix of leftover 6mm & 9mm plywood for the drawers and cupboards, while the cupboard doors we made from the leftover T&G boards. 

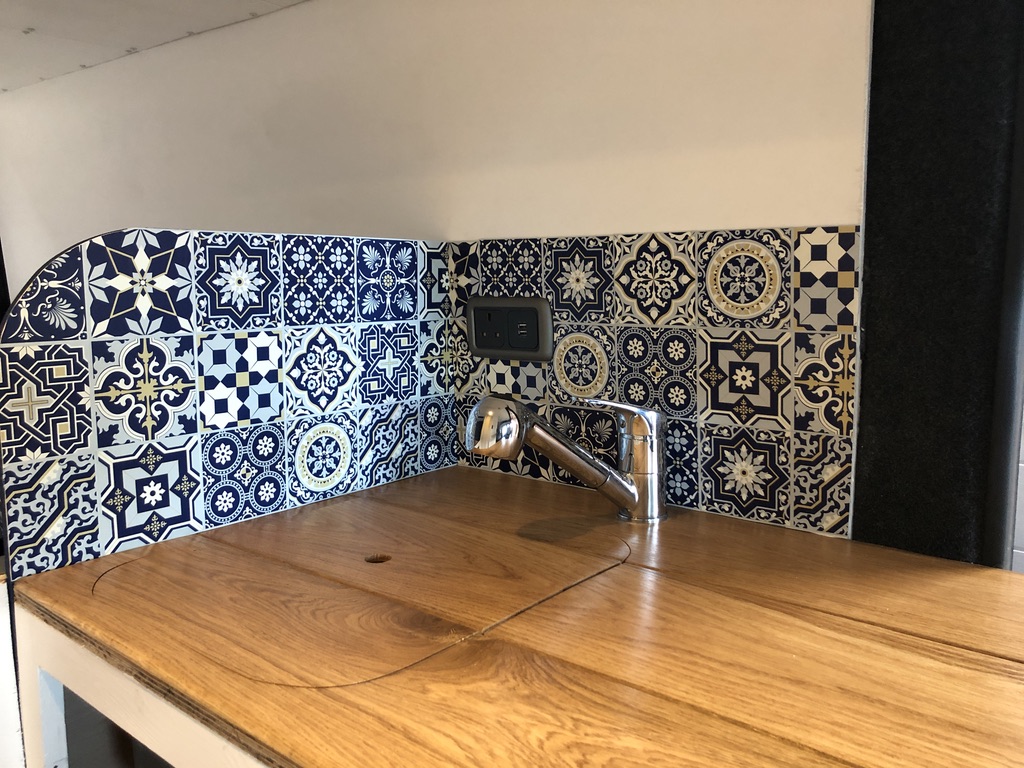
For the worktops and table we recycled some old oak floor boards by sanding them down and finishing with natural wood oil.

Gas installation

Once we had the kitchen carcass in, it was time to get the gas in.

This was the one job we wanted to have professionally done and certified.  We took the van to Leisure Technical Solutions in Lisburn who fitted the 25 litre underslung gas tank we purchased from Autogas 2000. They connected our Thetford Triplex oven and our Truma Combi 4E boiler, and fitted an external gas BBQ point.   This stage would have taken us at least a couple of days in awkward spaces with limited tools, but out-sourcing this job meant it was completed safely and professionally in less than 24 hours.

We installed carbon monoxide and smoke alarms as soon as the gas installation was complete, and added a fire extinguisher and a fire blanket.
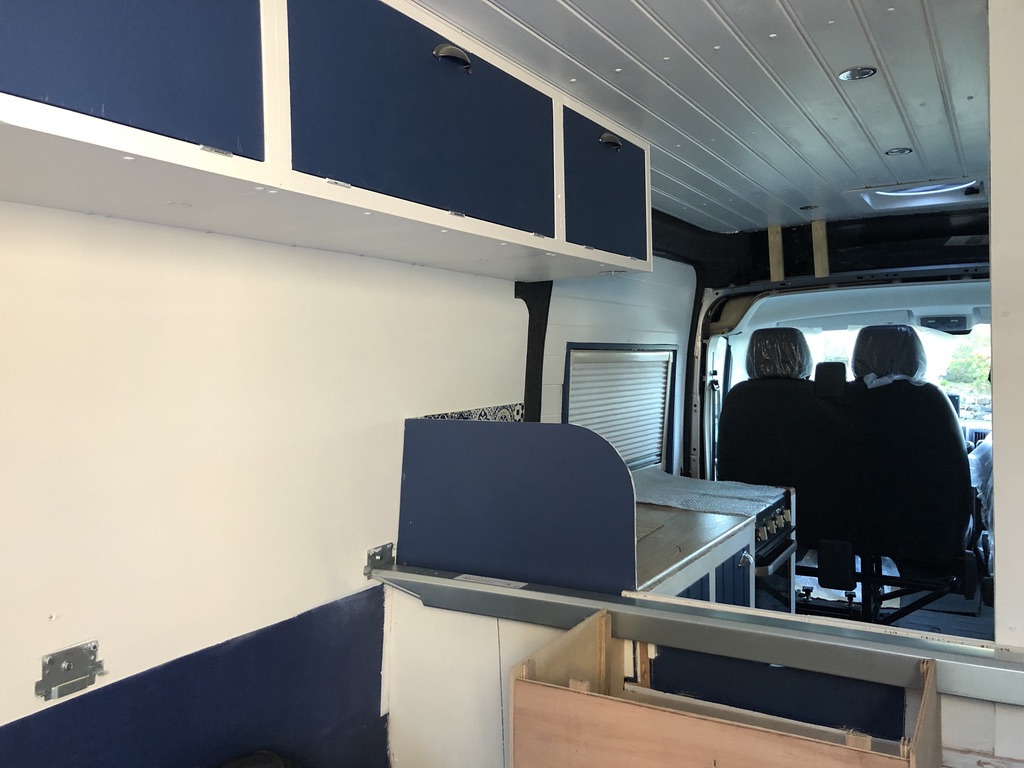
Storage and seating

Dave designed and built all the overhead storage cupboards with 2×1 frames, and 9mm plywood for the doors.  We had just about enough room to squeeze in a bench seat, with storage underneath, in the lounge/dining area.  Again this was built with 2×1 frames and fronted with leftover T&G boards.  We topped it with a couple of foam cushions recovered and recycled from an old sofa we had. 

Finishing Touches

There were lots of these to do!  In fact there is no such thing as a finished camper van build – it is a constant work in progress!

  • Making window frames. 
  • Panelling the sliding door.
  • Connecting the water monitor.
  • Plumbing in the kitchen sink and tap.
  • Connecting the fridge & filling it!
  • Covering the overhead cab with plywood trim (templates which we had custom made broke in transit!).
  • Adding stretch carpet trim around the rear and passenger doors.
  • Laying self-adhesive vinyl planks as the top floor.
  • Tiling the kitchen splash back – we used peel & stick tiles as a lightweight, cheap option.
  • Adding handles and magnets to drawers and cupboard doors.
  • Top coat painting. 
  • Adding the slide out tray to the garage with bicycle fork mounts.
  • Fitting the Lagun swivel table leg.
  • Adding the soft furnishings, hooks and mirrors.
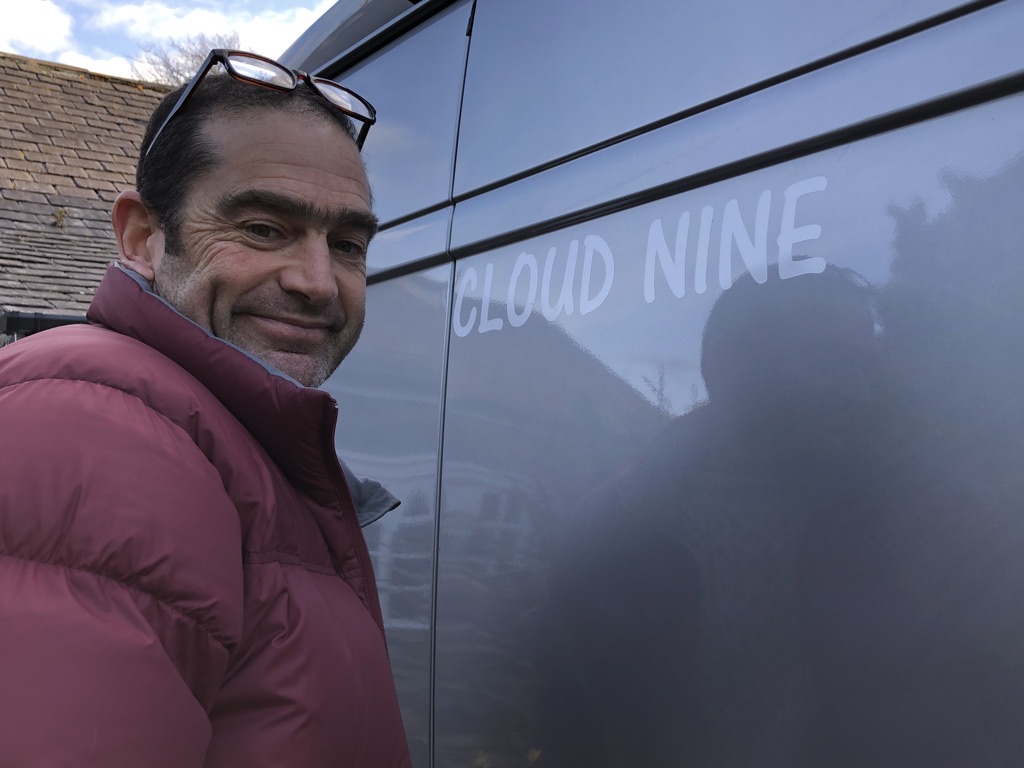
  • Adding some funky custom made Cloud Nine decals!

Completion!

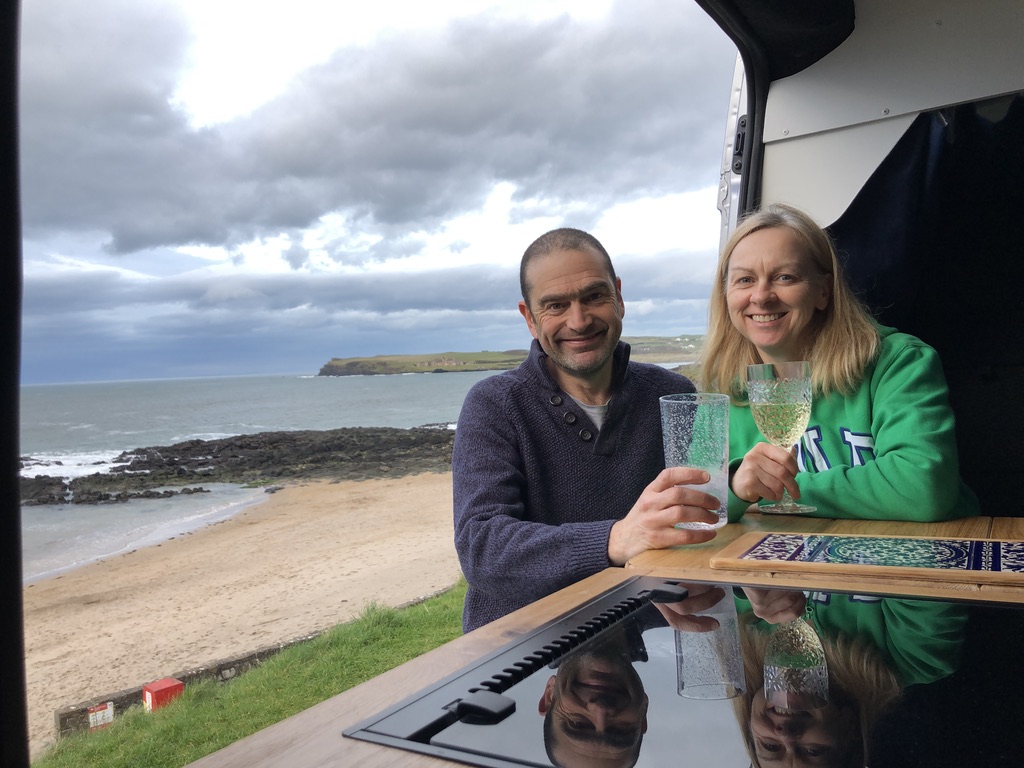
After 16 weeks of blood, sweat and tears our van build is practically complete and ready for a trial run.  It is full of imperfections, but they are our imperfections, and if anything does go wrong, as it invariably will, we should have a fair idea of how to get to it to fix it!

Building a camper van during a global pandemic and the coldest, darkest months of the year is not something we would recommend, or do again.  We started our van build the first week of December 2020 when the days on the North Coast of Ireland are very, very short.  There were no electric lights in the shed so we relied solely on natural daylight from the roof skylights.  Nor was there any source of heating to speed up the setting process of sealants and adhesives, or the drying of paint.  In fact for the first few weeks of our build process we were contending with below freezing temperatures on a daily basis!

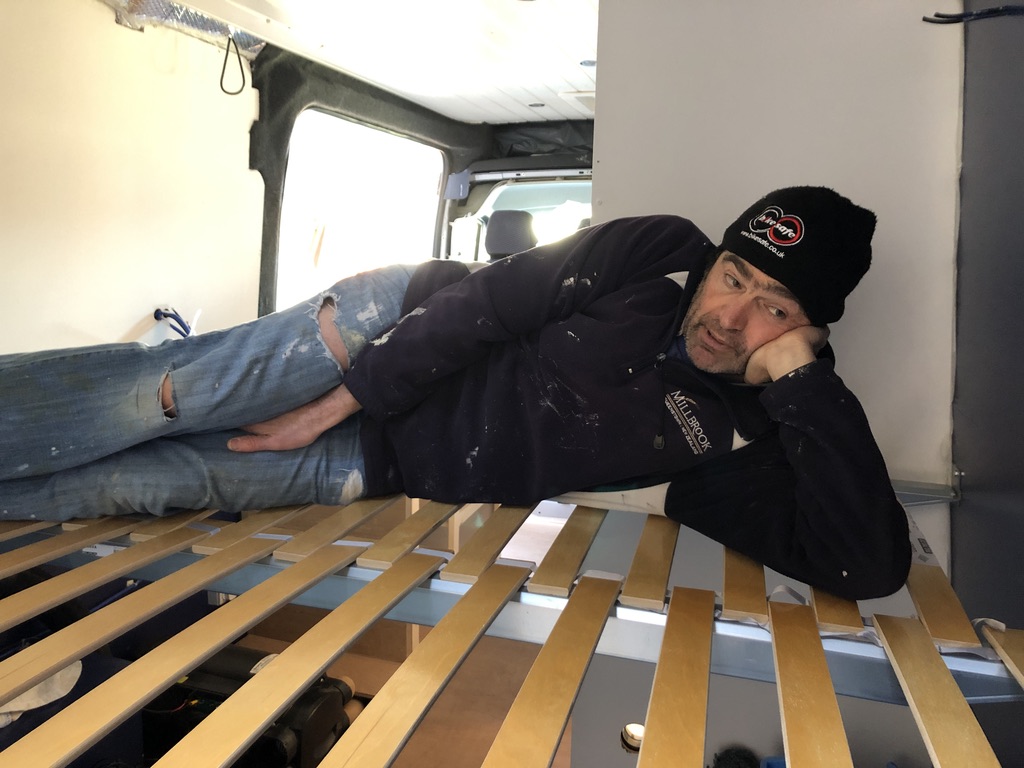
What we didn’t add to the process of building a camper van was that at every single stage we spent countless hours either standing in it and just looking at it, or hours lying underneath it trying to work out where everything was going to go!  

We learned a lot during the entire process and are very proud of what we accomplished together.  We couldn’t have done it without all the fantastic resources we found online, in particular the YouTube videos by Greg Virgoe, The Restoration Couple, VanLife Conversions and CamperVibe.

We will be forever thankful for all the inspiration, advice and motivational support we received from so many great online van build communities.  How people ever built their own camper vans before the internet is beyond us!!! 

If you read this far, well done! If you want to know any more details on how we built our camper van pop a question in the comments below or drop us a line hello@schindlersontour.com


Disclosure – We are participants in the Amazon Associates Program and as Amazon Associates we earn from qualifying purchases.  There are affiliate links in this post which means we may earn a small commission/referral fee if you purchase the product we recommend by clicking on the link.  There is no extra cost to you, and be assured that we ONLY ever recommend products that we truly believe in and have tried and tested ourselves.  If you use our links, we thank you!


The Story of Spot, our first camper van

The Story of Spot, our first camper van

It was after the Olympics finished in Sydney in September 2000 that we started shopping around for a vehicle that would take us not quite the length and breadth of Australia, but at least some of the way around this vast country.  Our mission was to drive the west coast, from Darwin to Perth, in time to spend Christmas with friends.  

Shopping around for second hand vehicles in those days meant hot-footing it around all the hostel notice boards searching the “for sale” ads, and then finding phone boxes to call the sellers and arrange viewings.  No mobile phones for trawling the internet back then! 

In early October we found “Spot”, a 17 year old (1983) Nissan Urvan pop-top camper van.  Spot had already done a few miles around the clock, and he came complete with pretty much everything we needed for an Aussie road trip.  There was a lounge area which doubled up as a bed, a fully equipped kitchen with gas stove, a 3-way fridge, and a microwave.  He even had a tiny TV, and a CB radio!  He had a 40 litre water tank, and the shower was a portable solar shower bag.  The toilet was a shovel for digging a hole! There was a great big lockable box secured on the back of the van to store the awning, the camping table and chairs, and other miscellaneous stuff.

Spot the pop top camper van parked in a campsite.
Spot the pop top camper van

We paid a whopping AU$7,000 in hard cash (the equivalent of about £3,000 back then) to a couple of backpackers who’d already had their time in the van touring around Australia.  

We christened the van Spot because we picked him up in a place called The Spot in Randwick, an eastern suburb of Sydney, and plus what 17 year old doesn’t know about spots!

We hit the road on the 10th October, and by the 13th the van was in the garage for major repairs having lost the gearbox!  Not a great start to our tour down under, but considering that was our only major mechanical issue in an adventure that took us almost 18,000kms (11,250 miles) wasn’t too bad in our opinion.  We did get one puncture, and after an incident with a kamikaze kangaroo we suffered a bit of damage to our water tank, but those are stories in their own right!

Replacing the gearbox early doors!

After five months of adventure on some of the most remarkable roads we said goodbye to Spot in Perth in February 2001 when we sold him for around AU$5,000 to a couple from Dublin starting their Aussie road trip.

Nissan Camper van parked beside huge mining truck
Spot next to a mining truck in Western Australia

Van Life Lessons

We learned a lot about van life and van travel in those five months in Australia:

  • A fixed bed is an essential for us.  Despite taking only 5 minutes twice a day to put the bed up and take it down, it becomes the most detested chore!  Not only do you have to find space for the bedding, but if one of you wants to go to bed and the other doesn’t then you have a stand-off!  
  • Even with a pop-up top it is difficult for anyone 6ft or more to stand up straight. 
  • Having the ability to survive off-grid and be self-sufficient opens up so many more places to you.  It takes a bit of planning though especially when there are no services for miles and miles.
  • Water is the most precious natural resource. Always carry more than you think you’ll need.
  • Digging your daily toilet hole wears thin!  Much easier to have a waterless or chemical free loo on-board that doesn’t need emptying daily.
  • Air conditioning is pointless as once you switch it off it is a lot harder to acclimatise. Keep the windows down and feel the wind in your hair! 
  • A 3-way fridge will not work in very hot climates no matter what the power source!
  • There is no such thing as mosquito nets that work – there will always be at least one that finds its way through.  
Nissan Urvan campervan with awning
Spot parked in a campsite
How we chose the vehicle to use for our campervan conversion

How we chose the vehicle to use for our campervan conversion

Before we launch into how we chose the base vehicle to use for our campervan conversion, let us tell you why we decided to take on such a crazy project! 

Inspiration

It was one fine day in Portrush when the first lockdown of 2020 had been lifted, that we met an Argentinian guy who was travelling with his family in a van that he’d converted himself.  

Our new found hobby since returning home from our unfinished cycling tour of Sri Lanka in March 2020, was trawling the internet, and, when permitted, walking the streets of Portrush, searching out camper vans.  We had started toying with the idea of investing in a van for our next travel adventure.  After getting locked down in Sri Lanka we felt so vulnerable and isolated on the bicycles.  It made us think that for our next travel adventure we would be better being in our own self-contained vehicle.  

Anyway little did we think that this friendly Argentinian would be the one to dissuade us from buying a ready made campervan, but he would be the one to inspire us to build our own!  “It’s easy” he said, “everything you need to know is on YouTube, just watch the Greg Virgoe videos”.

Later that same day, and for many, many days, weeks and months afterwards, we spent an endless amount of hours watching YouTube videos on how to build a campervan.  It looked so easy, surely we could try our hand at that!

The inspiration from our Argentinian friend was the impetus we needed to take on this new challenge.  Up until this point we had not been able to find a campervan that was designed to meet our specific needs, so designing our own was the obvious choice.  Plus with our bed and breakfast business decimated due to the global coronavirus pandemic, we had a lot of time on our hands and needed something to do.

Commercially built camper van.
We looked at lots of these types of commercially built campervans, but they didn’t meet our essential criteria.

Essential criteria

Before we could choose the vehicle to use for our self-build camper conversion, we had to consider what design features were important to us, and those that were less important.  This would determine the size of vehicle we were going to need.

We were in the lucky position of having experience of living and travelling in a campervan so had a good idea of what we wanted, and what we didn’t want.  Our six months driving  “Spot” around Australia in 2000/01 had taught us a lot!

Our essential and non-negotiable top three criteria for our van build were: 

  • Fixed bed
  • Inside storage for our bicycles
  • On board toilet and shower

In addition we had our list of what we would prefer to have in our base vehicle:

  • Enough headspace for Dave to be able to stand upright (he’s about 6ft)
  • A van big enough to be able to live in for extended periods of time (6-12 months) in all seasons
  • A van small enough to visit family and friends in cities and urban areas
  • A van less than six metres in length for ease of parking (and it means a cheaper tariff on ferry crossings – the prices go up if your vehicle is longer than six metres!)
  • A reliable, well-maintained van versatile enough to take us off the beaten track 

Plus we had our list of what we knew we didn’t want from our base vehicle:

  • An old van with high mileage and high maintenance
  • A van so big that you have to get a special driving licence
  • A white van!


White panel van suitable for camper van conversion.
We saw lots of white panel vans that we didn’t want!

Research, research, research

It didn’t take us long to realise that there is no such thing as the perfect base vehicle for a camper van conversion.  But there are definitely some vans that are more suited to converting than others, and that’s where your research is key.  

As well as our endless hours of watching “how to build a campervan” YouTube videos, we started looking online at van conversion companies to see what types of van they were using as the base vehicle.  The top two contenders at this stage were the Mercedes Sprinter and the Volkswagen Crafter.  And that was the route we were going down until we found the very helpful online forum at Self Build Motor Caravanners Club (SBMCC).

This SBMCC forum was undoubtedly our best find during the entire research, and subsequent self-build, process.  The £15 annual membership was well worth it for the valuable information and knowledge we gained.  The forum was full of people who were doing, or had already done, exactly what we wanted to do.  

It was on this forum that we learned that a Sevel van gives you a few extra centimetres width if you’re planning, like us, to have a fixed bed traversing the van.  And you all know every inch (or centimetre) counts!  We were completely ignorant as to what a Sevel van was and had to ask the question.  The answer was a van from the Sevel factory in Italy which makes pretty much identical vans for Fiat, Citroen and Peugeot.  

And so our mind was made up, we were going to start shopping for a good second-hand Fiat Ducato, Citroen Relay, or Peugeot Boxer van.

Shopping around

Shopping you think is the fun part, but no, it was far from it!  Bearing in mind this was in the midst of the 2020 global lockdowns and the demand for vans, both old and new, was almost outstripping supply.  The rise in vans needed by courier and delivery drivers during the pandemic was increasing daily.  Combine that with the booming  #VanLife phenomenon, and we were left with very slim pickings at very extortionate prices.  On top of that we could only view vans located in Northern Ireland.

We were trying to find vans that were 2-3 years old with low mileage and the average price was coming in at around £14,000 +VAT.  A lot of money for a second-hand vehicle with no guarantees.

A price comparison with brand new vans proved if we could stretch our budget to £16,495 +VAT we could get a brand new, pre-registered van and a clean slate from which to start our build.  And that is what we did.  

We chose a Citroen Relay 35 L3H2 2.2 Diesel Euro 6 panel van in Cumulus Grey metallic paint from Vans Direct.  It was not a buying process we’d want to repeat, but maybe more on that another time!

We took ownership in early December 2020 and the build got underway.

Our return to travel blogging

Our return to travel blogging

Our return to travel blogging

This is our first blog post in a very, very long time! And the first on our revamped Schindlers on Tour self-built website! We’ll tell you more about that process later, but meanwhile a bit of background about our travel blogging journey.

Here’s an overview of our blogging experiences:

When we started blogging

Our days of travel blogging started with blogspot – anyone else remember that?? That was way back in the year 2000 when the world didn’t end with Y2K. We made the decision to pack up our careers and our life in London into a couple of rucksacks and a tent, and set off on our first big overseas trip together. 

Our travel blog was a way for our family and friends to keep track of our travelling tales. Plus it was a way for us to keep a record of places we’d visited. Without the blog, communicating and connecting was via expensive long distance phone calls from phone boxes (remember them?), snail mail letters, and e-mailing from internet cafes (when you could find one!).

The early days

Back then there was no such thing as WiFi, Zoom, WhatsApp or social media platforms. And not a mobile phone in sight! Skype was the first real game-changer for us in terms of communicating. When it first launched we could call long-distance for free from our new found home in New Zealand.

Getting access to the internet was a time-consuming and often expensive challenge in those earlier halcyon days of our travels. No doubt that is incomprehensible to today’s generation of travel bloggers who have grown up completely at ease with technology.

Over the years we have tried and tested more blogging platforms and travel journal apps than we care to remember. In our experience Everlater and Weebly spring to mind as the best and worst respectively. Some of the platforms we used are still around, and others have long since gone. The result is us having a complete mish-mash of memories stored all over the web. Plus we have a stack of good old fashioned paper diaries from almost every trip we’ve ever taken together.

Here and now

And so in March 2020 when the coronavirus pandemic abruptly called a halt to our cycling tour of Sri Lanka we decided it was time to bring all our travel and adventure blogs and diaries together in one place. You’d think that with the world ground to a halt, no business to speak of, and plenty of time on our hands we’d have gotten right onto it, but the motivation and inspiration to build a new travel and adventure blog was not there during those strange times.

Instead we got busy in lockdown with building a campervan, shutting down our bed and breakfast business, selling our home and getting rid of most of our worldly possessions! The blog building got put on the back burner.

Now here we are nearing the end of 2022 attempting to collate 20+ years worth of travelling tales and life adventures to post as a collection of blogs on our Schindlers on Tour website.

Wish us luck!

Why we blog

First up we are not writing our travel and adventure blog in an effort to make a six figure income that so many travel bloggers rave about (although wouldn’t that be a fine thing!). Rather we’re doing it so that in years to come when our memories have faded, and we are old and demented, we will have one big memory bank that will hopefully trigger links to some of the happiest days of our lives.

We blog primarily to document our own personal travelling experiences and life’s adventures. It’s a hobby for us, and not a business venture. We’re not prepared to make the full-time commitment it requires to make an income from a blog, but if it ever generated enough to splash out on the occasional bottle of wine then happy days!

Secondly we have been asked by so many friends and family, and contacted by folks who we don’t know, to write more about our ever-changing travel and adventure lifestyle. And if sharing our stories on this blog inspires or motivates even one person to follow and realise their dreams, then our mission here will be accomplished!

What you’ll find in our blog

The plan is to have this new and revamped Schindlers on Tour website full of all our travelling and lifestyle adventures. There’ll be backdated posts from when we started travelling together, and right up to date posts from wherever we are now. It’s all about our own personal experiences and all blog posts are written by us.

You’ll find all the old posts from our previous travel blogging platforms, and excerpts from our old travel diaries. (As much as many of them make us cringe now, they are all part of our blogging history and we can’t change that!). The process of populating the blog with the old stuff is going to take a bit of time, so if you’re interested in that, check back another day!

There will be tales from our more recent travels, and maybe even some stories from our years as bed and breakfast hosts. We’ll do our best to add regular new posts and stories about van life and house sitting.

We’ll include travel tips when we can, plus honest, practical advice. You can be sure anything we recommend in a blog post has been tried and tested, or tasted, by us.

As we said, it is a memory bank for us, but we would love it if any of it inspires you to make memories of your own.

Subscribe here to our blog and never miss a post!

How we rebuilt our travel and adventure blog

Let’s start by saying it has not been easy! It’s been all fits and starts for the past 18 months, and there’s still a long way to go. It’s a constant work in progress.

Inspiration and motivation waned at the best of times. We were either too busy out exploring new places and adapting to van life. Or we were too comfortable cuddling pets on our latest housesitting gigs.

Frustration took over at the worst of times, especially when we couldn’t access reliable internet for weeks at a time, not helped by our hard drive packing up while we were on a remote Greek Island!

There were plenty of days when we were ready to give up on the idea of re-building our travel blog completely.

But here we are, still trying – it’s an ongoing process with a very steep learning curve.

If you think you can, you can. If you think you can’t, you can’t.

Starting from scratch

Our previous and most recent Schindlers on Tour website we built using Weebly. This was the same platform we used to build a very functional website for our successful Shola Coach House bed & breakfast business. But we were never happy with Weebly as a travel blogging platform. The hassle of transferring all our old Schindlers on Tour content to a new platform was not worth the effort.

We made the decision to rebuild our website from scratch and take on the challenge of learning a whole new platform! As they say you’re never too old to learn something new, or is it you can’t teach an old dog new tricks?! Either way, we’re giving it a go. We opted for WordPress, the free open source software which has a global reputation as the best blogging platform.

We have no special website building expertise or technical skills. We’re completely self-taught when it comes to computers, and technology. We learn as we go from trial and error. And thank heavens for YouTube!

Free resources

We’re grateful for the many free blogging resources and community forums that are available online for help and support. A few free resources that were of particular help to us were:

And we wouldn’t have a funky little logo if it wasn’t for the kindness of a very special and talented friend!

But we thought we needed more than the free resources.

At this point we should make it clear that we are not currently planning a strategy to monetise our travel and adventure blog. However, we do want to try and build it so that we have that option in the future.

The costs of building our travel and adventure blog

Building a blog that has the functionality to potentially generate an income, however small, doesn’t come without some financial investment. On top of that there’s the time and effort we’re putting into the building process.

Our costs included:

Domain Ownership & Renewal Costs

We registered Schindlers on Tour as our domain name many years ago with GoDaddy at a cost of about £10 per year. We have since transferred it to Host Gator with renewal costs of around £16 per year.

Hosting Costs

Our web hosting provider is also Host Gator at a cost of approx £3-5 per month.

Design Theme Costs

We could’ve gone with a free theme from WordPress.org, but a paid theme offers us more flexibility and functionality if we ever do decide to go down the route of trying to make money from our blog. We chose Divi from Elegant Themes for a one-off cost of £75 which includes support. Another steep learning curve!

Email Costs

We use Google Workspace for our website emails which costs us approx £4 per month.

Coaching Costs

By far our biggest investment was £600 for online coaching from Johnny Ward of the One Step 4Ward blog. The course was six one-to-one video calls on how the blogging industry works. In hindsight we may have received much the same information from any one of the hundreds of bloggers offering free online courses, or by doing more of our own desktop research, but as they say you live and learn.

What we’ve learned so far…

We quickly learned that we are not prepared to make the full-time commitment nor put in the tremendous effort required to become “successful” full-time travel bloggers. We want to retain the pure joy we get from our travelling lifestyle without feeling like a slave to the blog and being tied to technology.

Success for us at this stage in our lives is not about making a six figure income from our travel blog, or ranking high on Google. It is about proving to ourselves that we can learn new skills and build an honest travel blog of our personal experiences. And if by any remote chance you are reading this and feel inspired or motivated by our adventures to take on your own new challenges, then to us that is success.

If you have read this far, thank you! We’re delighted to have you join us on our return to the world of travel and adventure blogging.

The last days of our summer in New Zealand

The last days of our summer in New Zealand

The last days of our summer in New Zealand

It is the end of our first ever bicycling tour, and the last days of our summer in New Zealand.

Arriving in Auckland last night felt far from summer with the wind howling and gusting as we rode the short distance from the Strand station to our friends, Tracy & Paul in Grey Lynn, where we were spoiled with a delicious meal out in a Russian/Kiwi fusion restaurant.

Tracy & Paul

We had a last quick catch up with Candice on the North Shore, this time getting to meet little Lucas as well as seeing Emilia again, and meeting her parents who very kindly invited us for lunch. 

A quick train trip and a final short bike ride and we are back at Debbie’s place in Pukekohe, from whence we started way back in November!  Its time to pack the bicycles away, but not before enjoying one more glass of wine until we meet again.

The last leg to Pukekohe

Thank you New Zealand, and one and all of our old, and new friends, for making this a fantastic trip. We’re hoping this will be the first of many bicycle tours.

Subscribe to our blog below, or follow us on social media to see where we end up next year!


Pin It on Pinterest