In this post we highlight some information to be aware of if you are planning on driving a camper van in Morocco. It is a fantastic country for a road trip and very camper van friendly.
We spent 10 weeks driving a camper van in Morocco in the spring of 2025 – you can read our full itinerary here.
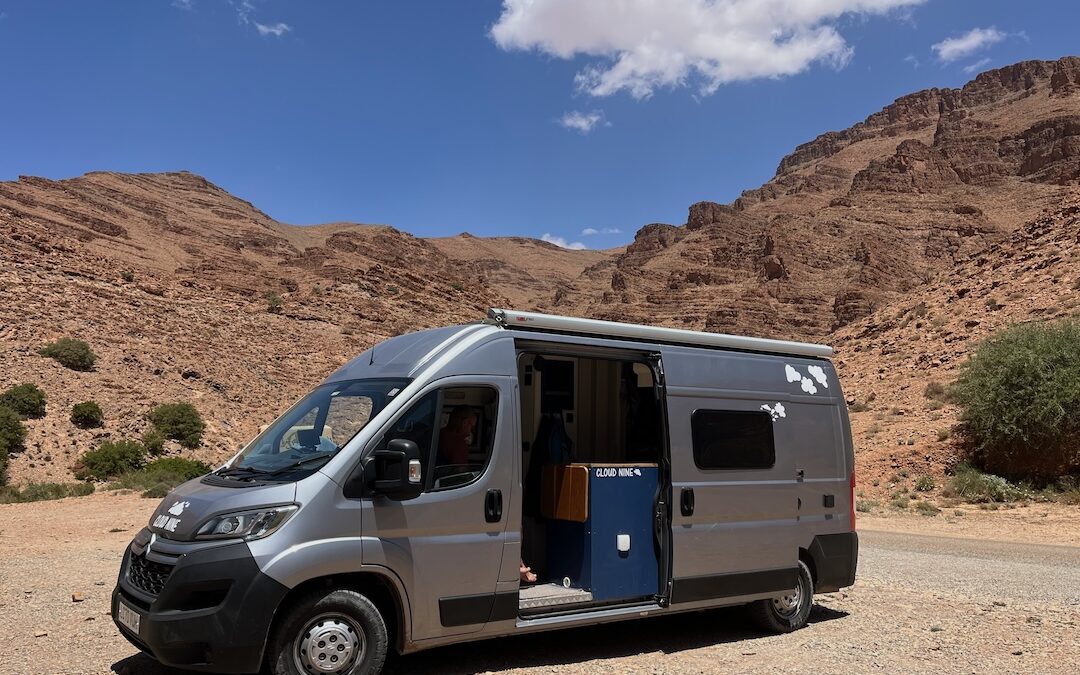
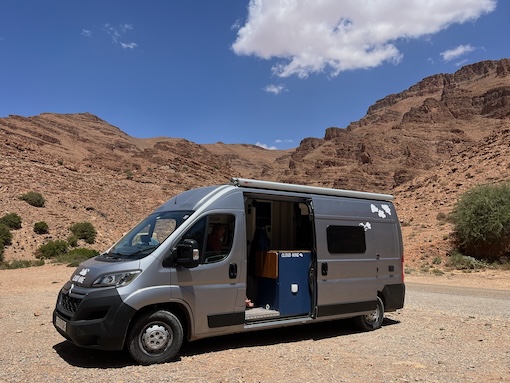
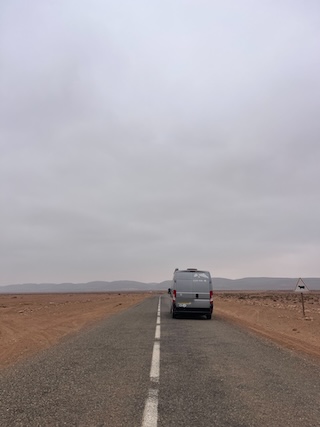
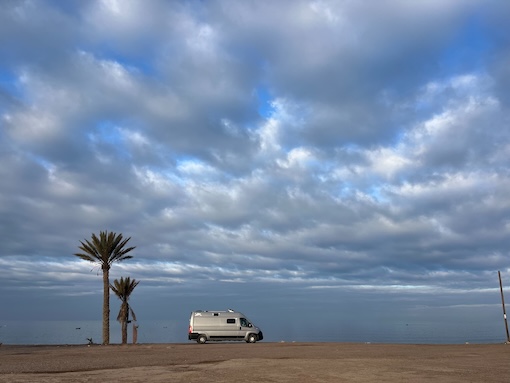
We covered a total distance of 4,572km/2,840 miles. We drove on all sorts of surfaces, from smooth sealed tarmac roads to corrugated sandy and rough gravel tracks in our 2WD self-built Citroen Relay camper van. Everywhere we wanted to go was accessible to us – mountains, desert, cities, coast. You will only need a 4WD if you are planning on driving off-road through the desert.
Driving Essentials
You need to be aware of the following essentials for driving a camper van in Morocco:
Drive on the right
Distances are measured in kilometres
The speed limit is 60km/h on urban roads, and 120km/h on the Autoroutes/motorways
Third party only insurance is available to buy on arrival at Tanger Med port – more details in this blog post.
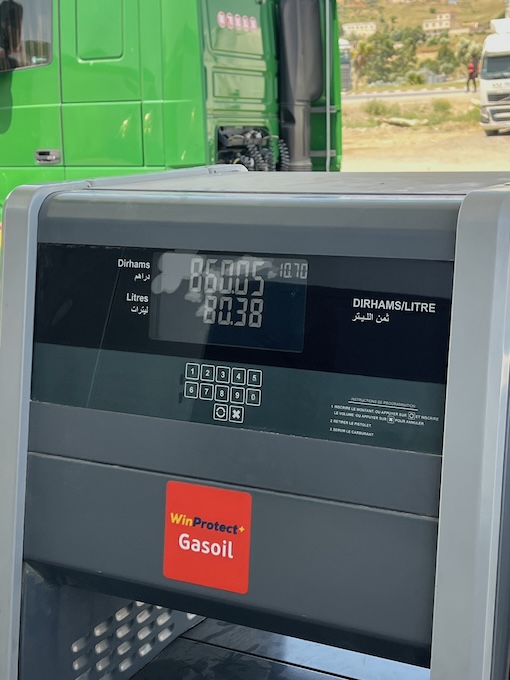
Diesel
If you’re driving a camper van in Morocco you will have no issue finding diesel. Fuel stations are easy to find in every town, even in the most obscure small towns! Diesel on average cost us between MAD10-11 per litre (around £1 per ltr). In general it was cheaper on the coast than inland. Credit cards are accepted at the majority of petrol stations, but not all, so be prepared to pay in cash if necessary.
Road Conditions
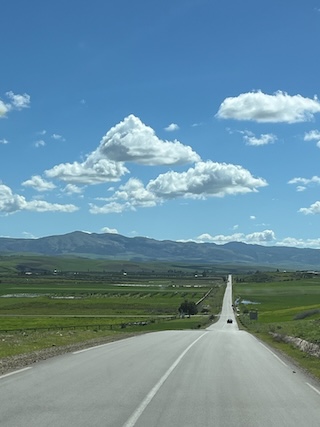
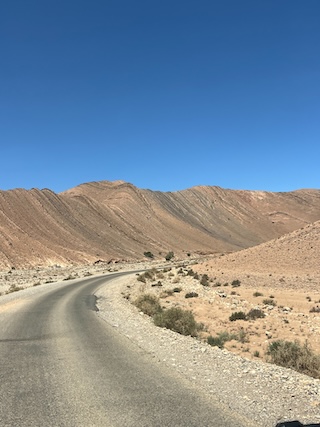
On the whole we found the main roads pretty good, albeit we did come across some serious potholes, unusual camber, and plenty of unmarked bumps! But let’s face it when you’re driving a camper van in Morocco, or anywhere else for that matter, you’re never going too fast anyway! Remember the speed limit on urban roads is 60km/h, and traffic cops are a very common sight.
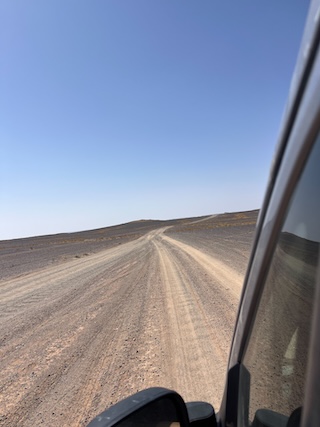
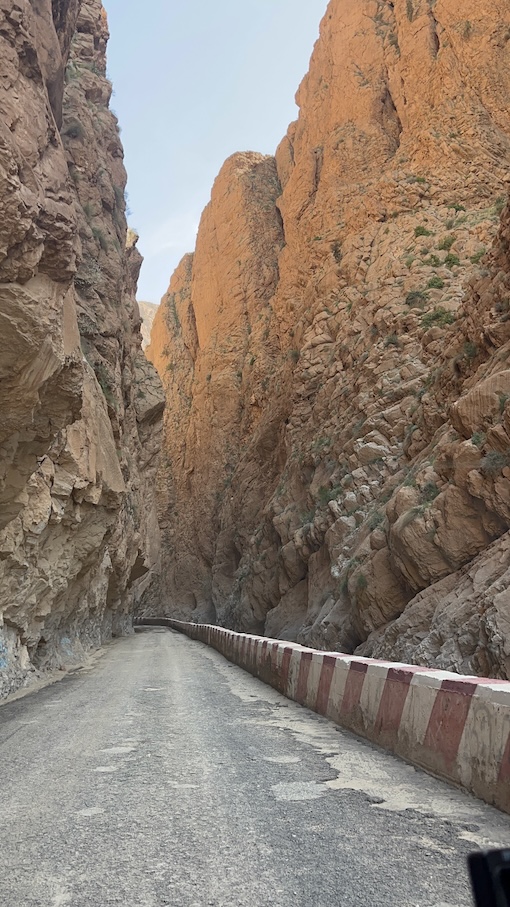
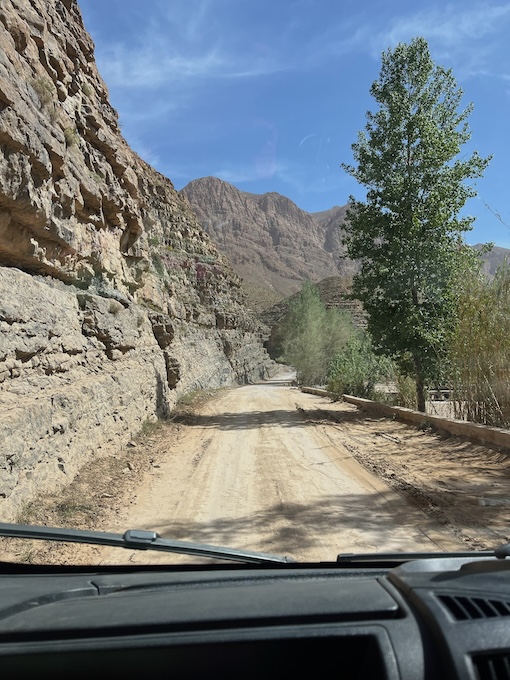
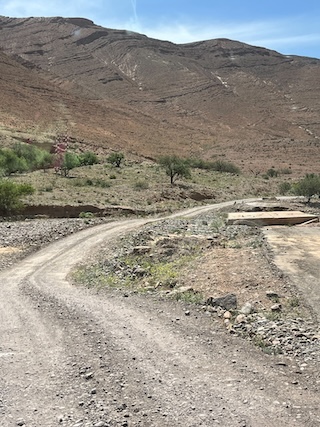
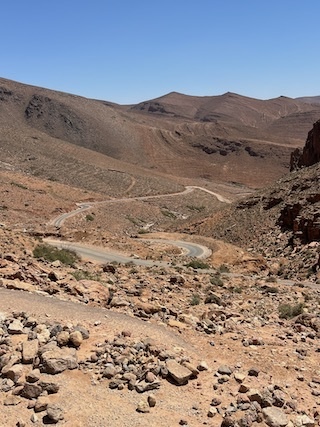
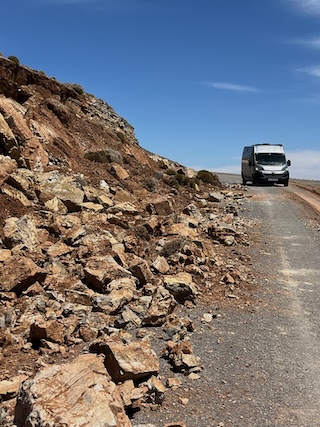
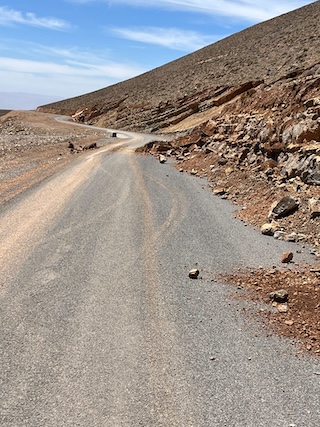
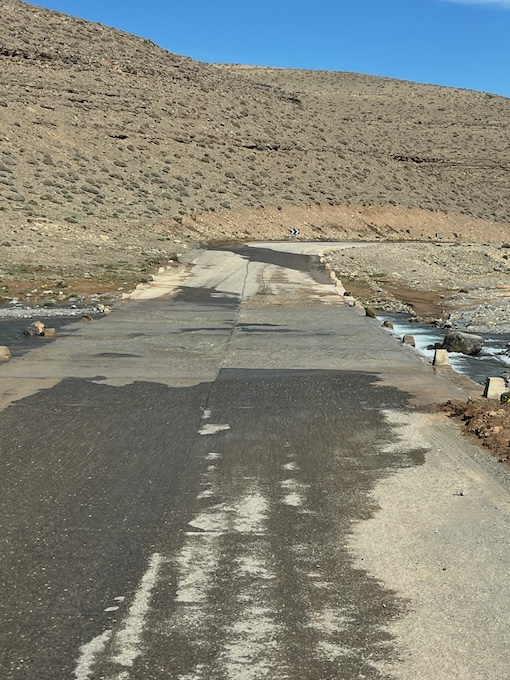
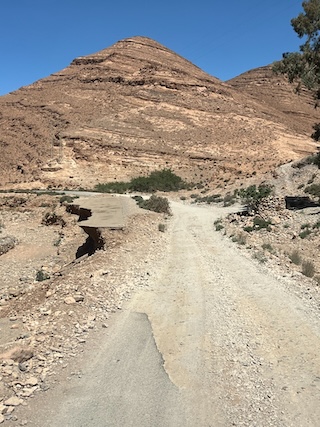
The more minor roads are a different case. Often these roads are gravel, or if you’re lucky one strip of tarmac down the middle of the gravel, and any road hazards are not necessarily marked with cones or signs, but with rocks!
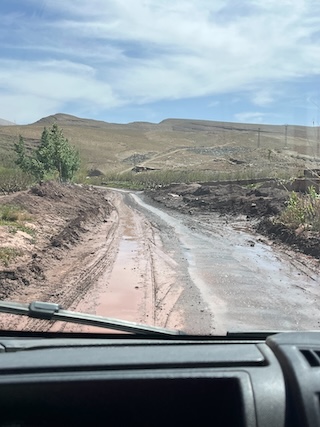
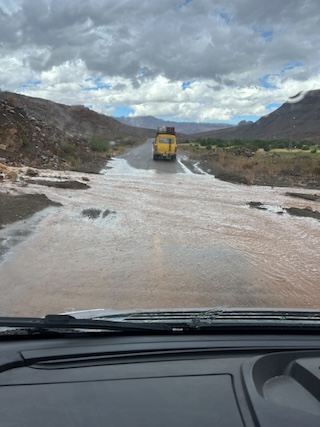
There had been some heavy rain in the mountains while we were there causing a couple of roads to close for a few days. It wasn’t always easy to get up to date information on the road conditions, and there were times when we were passed the point of no return that we had to trust the locals telling us we could get through. We did encounter the occasional slip and some small fords to cross, but all very manageable in our van.
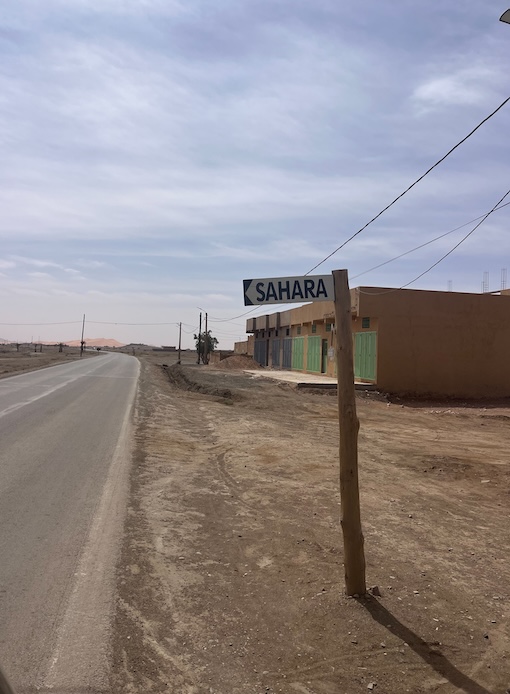
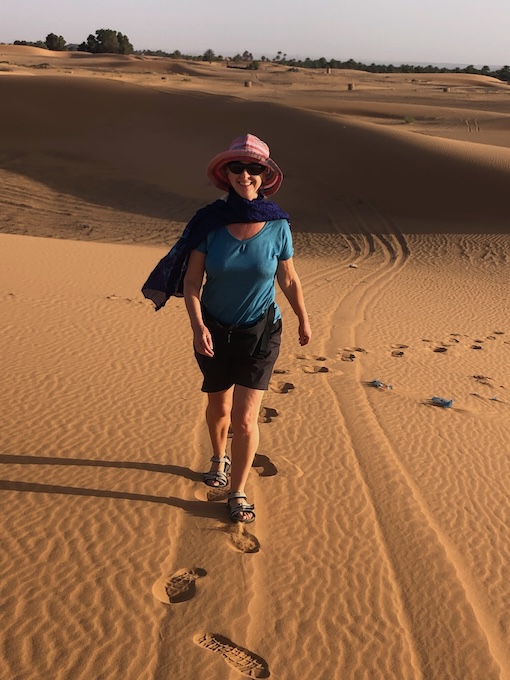
The access roads to Merzouga and the Sahara Desert are good sealed roads, but there is still no avoiding the dust and sand getting into the vehicle. We had to disconnect our smoke alarm while driving as the dust would constantly set it off!
We only used the Autoroute/toll roads twice on the trip, and it was not expensive. One we paid in the north of the country between Tanger Med and Martil was MAD16/£1.30, and the other was driving from Rabat to Asslah which cost MAD153/£12.
Traffic
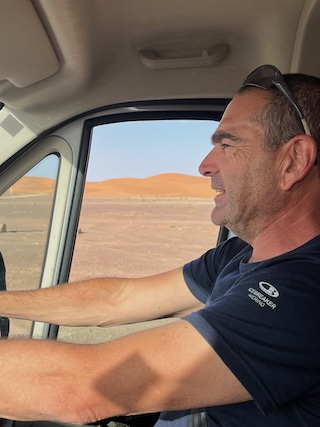
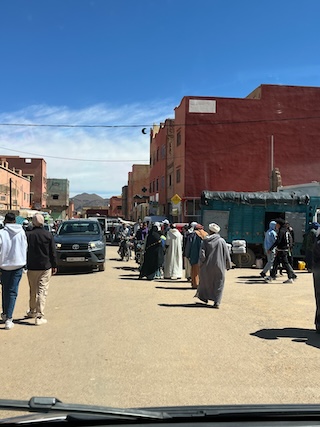
We found the traffic very light during the time we were there. There were times when we were driving that we barely saw another vehicle. The exception was in and around major towns and cities and tourist hotpots (e.g Todra Gorge) where you naturally expect congestion with coaches of day trippers coming and going. Even Marrakech was not nearly as bad as we’d thought it was going to be. Traffic there can be a bit crazy, and it pays to have two pairs of eyes on the look out especially if you’re in a right hand drive vehicle. Mopeds are coming at you from all angles!
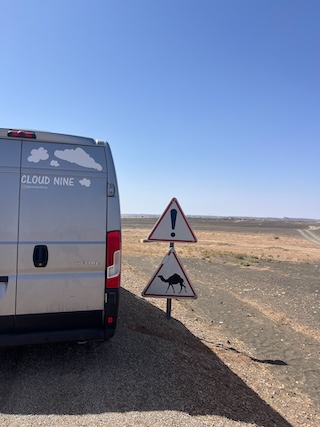
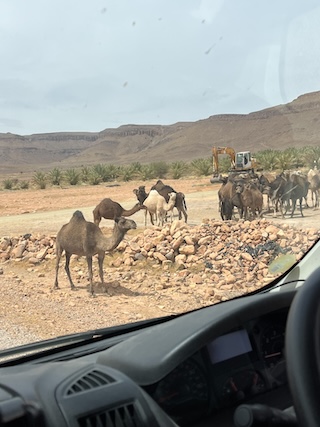
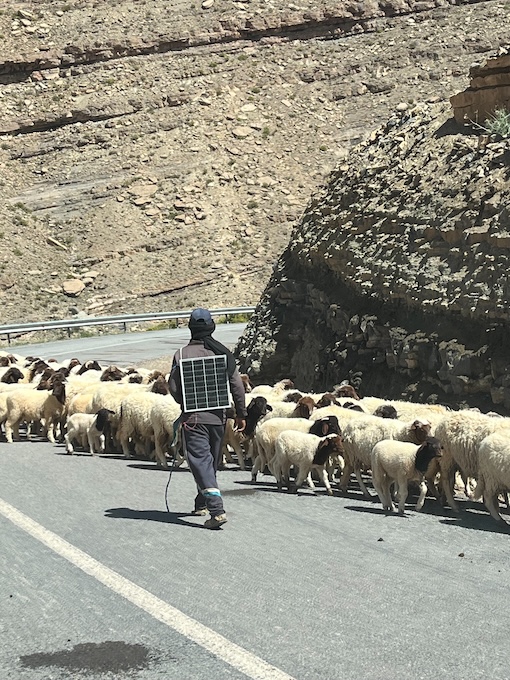
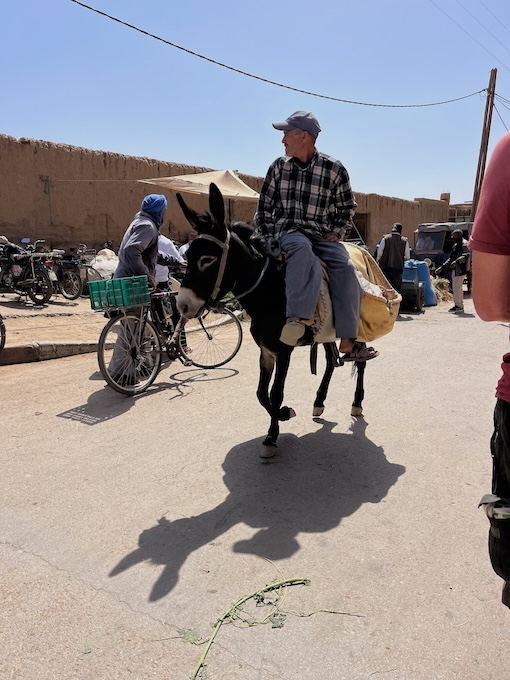
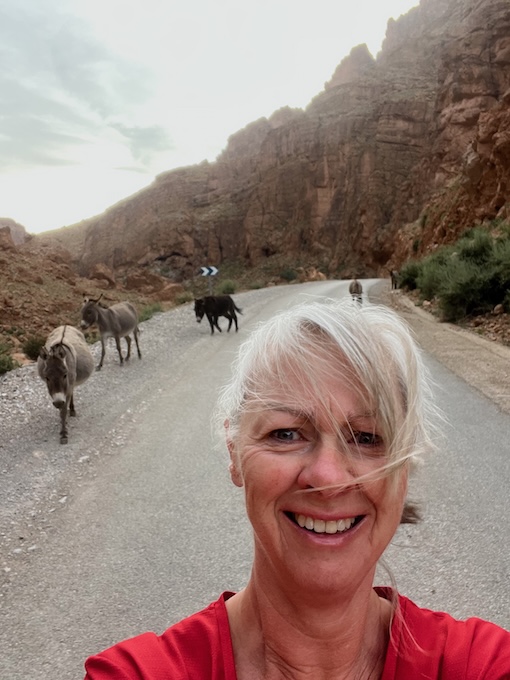
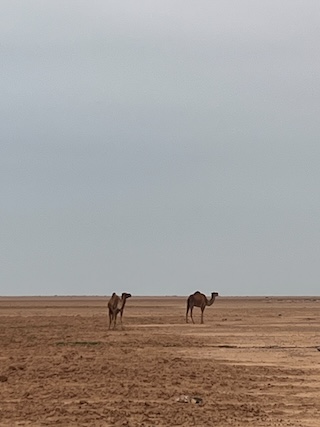
Often there are more camels, goats, sheep and donkeys on the roads than vehicular traffic, and that applies to urban as well as rural areas! Plus you have the pedestrians to watch out for.
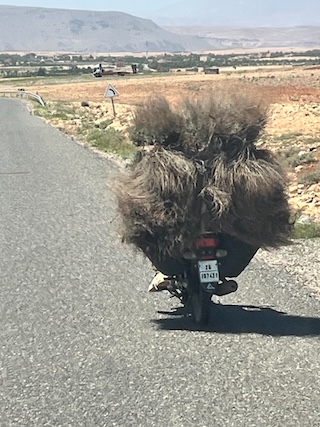
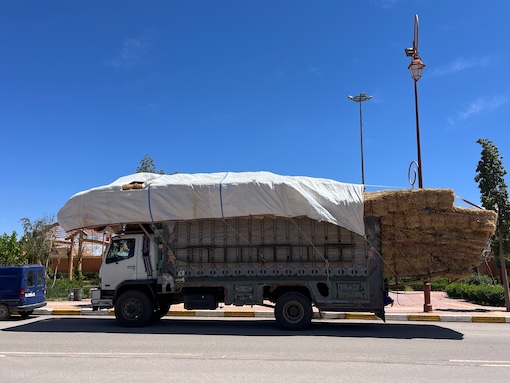
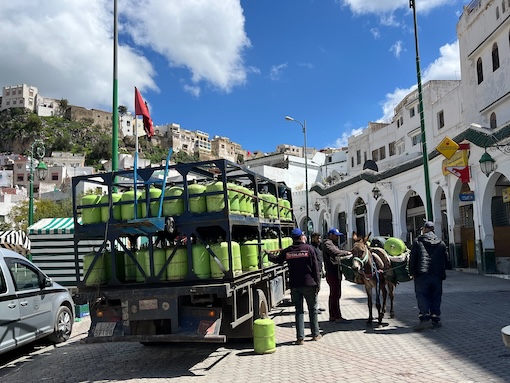
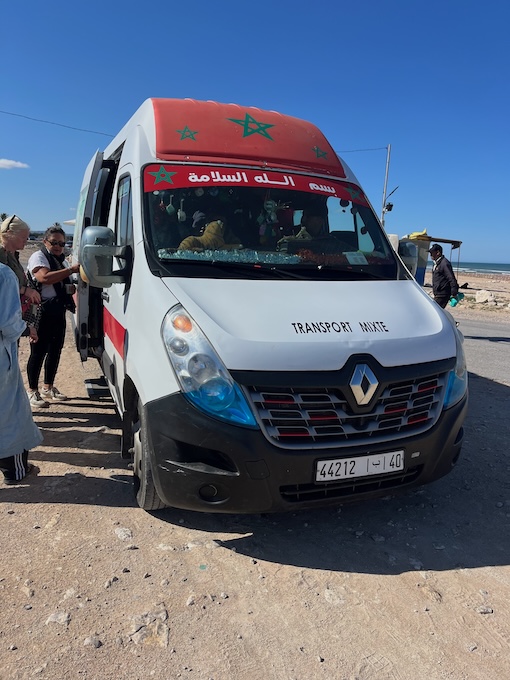
No matter where we were driving our camper van in Morocco we always, always saw lorries loaded with gas canisters. And as for some of the other loads of cargo you see being carried you just wonder how they don’t topple over!
Police
Watch out for the police if you are driving a camper van in Morocco. There are police and road checks everywhere – at most major intersections/junctions, and sometimes in the most unlikely of places! We heard from many other van travellers who received tickets for speeding, or not stopping completely at stop signs, or not slowing down enough at checkpoints.
It pays to stay on the safe side and adhere to the signs and always wait for instructions at manned checkpoints. We were always waved through every checkpoint with the exception of one where we felt the policeman was bored and just wanted a chat!
Navigation, Road signs & Place Names
The built-in satnav on our camper van is a Tom-Tom. It doesn’t include Morocco so we had to resort to a combination of maps.me (which we downloaded in advance for offline use), Google Maps, and a good old fashioned paper map. Because the paper map included Western Sahara we were advised to keep it out of sight to avoid confiscation by the police.
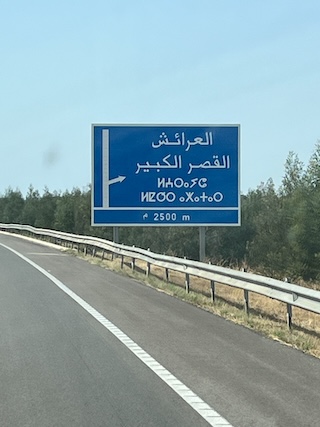
The road signs and place names you will see while driving a camper van in Morocco can be confusing to say the least. First of all place names can have multiple different spellings depending on the language being used – French, Arabic, Amazigh, or English. Secondly it depends on where you’re reading them – road signs, Google Maps, Lonely Planet, Park4Night, Michelin Maroc map, etc. As an example: Todra Gorge in Lonely Planet, Todgha Gorge on Google Maps, Gorges du Toudra on the Michelin Maroc map, and that’s not even including the Arabic versions!
What can go wrong driving a camper van in Morocco
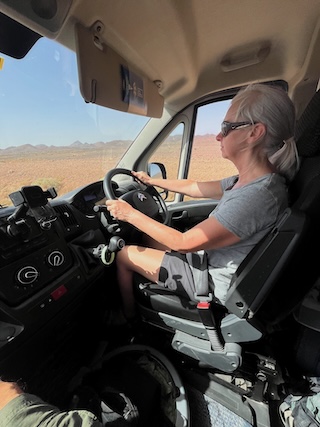
Driving a camper van in Morocco was a pleasure for us, and as long as you abide by the law and respect the locals, you should have no issues. We tended to give the local traffic priority on the narrower rural roads, but in the cities it was every man for himself! You always need to keep an eye out for mopeds, donkeys, and shepherds with their sheep, and goats. It really helps having two sets of eyes and two people to share the driving. We never risked driving in the dark at night, and always got to our destinations before sunset.
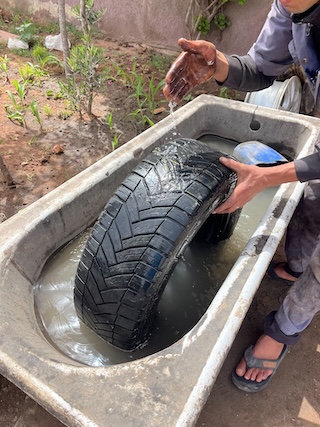
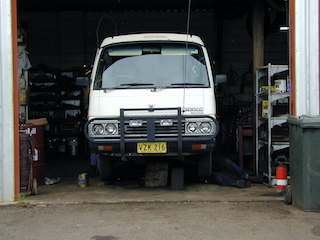
Like any road trip you and your vehicle have to be prepared to deal with all eventualities. Vehicles can break down and things can go wrong. We count ourselves lucky as we only had a few minor mishaps, and any of them could’ve happened in any country. The great thing about them happening in Morocco is that there is always a friendly local who is willing to help you fix the problems for not a lot of money!
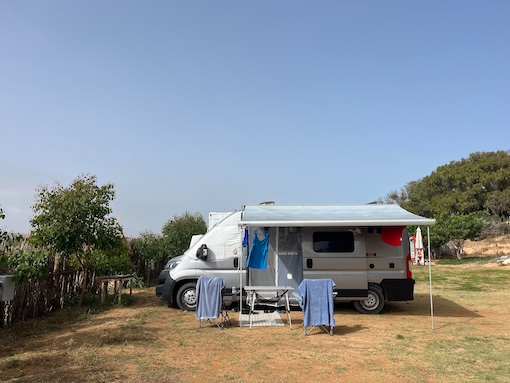
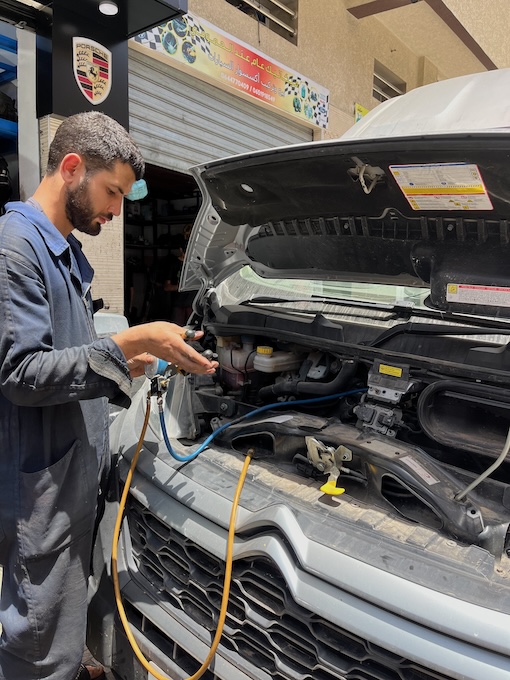
For us the air conditioning broke down a day or two after we arrived in Morocco; we had an oil leak just before we reached the Sahara; the leg of our awning snapped off in a campsite in Tafraout; the windscreen washer pump packed up during a torrential downpour in Zagora; we had one slow puncture in our final week from a screw in the tyre; and the smoke alarm was constantly going off triggered by all the sand and dust!
It is a truly great country for a road trip and we would highly recommend driving a camper van in Morocco. Remember to stop and take in the views and vistas, Morocco is full of them! And be prepared to embrace the sand and dust, there’s no getting away from it!
If you’re planning on driving a camper van in Morocco, take a look at this blog post for our checklist of things to do before you take your vehicle to Morocco.
In this post we highlight some observations from travelling in Morocco during Ramadan. We spent 10 weeks travelling in Morocco in our camper van in 2025. You can see our full itinerary in this post.
The first couple of weeks of our 10-week trip we were travelling in Morocco during Ramadan, the holiest month of the year for Muslims. It is a time of fasting, prayer, reflection and community. From dawn to sunset Muslims will fast – no food, no drink (not even water), no smoking, or no sexual activity. The fast is broken each evening with a meal called Iftar.
The dates for Ramadan change every year depending on the lunar calendar, and in 2025 it was from 1-31 March. The month ends with a celebration called Eid-al-Fitr, a festival of breaking the fast, a day of prayer, feasting and giving gifts, often to charity.
The Ferry Crossing during Ramadan
Our first observation that it was Ramadan was on the ferry crossing from Algeciras to Tanger Med. The ferry had been delayed for more than four hours, and we were getting hungry. As part of the compensation for the delay food bags were being given out, but of course the majority of the travellers on the ferry were Muslim and observing Ramadan, therefore not eating or drinking. We did not want to eat in front of them out of respect so we hid away in a corner with our snacks!
There was a cafe on board the ferry (cash only), but with very limited supplies, whether that was due to it being Ramadan or not, we don’t know. But for future reference we would recommend you take your own snacks on board, and if it is during Ramadan, be as discreet as possible when eating.
Mornings during Ramadan
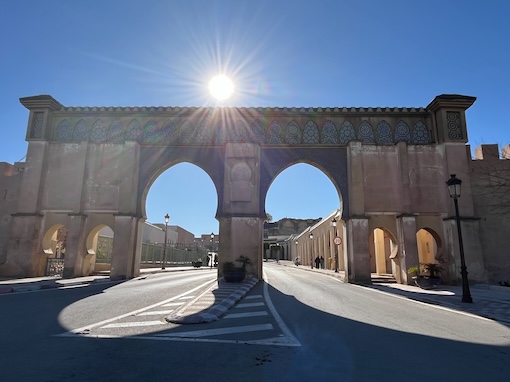
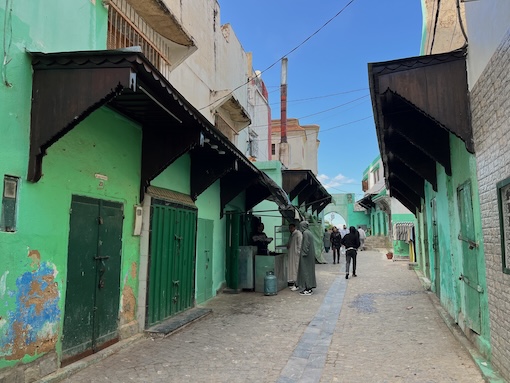
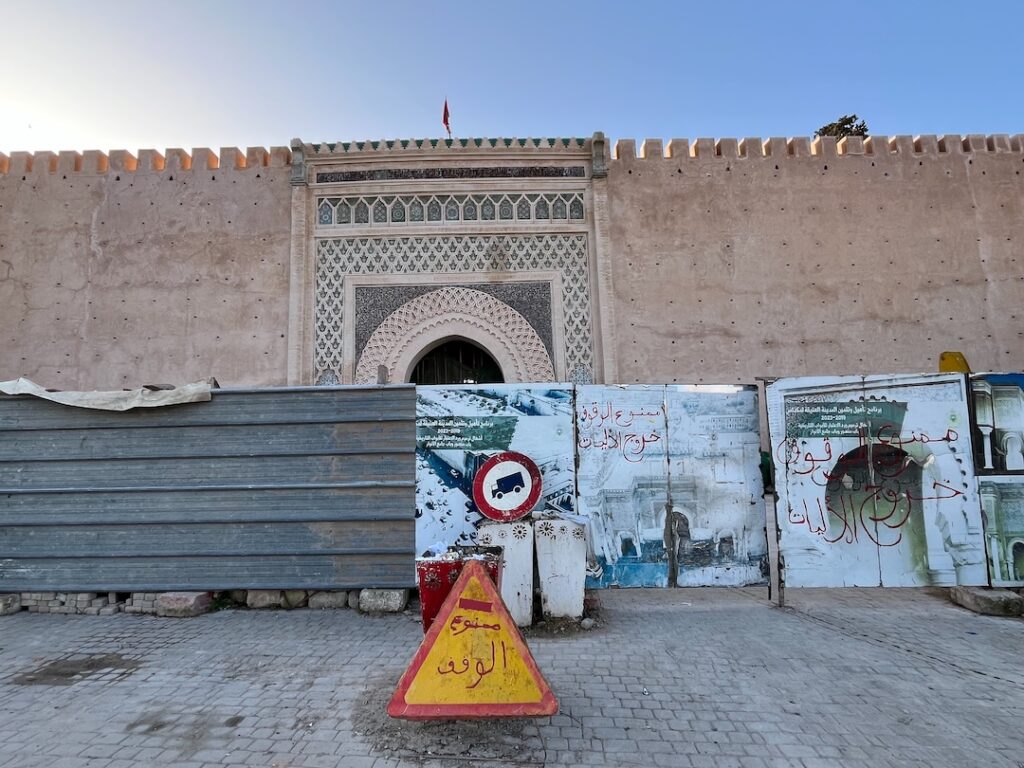
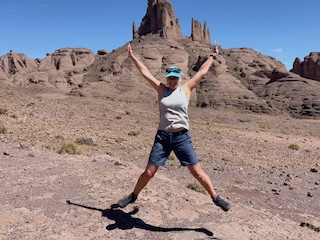
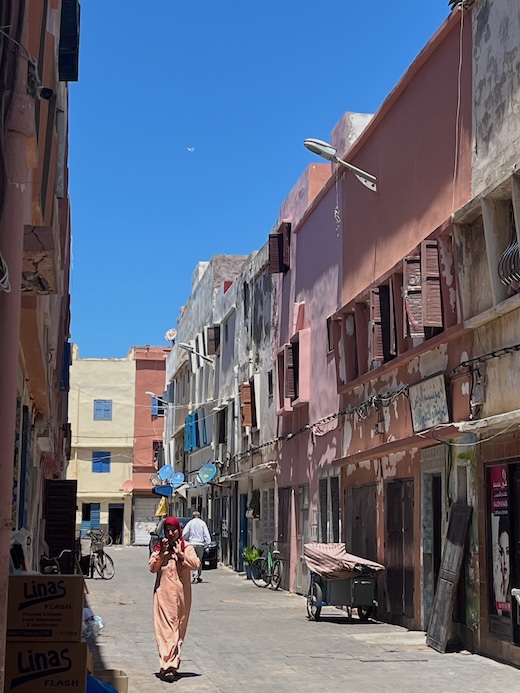
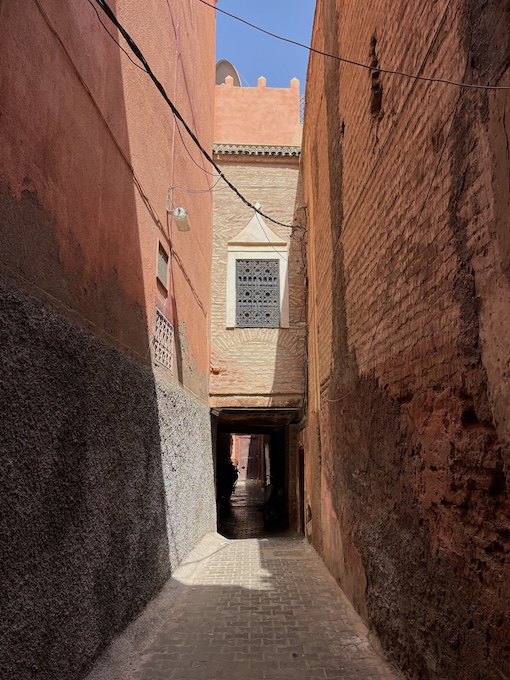
Travelling in Morocco during Ramadan we noticed the mornings very slow and quiet. Once you get past the pre-dawn call to prayer which can be anything from singing and chanting to sirens going off, or even a canon firing, things quieten way down. Nothing much seems to happen before 11am. We walked through plenty of empty medinas in the mornings.
Mornings during Ramadan when the streets and medinas are practically empty
Afternoons during Ramadan
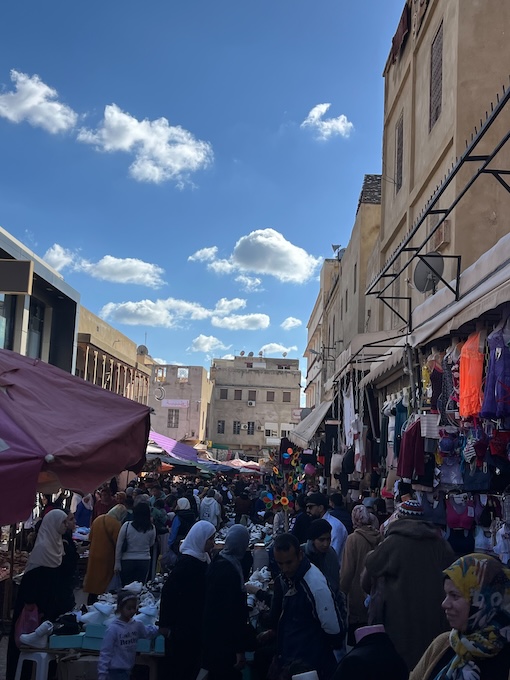
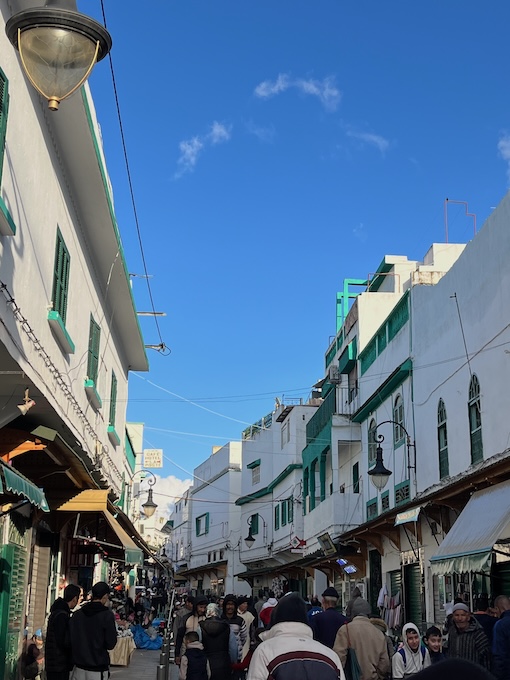
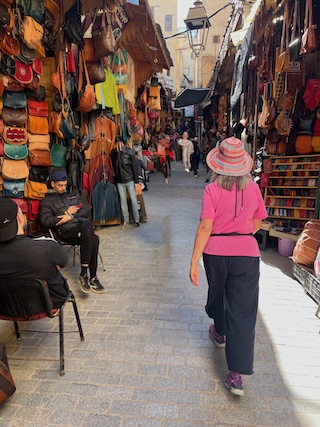
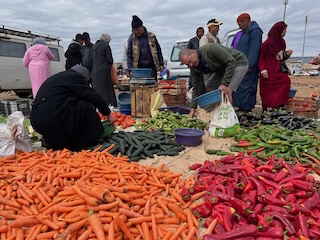
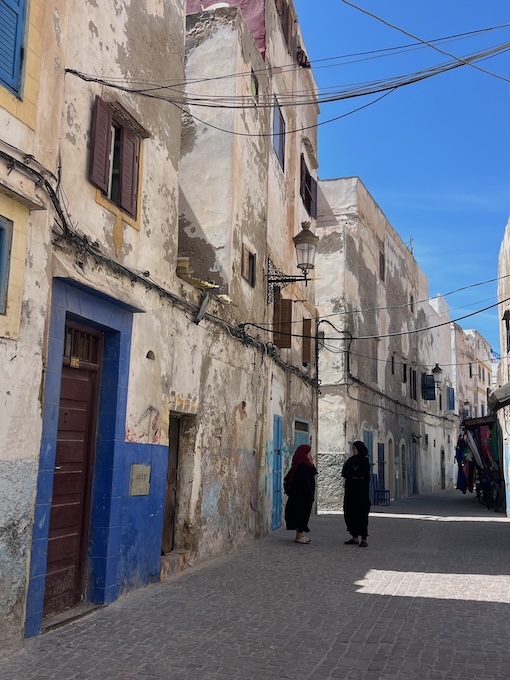
By mid-afternoon you’ll notice things start picking up. By around 3pm more and more people start appearing in the street. The streets come alive late afternoon with street traders in full swing selling bread, fruit and veg, clothes, etc.
The streets before sunset during Ramadan in Morocco
It can get a bit manic by about 5pm, and we regularly saw groups of men shouting and arguing, and in some instances even ending up in fisty cuffs! We were assuming it was nothing more than ‘hangry’ feelings, and we can certainly relate to that!
Evenings during Ramadan
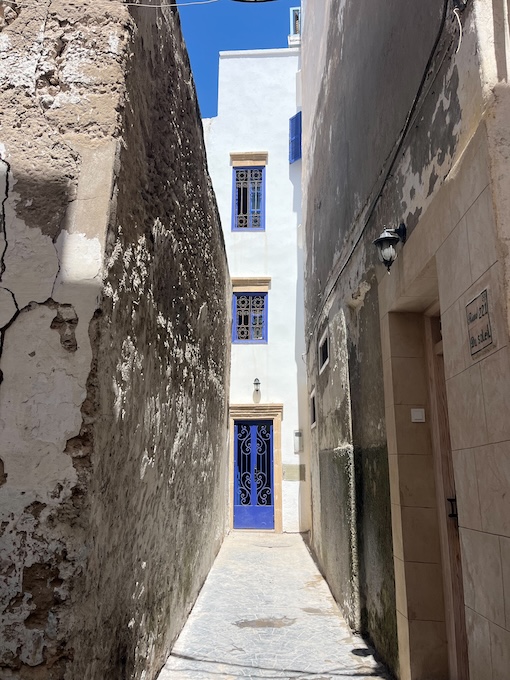
Once the signal goes at sunset for the end of the fast each evening, everyone disappears off the streets to return home to break the fast and for a while the streets become deserted again.
People return to the mosques after their “iftar”, the meal that breaks the fast. After the final call to prayer of the day (there are five calls to prayer per day) the souks come alive again with shoppers of all ages spilling onto the streets until long into the night. Many are dressed in traditional dress.
Closures during Ramadan
If you’re travelling in Morocco during Ramadan be prepared for closures during the day. We were in the north of the country during Ramadan and most cafes and restaurants we saw in smaller towns and villages were closed during the day. The exceptions were in the more tourist areas of cities like Chefchaouen and Fez.
Some museums, architectural sites and buildings were also closed during Ramadan, for example the Royal Artisan School in Tetouan. We’d recommend checking any opening hours before you plan a visit to sites and attractions during Ramadan.
After Ramadan
Once Ramadan ended we noticed how less and less people were in traditional dress, particularly younger girls and women, who returned to wearing more fashion clothing.
Trying local foods when we travel is one of our delights so we were relieved when Ramadan finished so we could enjoy the experience of eating out in Morocco. We had no problem making up for lost time!
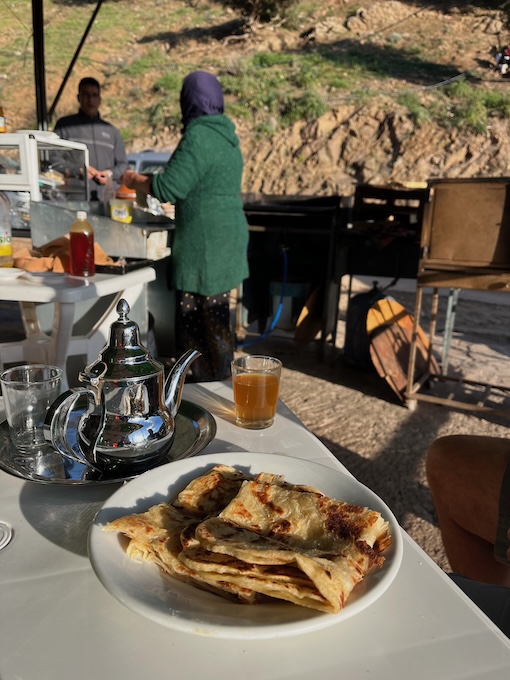
After Ramadan the coffee shops were full from morning to night, mostly with men sitting in pairs smoking and drinking. They too were making up for lost time! There were also an amazing number of mobile coffee carts and vans on every road junction.
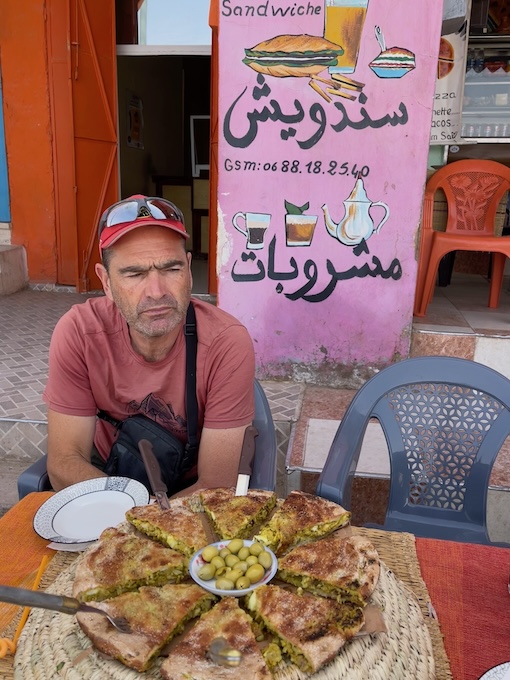
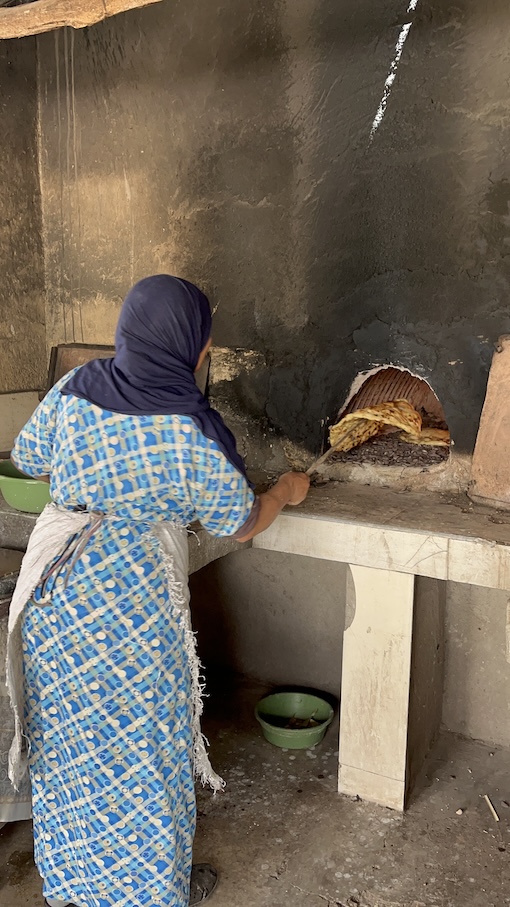
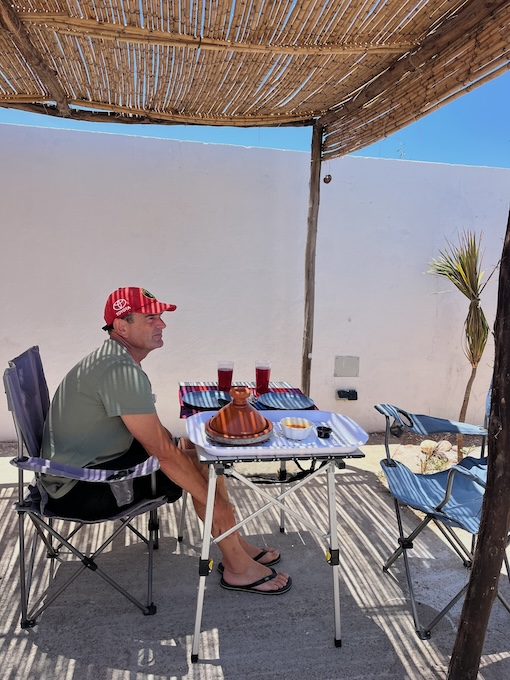
Pancakes and Tea at roadside cafe
Travelling in Morocco during Ramadan or not?
We were glad to have the experience of travelling in Morocco during Ramadan. It gave us more of an insight to the culture and customs of the country and its people. And since we were there during and after Ramadan, it was nice to see the contrast of how life is lived at different times.
We realise of course that our experiences may well have been different if we’d been in a different part of the country during Ramadan, the coast for example, as compared to where we were in the mountains in the north. But that is the joy of travelling, you’ll never know, unless you go!
Here are our top 10 things to do before you take your camper van to Morocco. And one thing not to do before you go! We used this as our checklist before we left Spain.
1. Fill up with Adblue
Fill up with Adblue if your vehicle uses it. We had read that Adblue was readily available in portable containers in Morocco, but that the quality was questionable so we thought it best to fill up before we left Europe. We prefer to fill our Adblue tank (10 litres) from the pump (approx €1.20 per litre). It is a more economical and sustainable way to do it. Filling from the portable plastic containers is a bit of a kerfuffle! Plus we didn’t know at this point if it was widely available via pumps in Morocco. Turns out you can find it in pumps at some of the larger petrol stations in the bigger cities.
2. Fill up with LPG
Fill up with LPG if you use it. This was essential for us as we have an underslung gas tank (20 litres capacity) that can only be filled from a pump (approx €1 per litre in Spain at the time of filling in March 2025). There are no LPG pumps in Morocco, only bottled gas.
3. Fill up with water
Fill up with water. We filled our underslung tank (83 litres) plus an emergency portable container (20 litres) and our drinking bottles (4 litres) before we left Spain. Water is always our most precious commodity in the van, and we have to be wise with every single drop, especially so when visiting a country like Morocco where drought is the norm. Keeping our water levels topped up with potable water was one of our main concerns before going to Morocco.
From what we had read the availability in Morocco of fresh drinking water was limited. Turns out, in our experience of a 10-week trip in Morocco, there are plenty of places to fill up with potable water. If it was clean, clear, odourless and tasteless when we tested it, then we would fill up with it.
The majority of motorhome and camper van travellers we met during our 10-week tour of Morocco used bottled water for drinking. Buying bottled water is one of our personal pet peeves and we avoid it if at all possible.
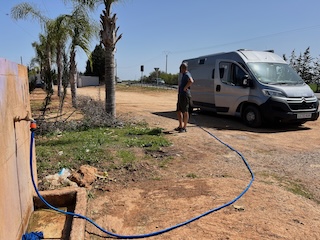
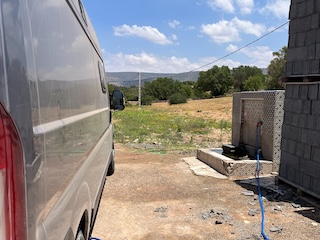
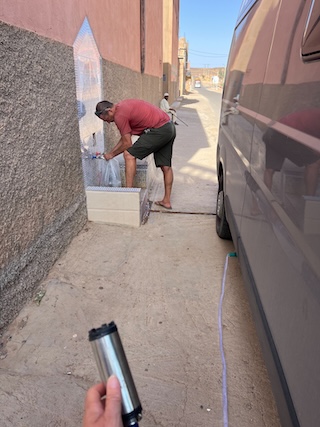
Various water fill up points in Morocco
4. Download maps
Download maps. Our built-in TomTom sat nav in the van does not include maps of Morocco. Our go-to alternative for navigating anywhere when we are offline is the maps.me app. Just download the Morocco maps from the free version before you go. We also have Google Maps and Waze to use if we have online access. We’re lovers of paper maps when it comes to planning an itinerary. The Michelin Morocco map was a €15 must-buy from Carlos when we were booking our ferry tickets at his office near Algeciras. Carlos’ staff advised us to keep the map hidden out of sight from the Moroccan police due to the fact it included the still contested area of the Western Sahara!
5. Download Google Translate
Download Google Translate. Since we speak only school boy/girl French and zero Arabic we downloaded these languages so we could use them offline.
6. SIM card for Morocco
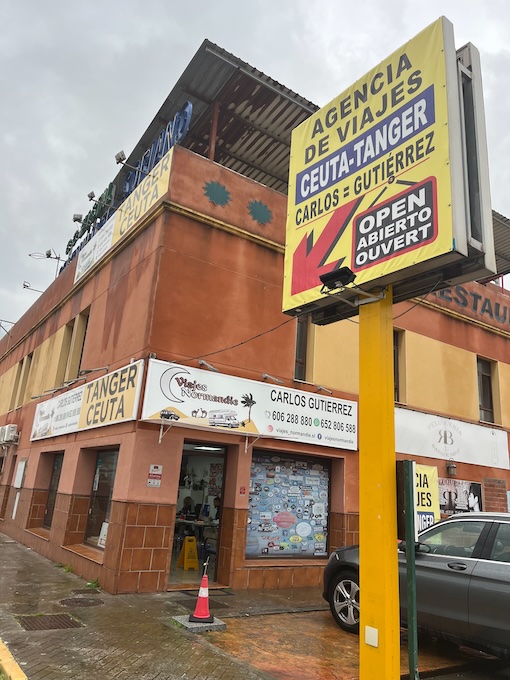
Buy a SIM card for Morocco. You can buy a Maroc Telecom starter SIM card from Carlos’ Travel Agency (www.viajesnormandie.com) for €10. That way you have some online connection as soon as you arrive in Morocco if needed. It’s worth noting that there is an area of free public WiFi in the car park shortly after you clear customs at the port of Tanger Med. Read more about SIM cards when you get to Morocco on this blog post.
7. Get cash – Moroccan Dirham
Get local currency. You can buy Moroccan currency (Dirham) from Carlos’ office so you have at least some cash when you arrive in Morocco. The rate when we were there in mid-March 2025 was €1 = MAD10. Read more information on withdrawing cash in Morocco on this blog post.
8. Store your drone
Store your drone if you have one. Drones are banned in Morocco and if found by customs or police it will likely be confiscated. It’s not worth the risk. We stored our drone at Carlos’ Travel Agency. They wrapped it securely and stored it safely for free. You just need to remember to pick it up on your return!
9. Stock up on sun cream
Stock up on sun cream, especially if you’re a fair skinned Irish person! Sun cream is very hard to find in Morocco and if you do find it, it’s much more expensive than in Europe.
10. Rabies vaccinations
Consider Rabies vaccinations. This was not on our original checklist, but with hindsight it should’ve been. Rabies is widespread in Morocco, and you will encounter stray dogs and cats everywhere you go. We did, and I got scratched by a puppy. Please read our post on the importance of being vaccinated if you’re planning a trip to Morocco.
And one thing not to do!
1. Don’t fill up with diesel
Research on diesel prices showed us it was much cheaper to fill up when we got to Morocco. Instead of about €1.60 average per litre in Europe it is about €1 per litre in Morocco!
A couple of things not on our checklist
A couple of things that were not on our checklist, but that we would suggest bringing:
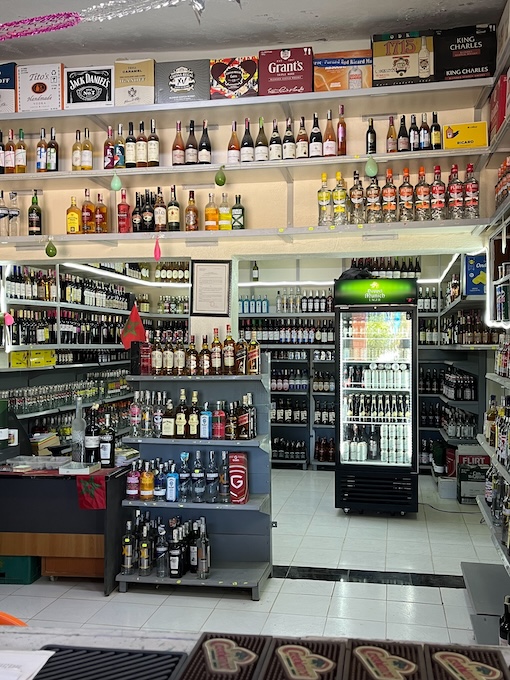
A supply of wine and beer if you like a sundowner of an evening! Alcohol is not widely available in Morocco, but you can find places that sell it. We did manage to buy some local Moroccan wine, but it is expensive in comparison to buying wine in Europe. If space was not an issue in our camper van, then the cellar would always be full!
An egg carton! All eggs are sold loosely so best to have a carton to store them in your camper van. Luckily we did have one in our fridge to reuse time and again.
If you’ve been on a camper van trip to Morocco let us know what you would or wouldn’t bring with you in the comments below.
In this post we share our 10 week itinerary of travelling Morocco in a camper van. It was a last minute impromptu decision to go to Morocco in our camper van so this 10 week itinerary was not a planned one! We were on the beach in Punta Umbria, near Huelva in Spain, on a wet Sunday afternoon in mid-March 2025 when we made the decision to go to Morocco. Armed with nothing more than the excitement of going to a new country we set off towards the port city of Algeciras in southern Spain!
This post may contain affiliate links. As an Amazon Associate we earn from qualifying purchases.More info in our Privacy Policy.
At the time of this last minute planning we didn’t know how long our tour of Morocco in a camper van would be! We knew we could stay for up to 90 days as tourists. Spring felt like the ideal time to visit. We would miss the cold, snowy winters in the mountains, and the scorching hot inland temperatures of summer. We were also aware that our first couple of weeks of touring would coincide with Ramadan, the holiest month for Muslims. Ramadan this year was from 1-31 March 2025. (The exact dates for Ramadan change every year).
Our other time constraint was the fact we had to be back in the UK by late June for the van’s annual MOT. All things considered we were roughly planning a tour of Morocco in our camper van for about 8-10 weeks.
Given that we’d made such a spontaneous decision, our pre-trip planning for our tour of Morocco in a camper van was minimal at best! Everything was last minute. Most of the trip planning was online research done from the comfort of our van while a wet, winter storm swept through Southern Spain! Joining the Van Life Morocco group on Facebook was a really helpful starting point.
Travel Guide Book
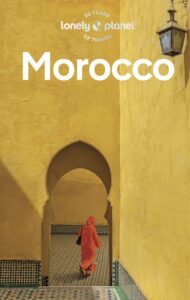
In an ideal world we would’ve bought a good old fashioned hard copy guide book to help us plan our trip to Morocco. But living in a van where space is at a premium, we had to settle for the Kindle version of Lonely Planet’s Morocco travel guide (published in February 2024). For us guide books are just that – a guide. We used the Lonely Planet Morocco guide for itinerary ideas, and combined some of their suggested itineraries to make up our own. We have been long time followers of Lonely Planet and have used their books to help plan many an itinerary!
After a couple of days of very rough planning we set sail from Spain and made the rest up as we went along!
You can see our last minute checklist of the 10 things to do before you take your camper van to Morocco, and the one thing not to do, in this blog post.
On a side note our Shola Coach House bed and breakfast business in Portrush, Northern Ireland, was listed as a “must visit” recommendation in the Lonely Planet Ireland 2018 edition!
Getting to Morocco in a camper van
Ferry
We chose to sail the route from Algeciras in Southern Spain to Tanger Med in the north of Morocco. There are several different ferry companies operating this route and sailings go regularly throughout the day. The crossing takes about 90 minutes. We bought our tickets by going to the family owned Viajes Normandie travel agency in Los Barrios (www.viajesnormandie.com), about a 20 minute drive from the port of Algeciras. Carlos and his travel agency came highly recommended by many other camper van and motorhome travellers. We paid €270 for an open return with Armas Transmediterranea which included a bottle of wine and a box of biscuits from Carlos!
We got to the ferry terminal at about 6.15am for an 8am sailing. It was the day after a big storm, and it was also during the holy month of Ramadan. Because of weather cancellations from the previous day, and the holiday traffic, there was a backlog and our ferry only started boarding at 10.20am! We eventually set sail at 12.20pm, more than four hours after our scheduled departure.
It was only after one of our Instagram followers saw our delayed ferry story that we found out that we were entitled to compensation! Thanks to @team_ateem for bringing this to our attention. EU rules state that any ferry delay from an EU port of at least one hour on a scheduled trip of less than four hours means passengers have the right to compensation. See your travel rights here: https://europa.eu/youreurope/citizens/travel/passenger-rights/ship/index_en.htm
We contacted Armas Transmediterranea directly by email and we eventually received €54 compensation!
Visas
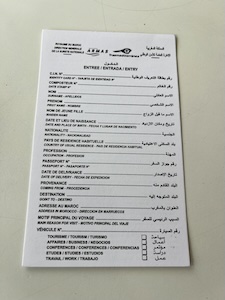
Most nationalities including the UK and the majority of European passport holders can enter Morocco for tourism purposes for up to 90 days without a visa. But remember you do need to have at least six months validity on your passport from your date of arrival. You need to complete an Entry Card on board the ferry and queue up at the Immigration desk on board to have your passport checked and stamped. We queued for at least an hour! But it could’ve been a lot longer had we waited to go through Passport Control on arrival in the port at Tanger Med.
Arriving in Morocco in a camper van
Clearing Customs
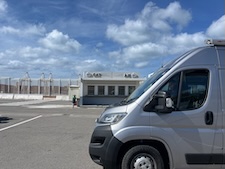
Tanger Med is a huge port. Once you exit the ferry it is about a 10 minute drive to the Customs area. This is where your camper van will get checked by the customs officials and sniffer dogs. It did not take us long to clear customs. Along with providing our paperwork (passports and the V5 vehicle document), we were asked a few questions about our trip before the sniffer dogs came on board for a check. It is worth noting that there were dozens and dozens of market trader type vans queued up to clear customs, all with their entire contents emptied on the ground waiting to be checked!
Withdrawing Cash
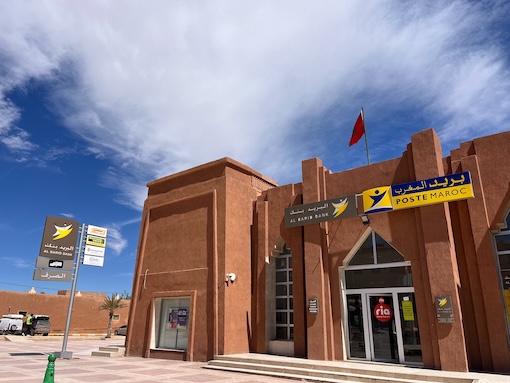
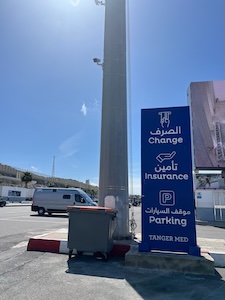
Once you have cleared customs, and before you exit the port, there is an area sign posted for Change, Insurance and Parking. There are several Bank/ATM booths where you can withdraw cash, but they all charge a withdrawal/transaction fee. The rough exchange rate at the time of our trip was GBP£1 = MAD12 or EUR€1 = MAD10. (Note there is also free WiFi in this area of the port with good enough signal to get a Google map started with directions to your first stop).
If you don’t need cash at this point it is better to wait until you get to a town where you can use the Al Barid Bank/Post Maroc ATM’s for free cash withdrawals, there is no transaction fee. Cash is king in Morocco, and the Al Barid Bank or Post Maroc ATMs are easy to find in every town.
Buying SIM Cards
Do not buy SIM cards at the Tanger Med Port. You will get better options at the telecom shops in towns and cities. The best deals are with either Maroc Telecom or INWI. The prices seem to vary depending on where and when you buy them, and the package you choose e.g calls only, data only, or calls and data.
We bought a Maroc Telecom SIM card for €10 from Carlos’ travel agency when we were getting our ferry tickets. This was as an emergency back up to make any local calls from our spare phone.
We primarily use a local SIM card for data only. We slot it into our TP-Link Portable WiFi router which we use as a hotspot to connect all our mobile devices (two phones, iPad and laptop).
When we arrived in Martil (our first stopover) we went to the Maroc Telecom shop and paid MAD200 for a 30GB SIM card valid for 30 days. We later bought an INWI unlimited data SIM card in Erfoud for MAD200 – much better value, lasted for the entire time, and the coverage was excellent.
Getting vehicle insurance
If your camper van is not already covered by your vehicle insurance company for travel in Morocco, then you can buy Third Party cover only from the CAT Assurance & Reassurance booth. It is the final booth on the right hand side next to the ATMs before you exit the port. You will need to present your vehicle V5 certificate and the passport of the registered vehicle owner, and you will need cash. They accept payment in Euros or Dirham only. They do not accept credit card payments.
We paid 2,010 Dirham for 90 days of cover for our Citroen Relay L3H2 vehicle (it is the same price whether you pay for two or three months).
With a little cash in our pocket and the camper van insured we were ready to hit the road in Morocco!
Morocco Entry VisaClearing Customs at Tanger MedParking area at Tanger Med PortVehicle Insurance Booth at Tanger Med Port
Driving in Morocco in a camper van – 10 week itinerary
Our 10-week driving tour of Morocco in a camper van started by driving straight from Tanger Med to the Mediterranean Coast. We had decided to take a more or less clockwise route of the country. The actual itinerary we made up as we went along!
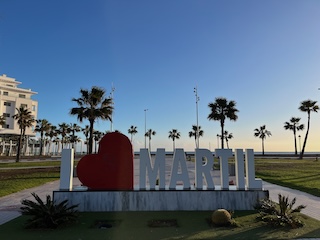
We chose the comparatively low-key town of Martil on the Mediterranean Coast of Morocco as our first stop. It was an easy drive on the well maintained toll road (MAD16/GBP1.35), and just over an hour from Tanger Med. It had a few choices of places to park up, had all the shops and services we needed, a nice seaside location, and easy running routes! All in all a perfect base for the first couple of nights to familiarise ourselves with a new country, a new culture, and a new language. It is worth noting that in this northern area of Morocco, Spanish is more widely spoken than French.
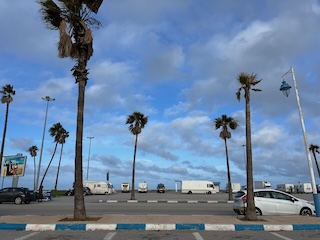
Guarded Car Park Martil
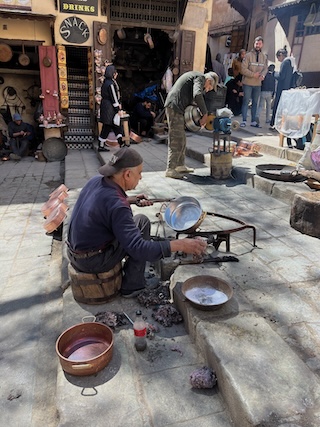
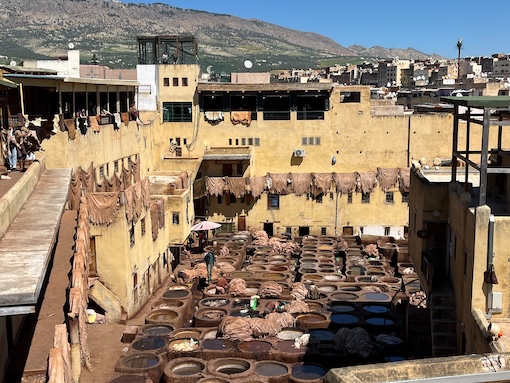
From Martil we headed towards the Rif Mountains. We stopped in the town of Tetouan where it felt like time had stood still in the old medina (a feeling we experienced in many parts of Morocco). It was here where we had our first sight (and smell!) of a traditional tannery. Unfortunately the Royal Artisan School was closed while we were there due to Ramadan.
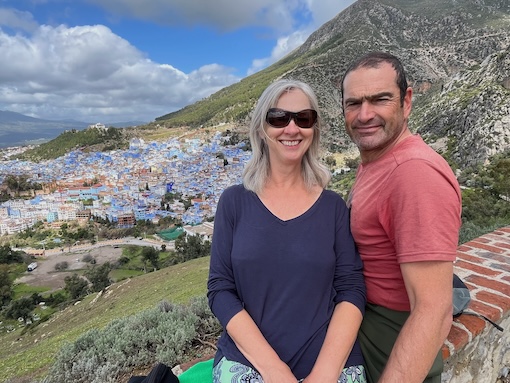
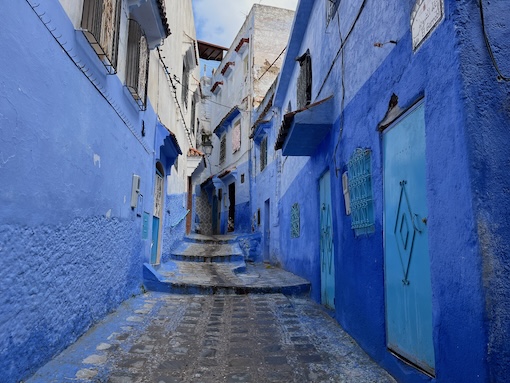
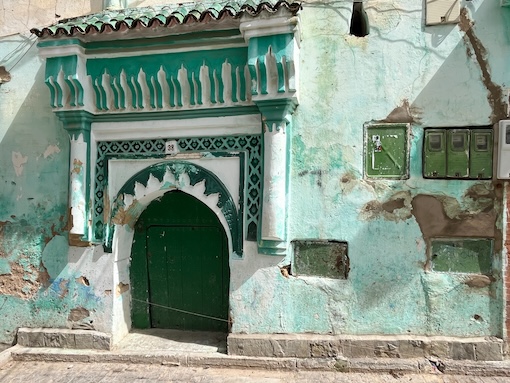
Next up was a couple of nights in Morocco’s famous “blue pearl” town of Chefchaouen. Why the town and its homes are painted in a myriad of shades of blue remains a mystery, but some believe it was the Jewish refugees who settled in the town in the 1930s and used the colour blue to connect to their faith. Whatever the reason it has meant Chefchaouen is now a hot spot on the “Gram”. It is attracting the floaty dress Instagrammers posing for photos, much like the same crowd you see in Cappadocia, Turkey! But the good news is you can avoid them by walking the streets early in the morning to get your own posed shot! At least that’s what we did! And if you’re after something to smoke (cannabis or hashish) in Chefchaouen you will have no shortage of offers from the locals trying to sell their stuff morning, noon, and night!
Blue Pearl town of ChefchaouenChefchaouen, Morooco
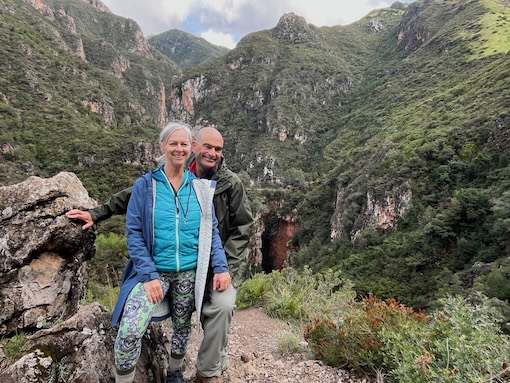
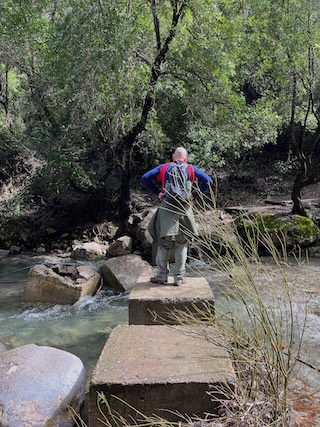
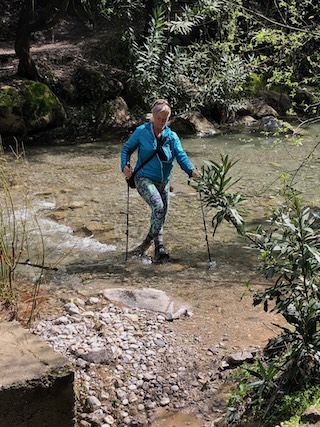
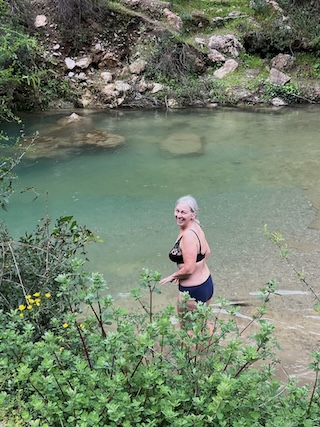
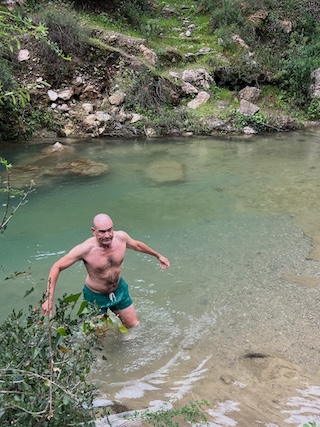
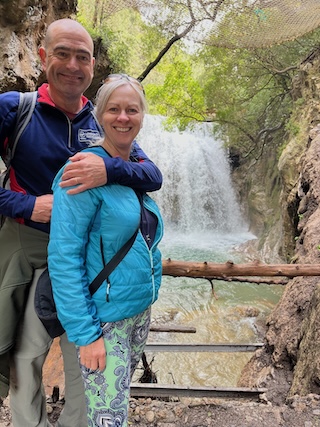
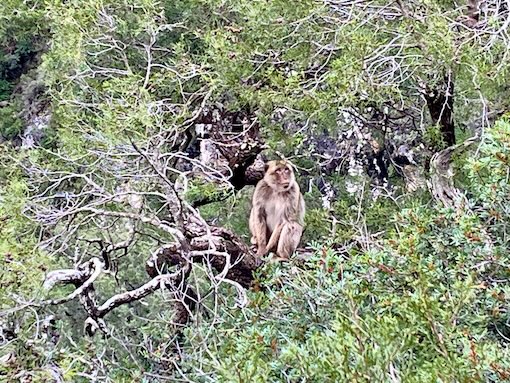
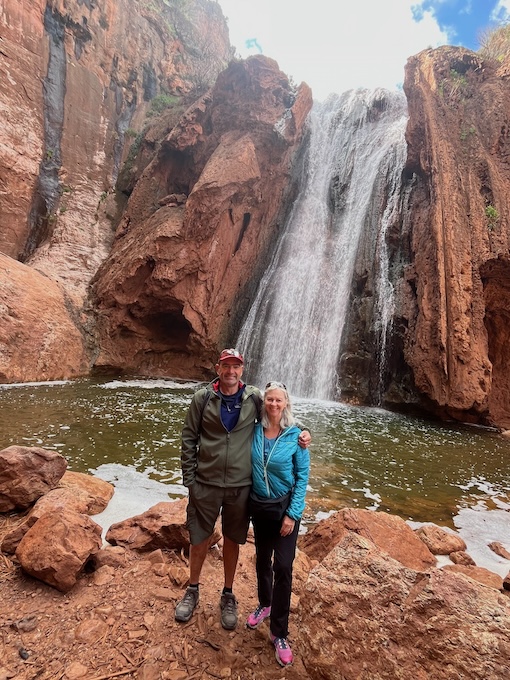
A stunning scenic drive to the Talassemtane National Park for some hiking around Akchour was our next stop. During the short, but challenging hike to and from God’s Bridge (about 45 minutes) we felt like we had the place to ourselves. Bar a few monkeys we didn’t see a soul. We attempted the hike to the big waterfall, but after about two and a half kilometres and four river crossings we gave up. The recent and heavy spring rainfall meant the river was flowing very fast and very deep, covering some of the stepping stones and making it a tad treacherous to cross. We still managed a cold water dip in one of the smaller waterfall plunge pools. Whether it was due to the heavy rain or the fact that it was during Ramadan, all the food stops en route to the waterfalls were closed while we were there.
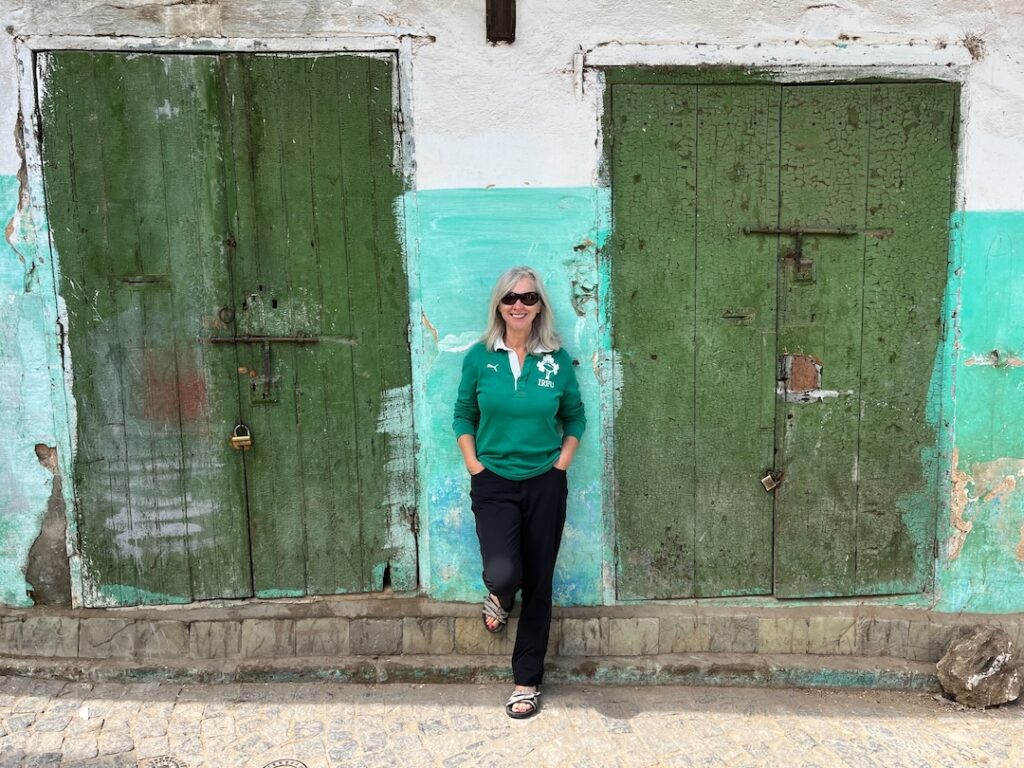
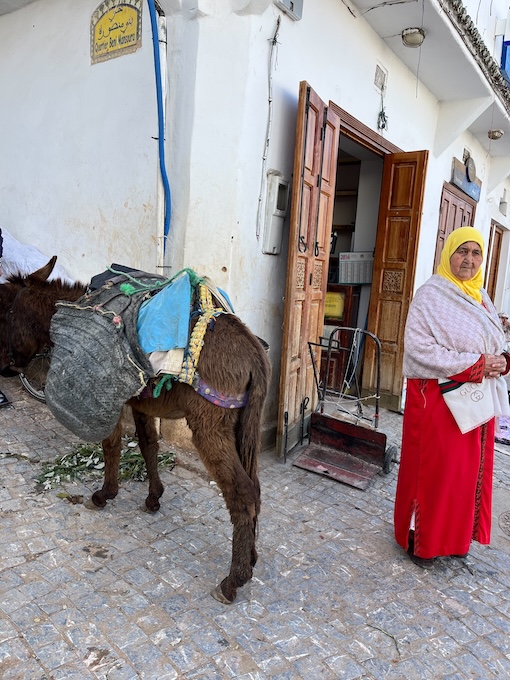
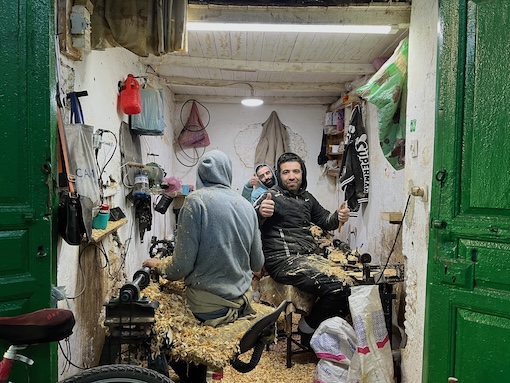
We lost count of the number of donkeys we saw as we drove south from Akchour through the rolling green hills to Ouazzane. Donkeys and mules we would soon come to realise are an integral part of daily life in Morocco, not a day goes by when you don’t see a donkey! As blue as Chefchaouen was, Ouazzane was as green. This little gem of a mountain town with its more than 40 shades of green was well worth a visit. Their ancient medina was full of friendly woodworkers and cloth makers, many of whom dress in their djellabas, the traditional hooded cloaks, and all were keen to show us their skills and wares. No hard sell, they seemed genuinely pleased to see us. And the added bonus was there wasn’t a single Instagrammer in sight!
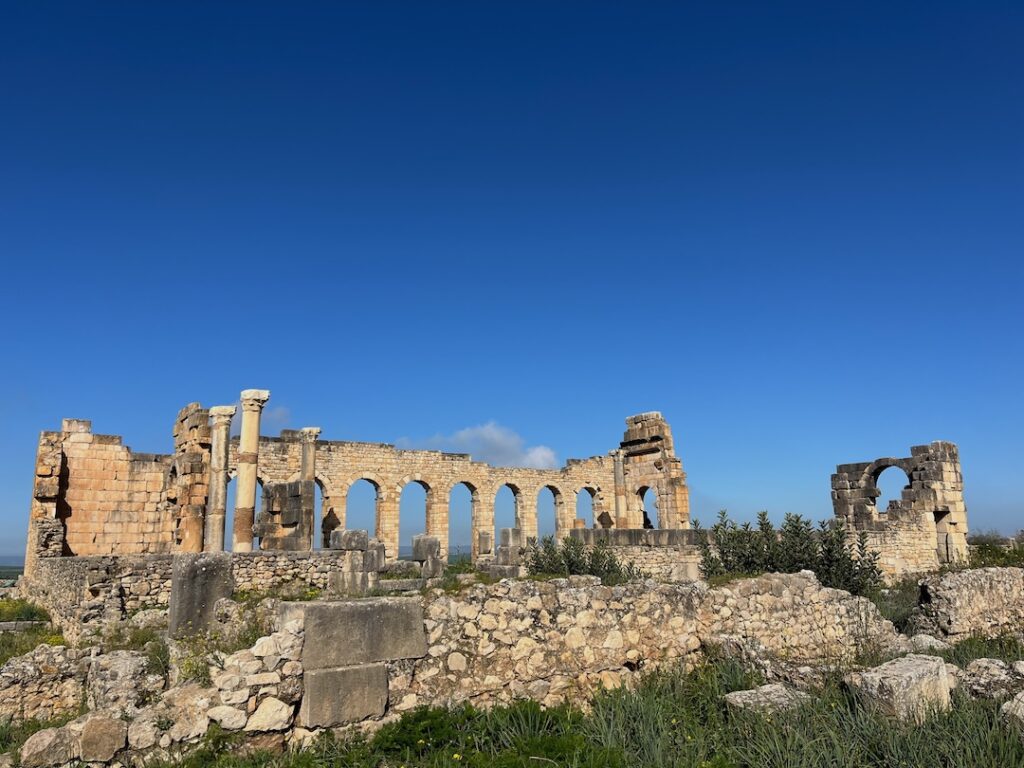
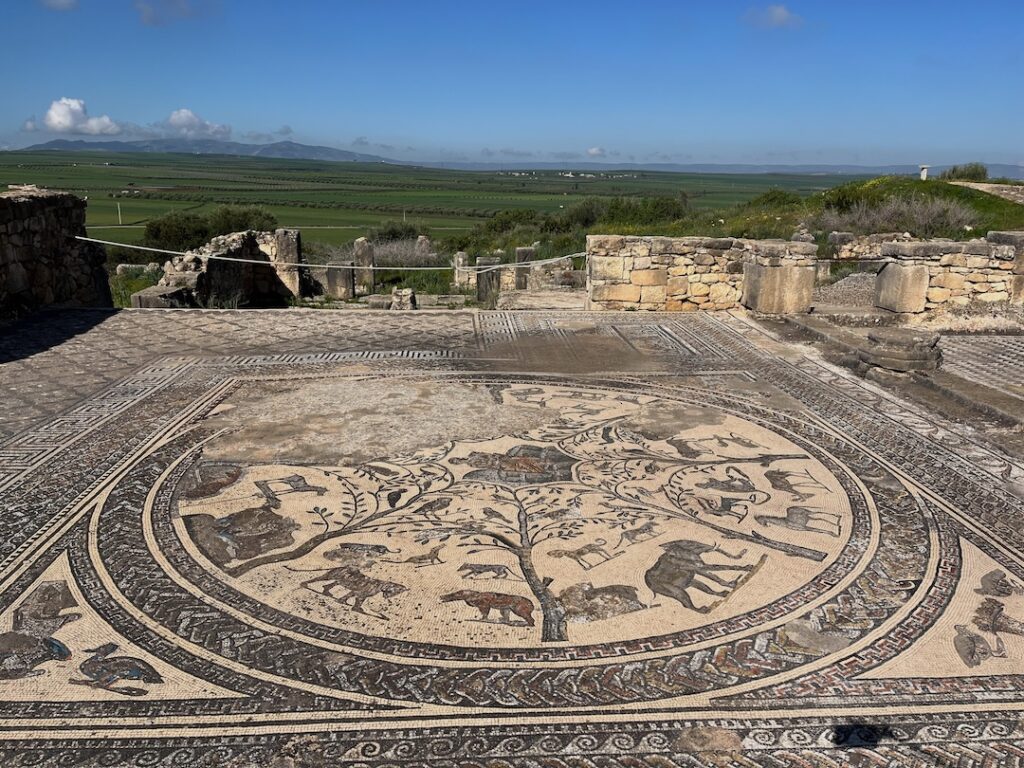
Volubilis is the site of an ancient Roman city set amongst lush agricultural land. The views alone from Volubilis make the visit worthwhile. Its historical and architectural significance led to its designation as a UNESCO World Heritage site. There are dozens of impressive ruins to explore and some really well preserved mosaic floors. Due to its location near Meknes and Fes it gets bombarded with day trippers and tour buses. We got there for the advertised opening at 8.30am and although it didn’t actually open until 9am, we did manage to see most of it before the big groups arrived.
Week 2 of Morocco in a camper van
Volubilis – Moulay-Idriss – Meknes – Fes – Ifrane – Azrou – Sources de Oum-er-Ribia – Khenifra – El Kebab – Midelt – Gorges du Ziz
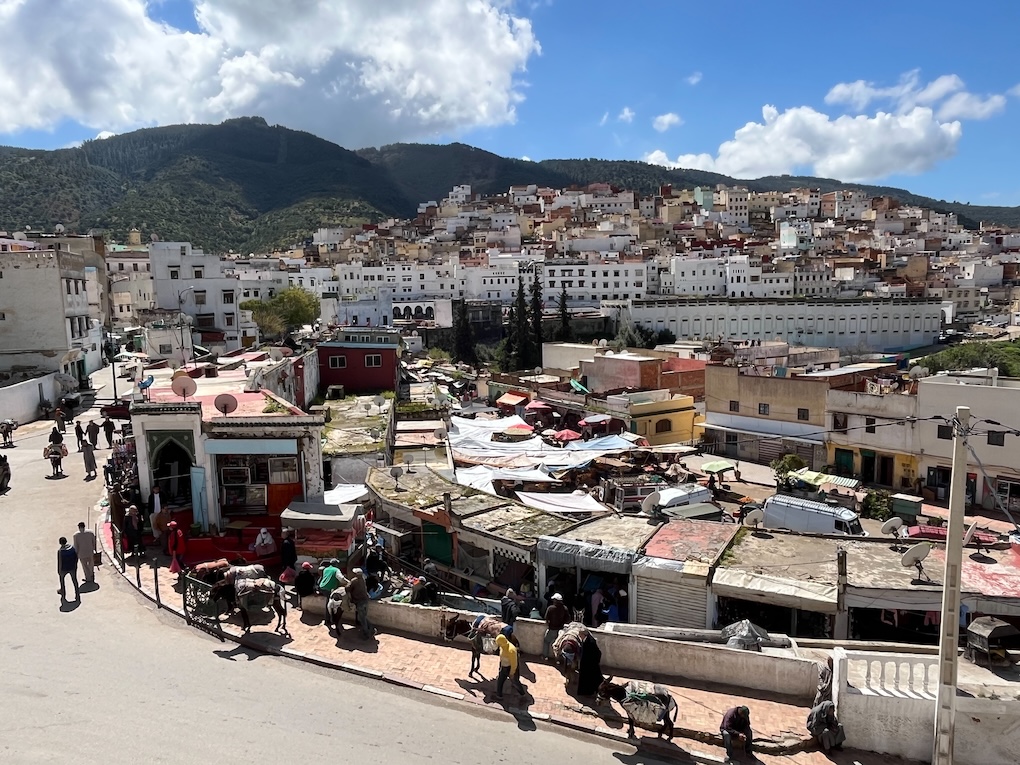
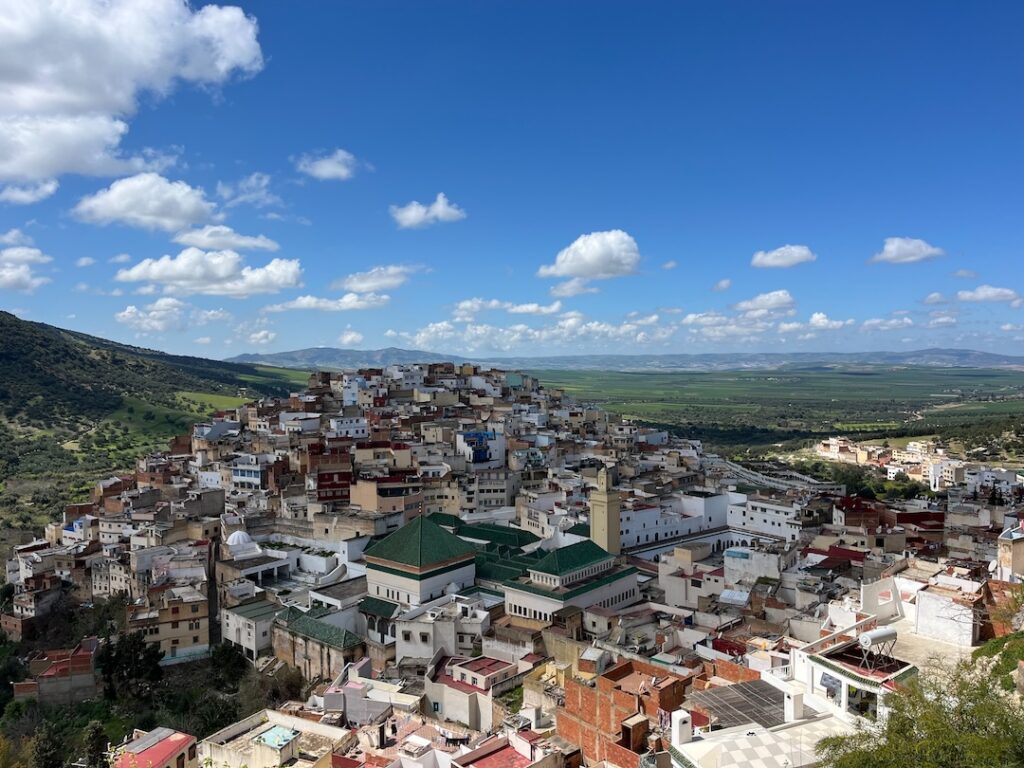
Moulay-Idriss is one of Morocco’s most important pilgrimage sites, often deemed second only to Mecca as a place of pilgrimage. This little hilltop town overlooks Volubilis which is only a short drive away. We were struck by the lack of tourists on the day we visited. We strolled up the hill through a maze of narrow streets and countless steps for panoramic views of the surrounding countryside. It is the perfect place to get a glimpse of everyday life in a rural Moroccan town. Note that the mosque/mausoleum complex in the main town square is not accessible to non-Muslims.
Everyday life in Moulay IdrissHilltop town of Moulay-Idriss
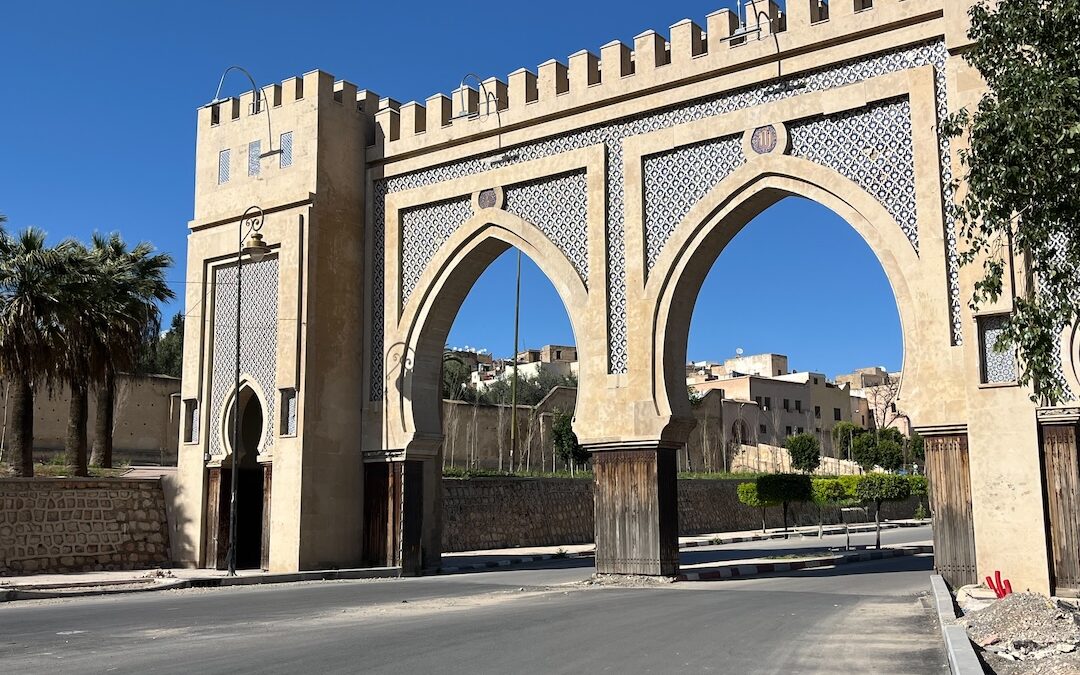
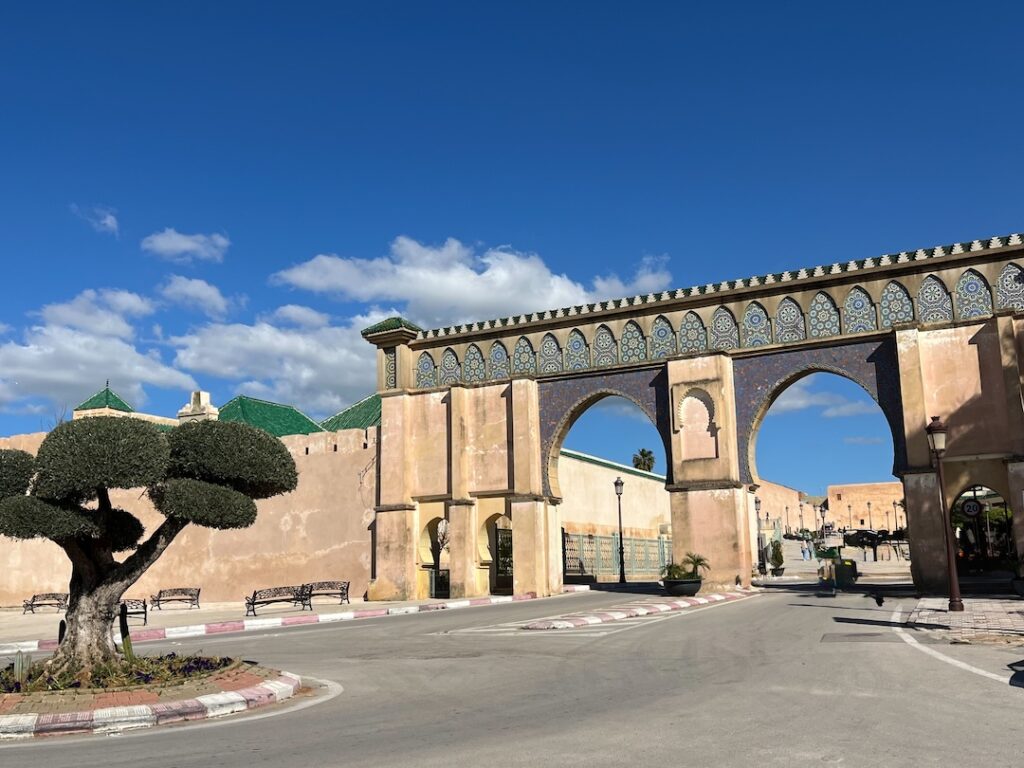
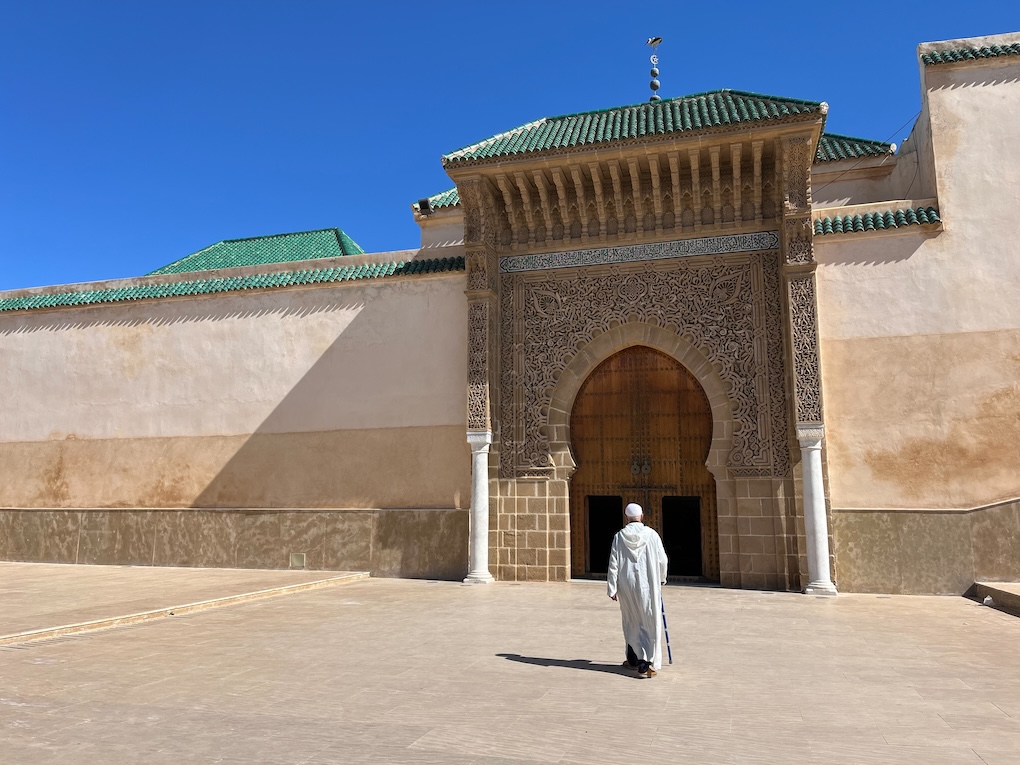
The massive walls enclosing the imperial city of Meknes make for a majestic entrance. This was especially so when we arrived on a hot mid-afternoon during Ramadan as the streets were fairly empty except for a few horse-drawn carriages. It was such a different place in the evening when the streets came alive with people and traffic! If you want to escape the heat, then a visit to the Dar Jamai palatial residence is a must. It is now the the National Museum of Music. For an entrance fee of 30 dirham per person we enjoyed the shaded courtyard surrounded by fabulous Moroccan architecture, and learned a bit about Morocco’s musical influences.
The imposing walls around MeknesMeknesRestoration work in Meknes
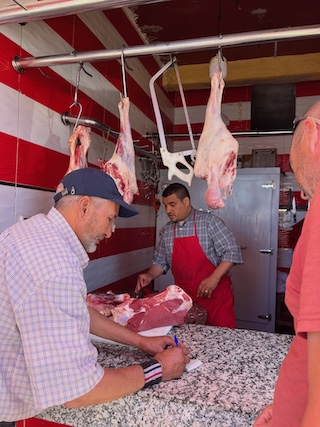
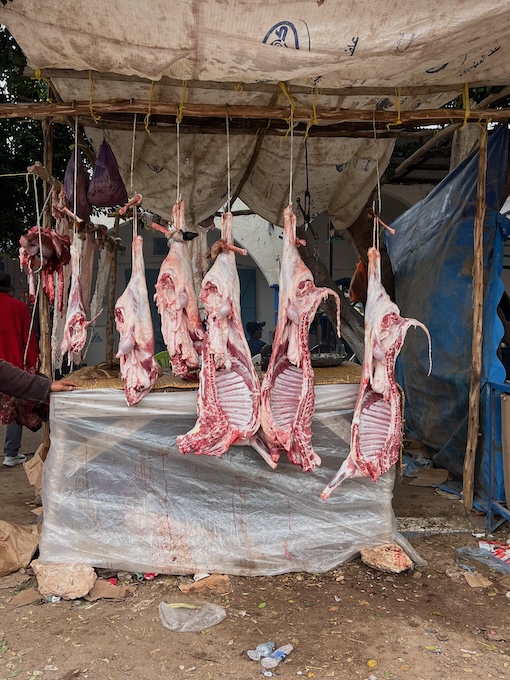
The covered market in Meknes is a must visit to see how locals shop. The heat, the noise, the smells, and the flies, especially in the meat department, meant our stay was short-lived. It is not for the faint hearted, and definitely not for vegetarians or vegans! We will spare you the images!
If you’re planning on visiting Meknes it’s worth noting that there’s lots of restoration and building works going on around the historic sites. Many of the sites were closed and have been inaccessible for some time, and to us it looked like they are a long way off from completion.
For our visit to Fes, the oldest city in Morocco, we opted for the ‘free’ Funky Walking Tour with local guide Abdelalia [https://www.guruwalk.com/walks/43624-funky-walking-tour-15-of-the-best-things-to-do-in-fez-morocco]. He led us through the maze of the medina for three hours. It was fascinating to see all the traditional souqs and learn about life within its ancient walls. The Chouara Tannery was a particular feast for the senses!! Thankfully some sprigs of mint helped to stem the smells a little!
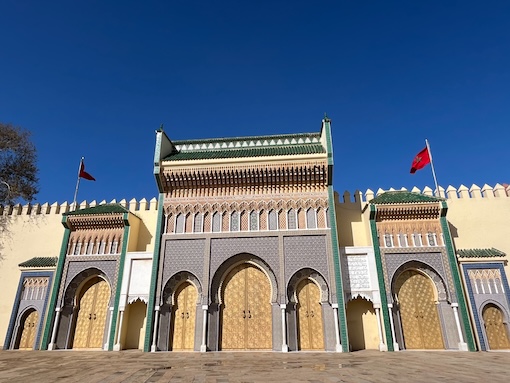
We explored the much quieter El Jdid neighbourhood, and the Mellah (the Jewish quarter) on our own, and were impressed by the size and scale of the entrance to the Royal Palace with it’s seven doors.
If it’s steps you’re counting you will have no problem racking them up in a couple of days walking around Fes!
Royal Palace Fes
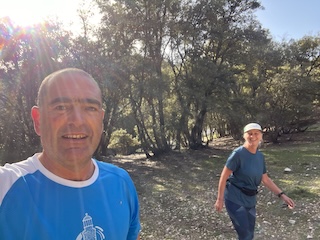
Running through the fragrant trails in the Cedar Forest between Ifrane National Park and Azrou in the Middle Atlas was our next stop. Running at altitude was a shock to the system so there were plenty of breaks to stop and grasp the fresh mountain air!!
We were lucky enough to hit the Amazigh mountain town of Azrou in time for its traditional weekly (Tuesdays) outdoor market. We were too late for the early morning livestock market, but since we weren’t planning on buying a sheep or a goat it wasn’t a problem! There were still enough piles of potatoes and pungent onions laid out amongst peppers, peas and aubergines, fresh fruit, nuts and dates, for us to pick up and pay for our weekly shop for practically nothing!
The drive through the Middle Atlas spectacular mountain scenery from Azrou to the Sources de Oum-er-Rbia, Morocco’s second largest river, was much more rewarding than the destination itself. The natural course of the river seems to have been changed and spoiled by the construction of concrete platforms. On top of that the amount of rubbish generated by the huge volume of Moroccan tourists was really off putting for us. As fascinating at it was to see the traditional style Amazigh village along the banks of the cascading river, we felt it was ruined by becoming a tacky tourist trap with no regard for the natural beauty of the place.
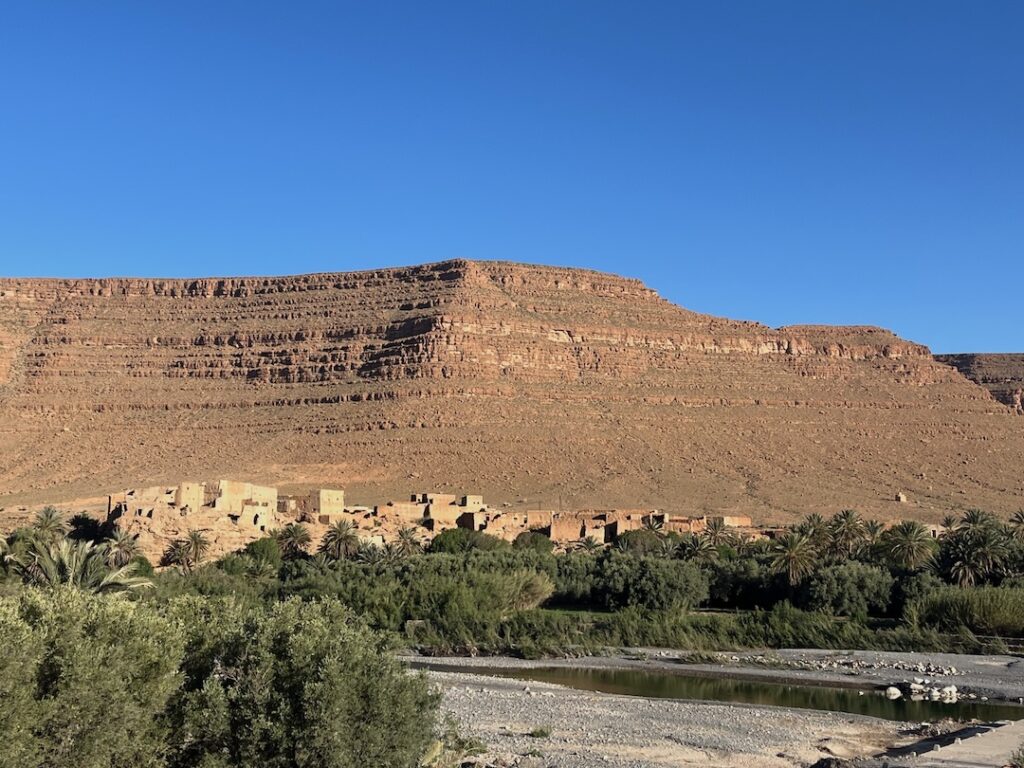
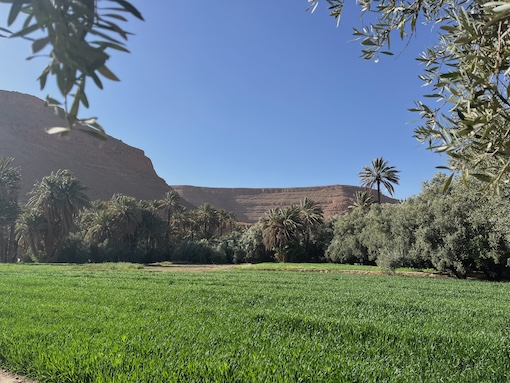
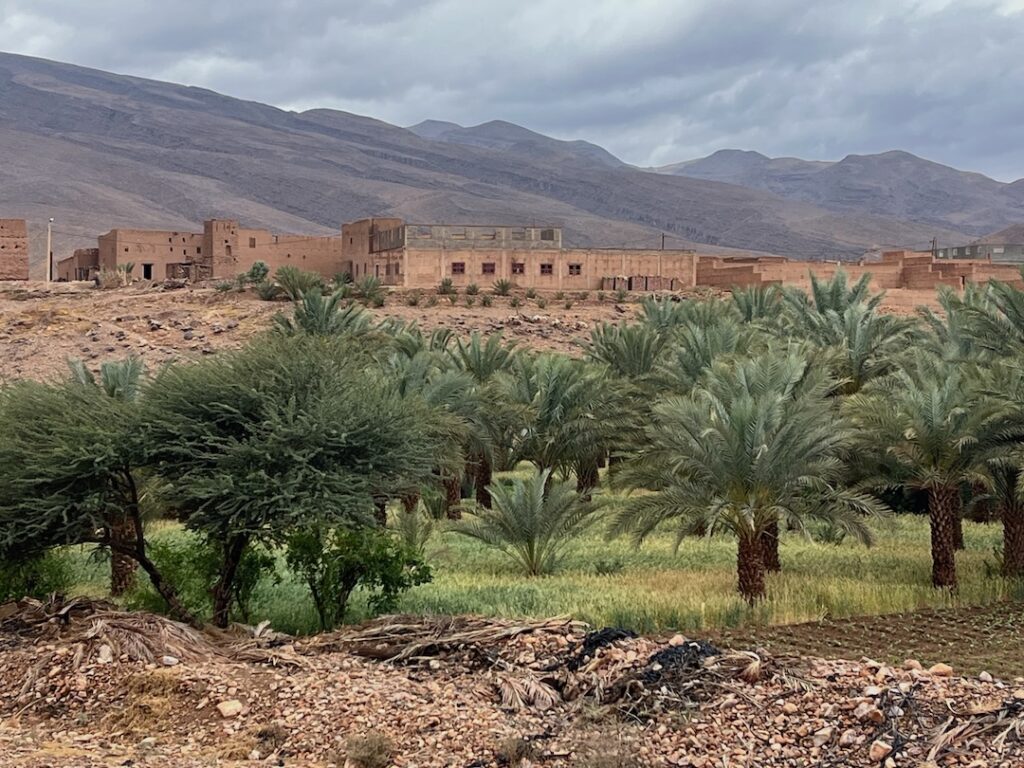
We left after one night and continued south to Khenifra and El Kebab, joining the N13 route near Midelt through to the very windy Gorges du Ziz. A fabulous dramatic landscape of gorges and valleys with lush green palm groves and mud-brick houses in all their earthy colours. Running through the Ziz Gorge in the early morning sun under sharp blue skies, and watching the golden hour colours change as sunset approached are magical memories of Morocco.
Gorge du Ziz
Week 3 of Morocco in a camper van
Gorge du Ziz – Erfoud – Hassi Labied/Merzouga – Rissani – Ait Yahya – Tazzarine
From the Gorges du Ziz it was south to the Sahara Desert! Not before a quick stop in Erfoud for a shave for Dave. Apparently the best one he had in all of the ten weekly shaves in Morocco!
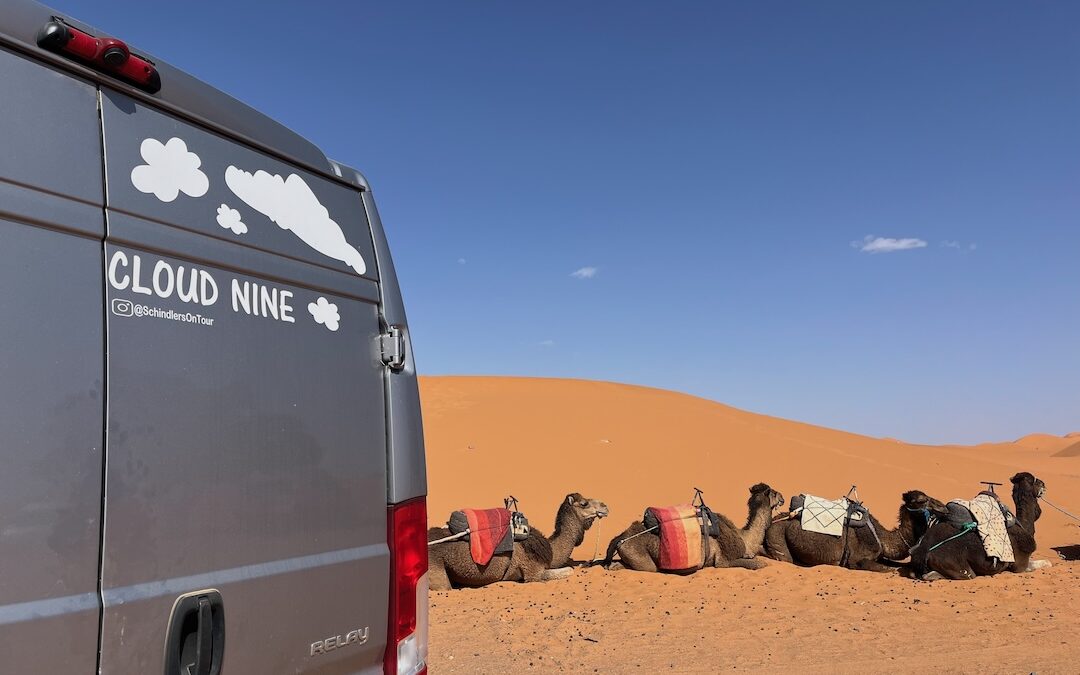
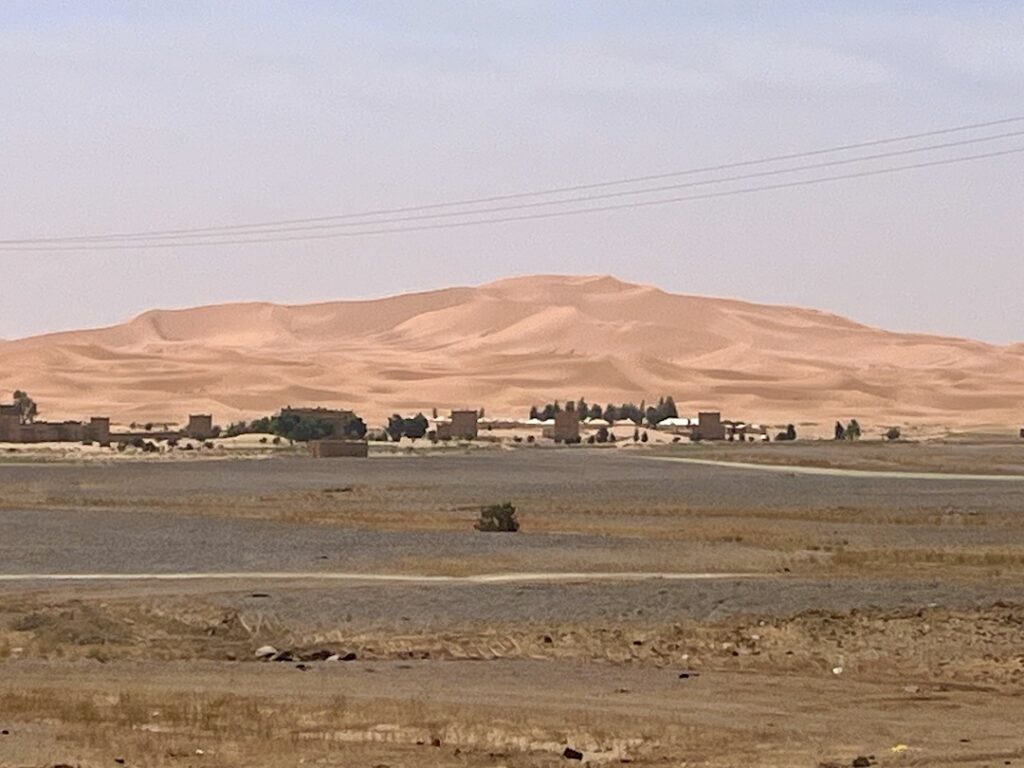
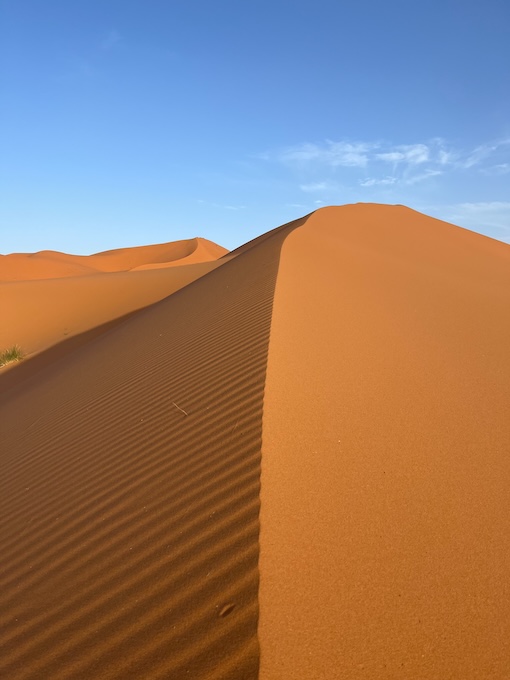
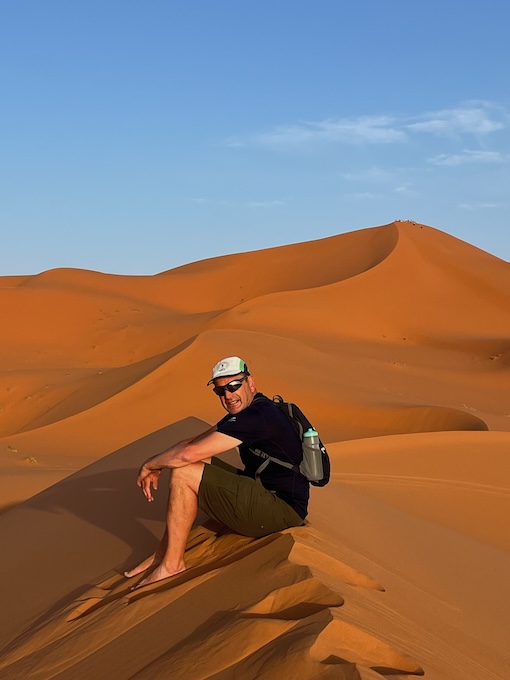
After an overnight stop at a roadhouse we headed straight for Merzouga, the gateway to the Sahara. Long tarmac roads with the massive golden sand dunes of Erg Chebbi visible from miles away. Merzouga was much much smaller than we had imagined, but despite its size it was packed with touts trying to sell desert trips and activities. We opted to turn back to the smaller village of Hassi Labied where no one hassled us. We hiked freely up and down the razor sharp ridges on sky high dunes. The desert landscape was picture perfect with the swirls of sand and the curls of the corduroy lines spectacular in their shades of burnt orange and gold. It was still and serene except for the occasional swarm of buzzing quad bikes and 4WDs churning up the sand.
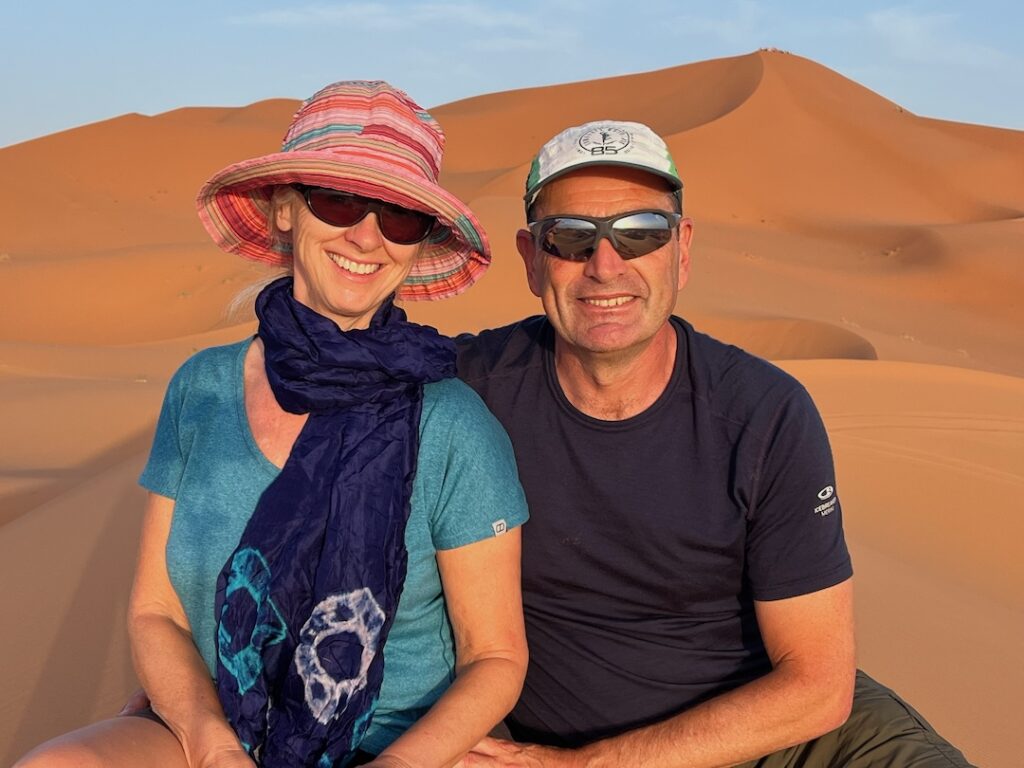
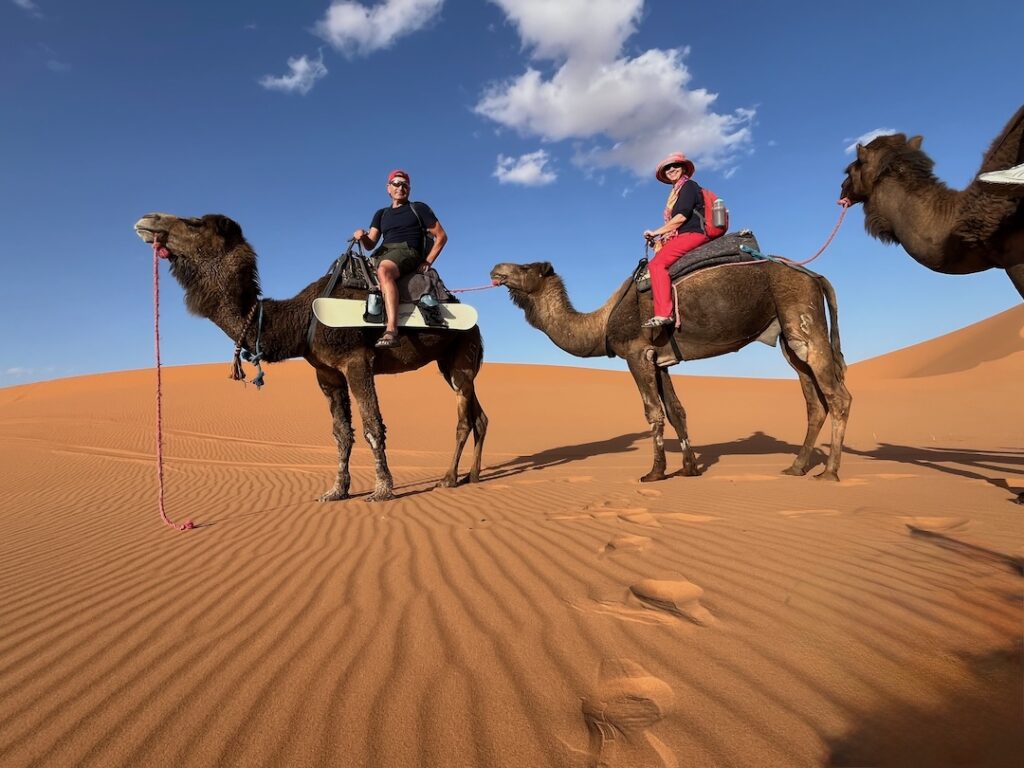
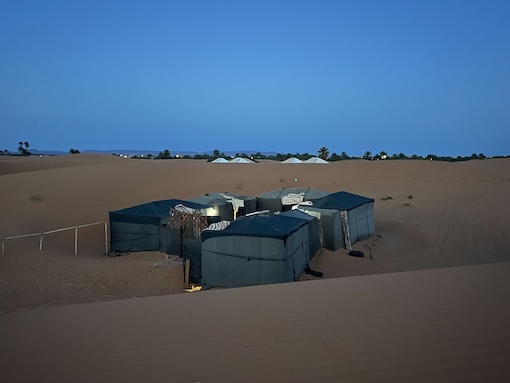
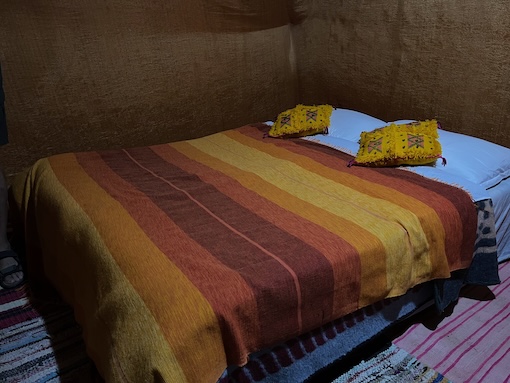
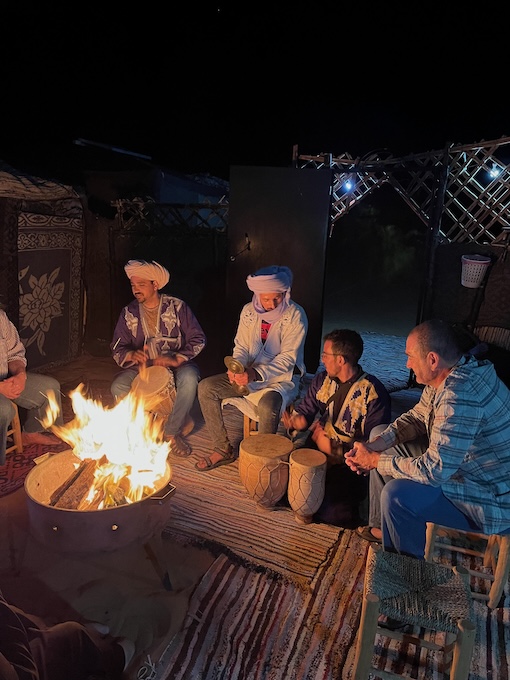
We parked with Ibrahim and his brother at Camping Auberge Ocean des Dunes and they organised our overnight camel safari for a very reasonable price (400 dirham each). An unforgettable Sahara experience and definitely well worth doing. We trekked across the desert on camelback, tried sand-boarding down the dunes, stayed overnight in a traditional style Berber tent, had traditional dinner and breakfast cooked for us, music and stories by the campfire, and watched the stars in the dark night sky. We chose a small and secluded basic tented desert camp – four double tents (we were a group of seven) and no fancy en suites! It was perfect.
Tented Desert CampBerber BedCampfire Entertainment
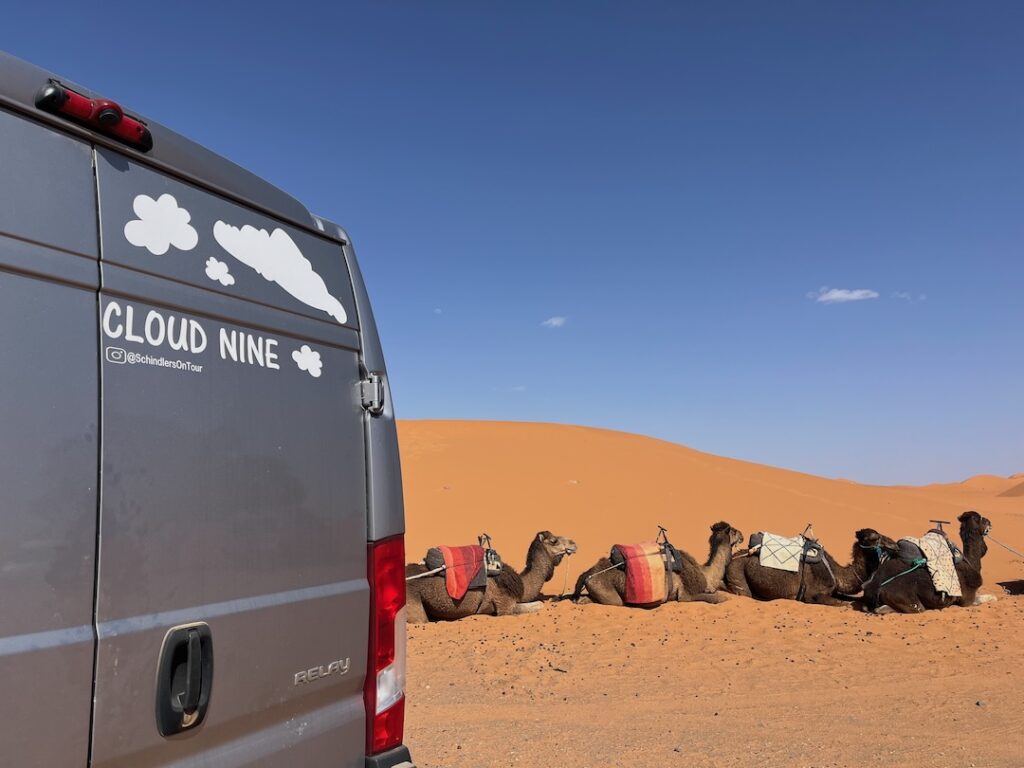
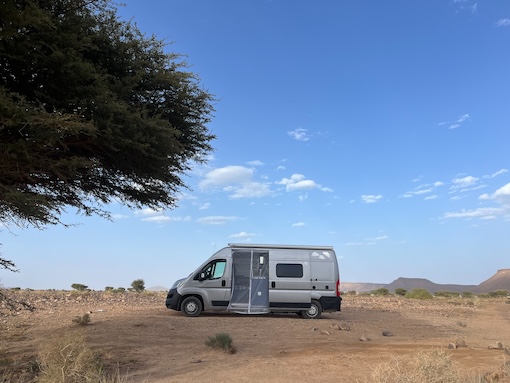
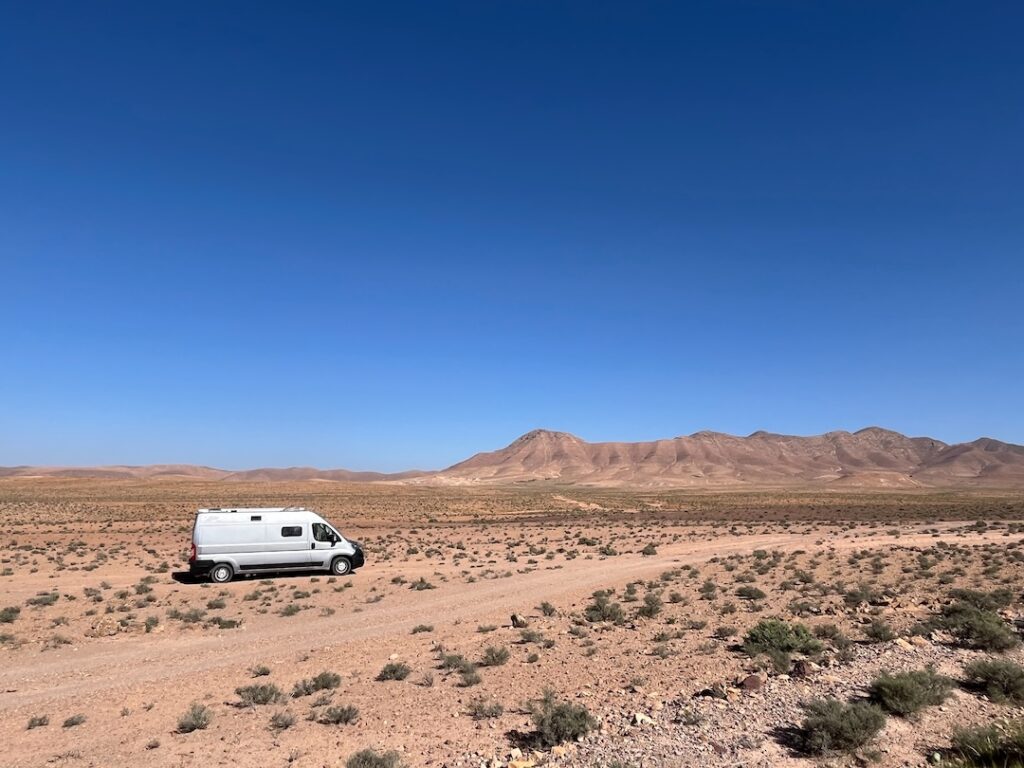
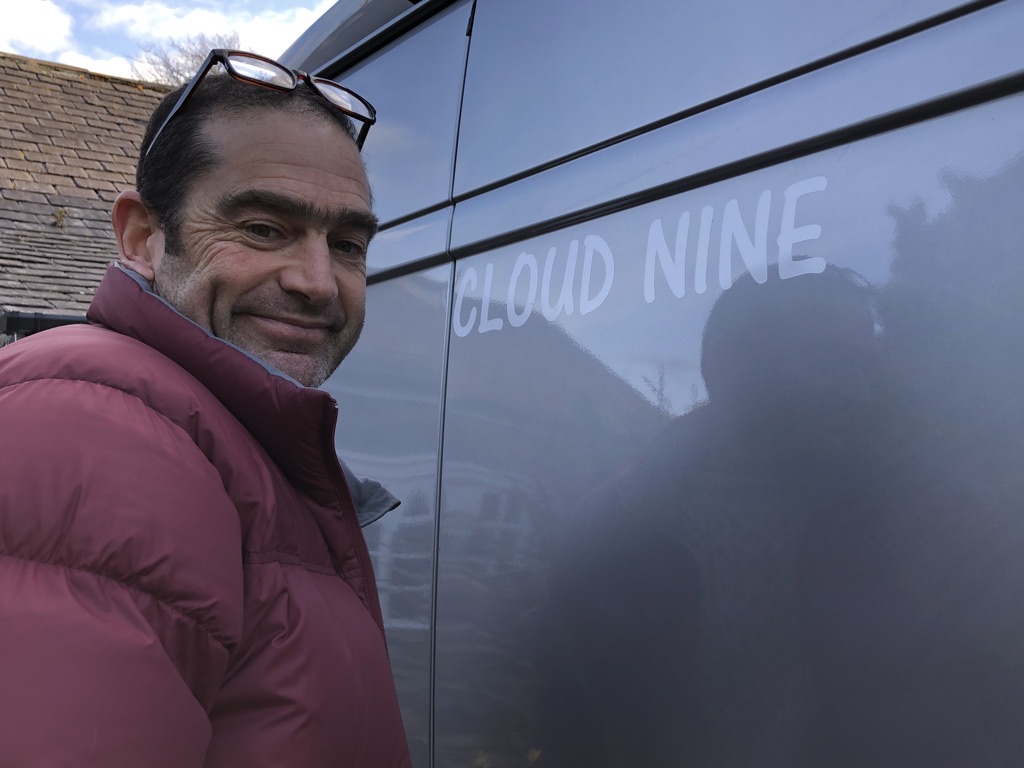
Driving Cloud Nine to the edge of the sand dunes for another night of seclusion in the Sahara was something really special. If it wasn’t for the dust and the extreme sultry heat of the day we would’ve stayed longer in this spellbinding place.
It was time to head west. We stopped off in the bustling market town of Rissani to stock up on supplies. Probably one of the best souqs we visited in our 10-week trip. And it was here we had the best Berber pizza of our trip! Flatbread stuffed with meat and vegetables and baked in the fire for 100 dirham. We wanted to visit the 8th century (lost) city of Sijilmassa, but the local police stopped us saying it was closed!
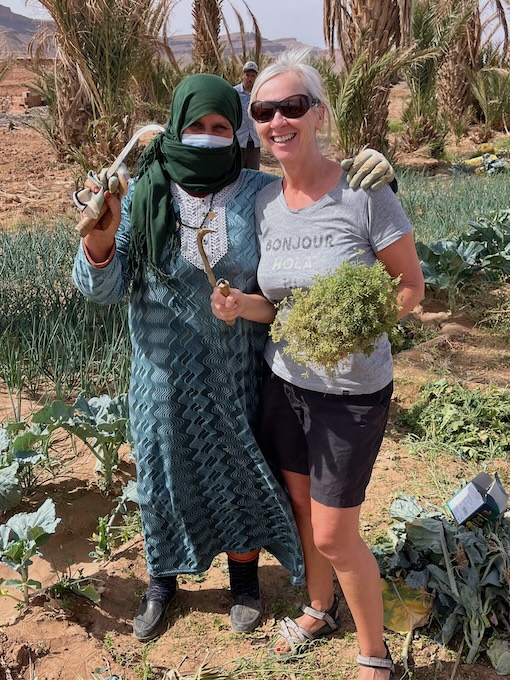
We ended our third week camping somewhere off the N12 near Tazzarine where the friendly locals invited us to work with them in their oasis tending their vegetables.
Week 4 of Morocco in a camper van
Tazzarine – Zagora – Amezrou – Tamegroute – Drâa Valley – Tamezmoute – N’Kob – Bab N’Ali – Tizi n’Tazazert – Ikniouen- Tinerhir/Tinghir – Gorges du Todra
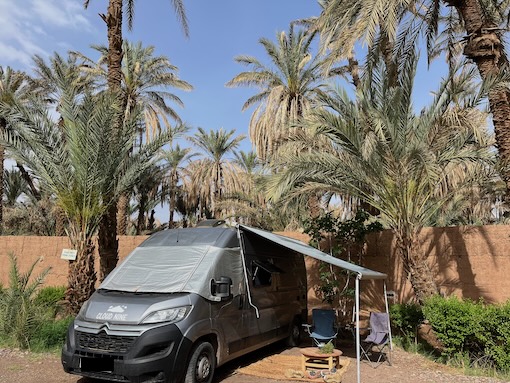
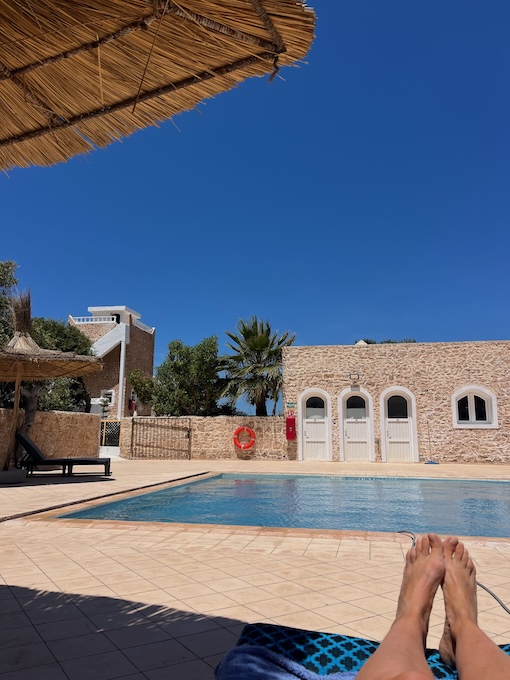
Our first stop on week four was the oasis town of Zagora lined with its lush palmeraies. We were hoping to relax by the campsite pool for a day or two, but a sudden sandstorm followed by huge thunder and lightning storms put a stop to that idea! Instead we had to deal with desert dust and sand everywhere, and we mean everywhere. A constant crusty nose plus very dry skin, and on top of that loads of insect bites! Don’t say we didn’t warn you! Pack your moisturiser and insect repellent.
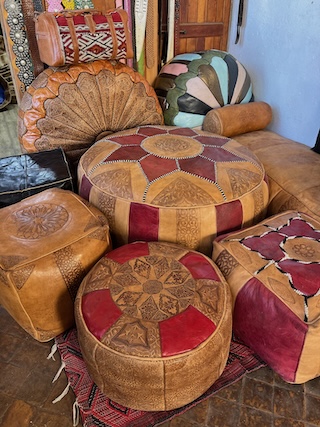
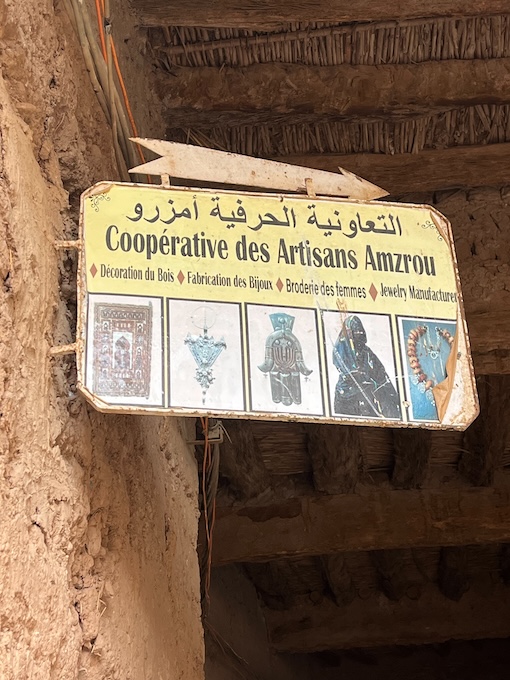
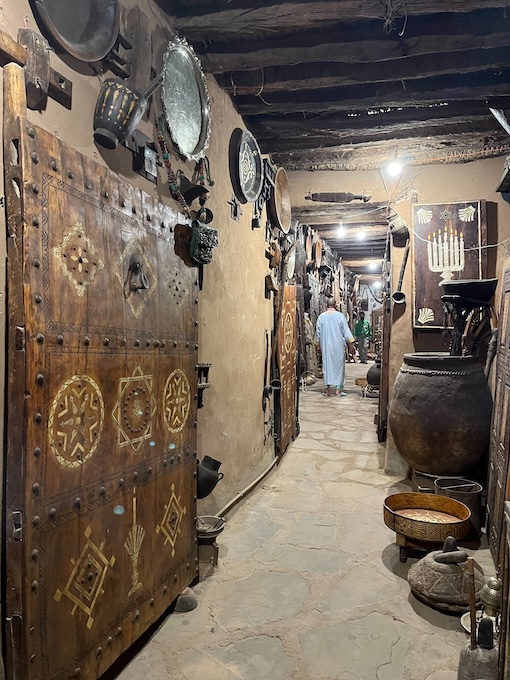
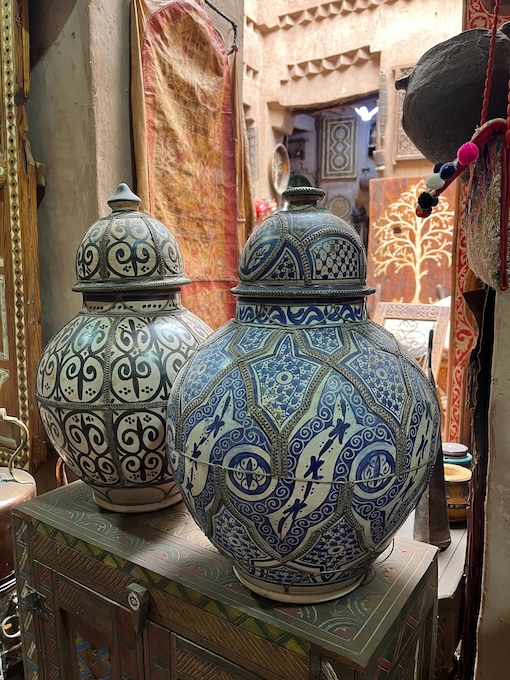
A visit to the village of Amezrou, once home to 400 Jewish households, was fascinating. Before we found local man Abdul to guide us through the historic mellah and show us the old synagogue, we felt like the pied piper as the number of kids following us around grew with every corner we turned! The artisans cooperative in Amezrou was a proper Aladdin’s cave and a treasure trove of some of the best hand crafted curios we have ever seen. The range of handcrafts with intricate Amazigh, Muslim, Jewish & African designs was staggering. There was room after room packed to the rafters with woodwork, metalwork, jewellery, leatherwork, ceramics and carpets. If we were going to buy anything from Morocco then this was the place we would’ve shopped. Its probably a good thing we have no space in the van for such luxuries!
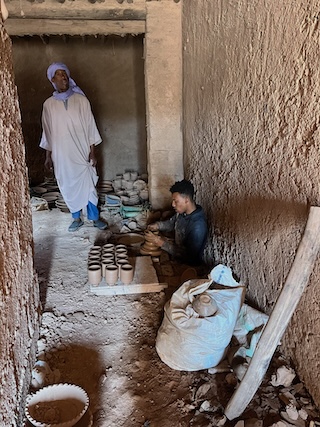
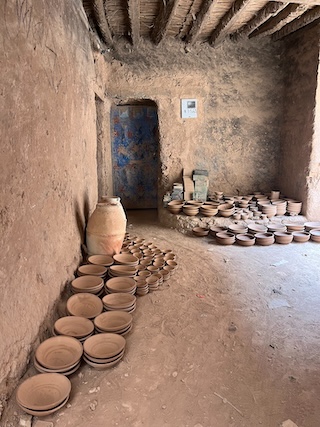
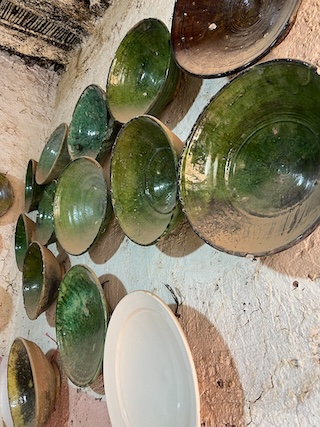
The green tiles that top the roof of almost every mosque in Morocco are made in the town of Tamegroute. We walked around the maze of streets and alleyways watching as families and generations of pottery makers moulded the clay on their potter’s wheels. The streets are lined with all shapes and sizes of pots and tiles all drying out before adding the distinctive green glaze for baking in the huge hot ovens. The families are well used to having the eyes of tourists on them and many will demand money for the privilege. Of course you can also support the community by buying the finished pottery from the local co-operative shop.
Tamegroute is also home to a library of ancient Koran manuscripts. For a donation the English speaking curator of the library gave us a quick tour of this very significant collection showcasing Morocco’s cultural and religious heritage.
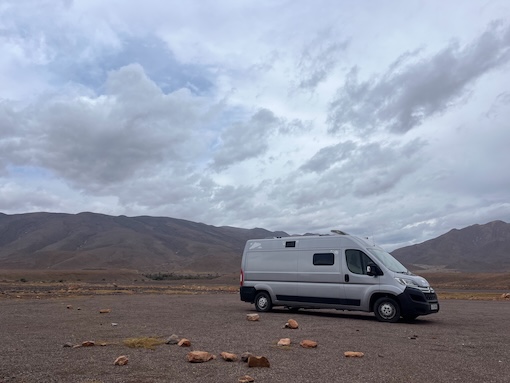
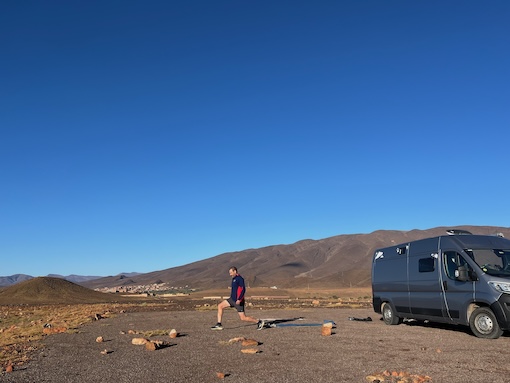
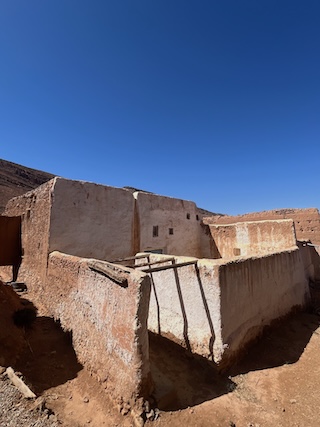
From Tamegroute we took the road north through the stunning Drâa Valley where it was all about the mud brick homes and centuries old kasbahs. It was one village after the next in their earthen colours and all surrounded by palm oases. At first the buildings look deserted, but a run/walk through the villages saw the locals stop their daily life to come out and wave and smile at these foreign passers-by. The ever-changing colours and mountain views from our isolated park up in Tamezmoute were starkly beautiful. Another perfect backdrop for our outdoor gym sessions!
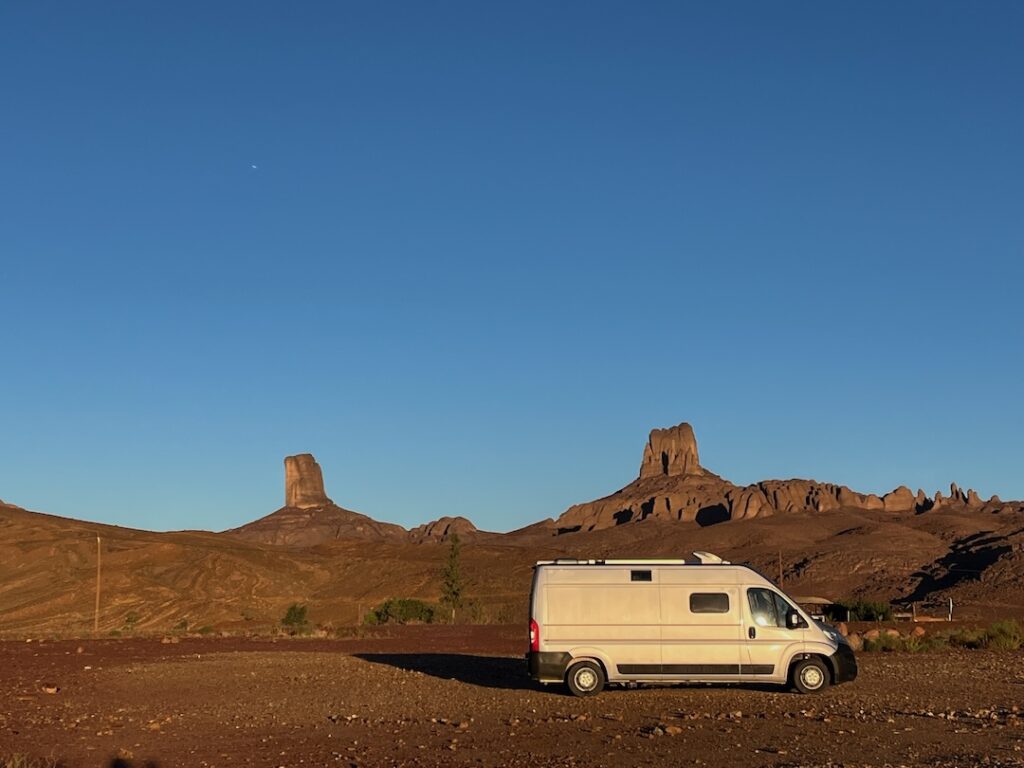
We veered north east towards Nkob and further into the Jbel Saghro mountain range before parking up for the night at a roadhouse cafe at the foot of Bab n’Ali. We felt like we were on the set of a western film! The friendly owner made us dinner to order (the usual tagine with bread and salad). With heavy rain and thunder it felt like the most unlikely of places to get a good WiFi signal in the van. But as we know every cloud has a silver lining. We had a great WiFi signal in CloudNine and we managed to stay awake to watch Rory McIlroy eventually lift that elusive Masters trophy!
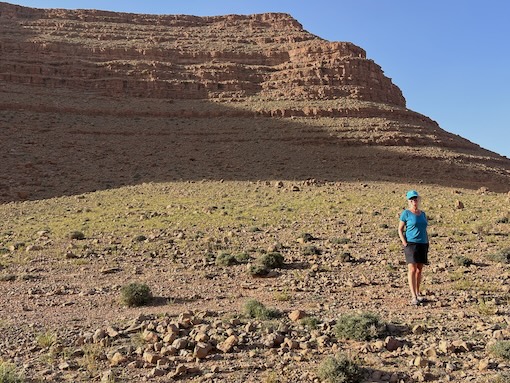
The trekking through this dramatic lunar landscape with its bizarre rock towers and unique pinnacles was enough to make you jump for joy and feel truly alive.
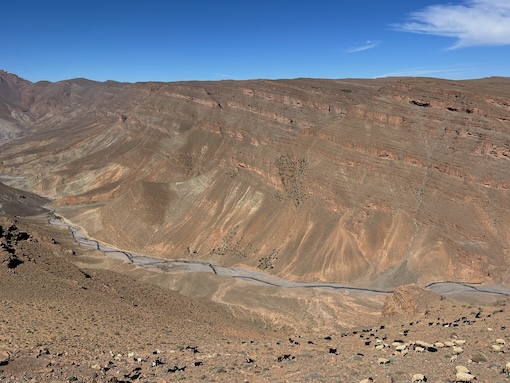
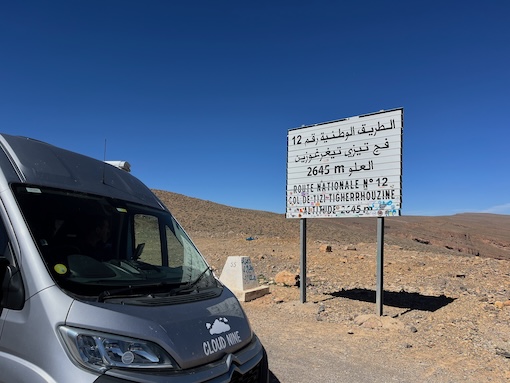
Driving the high mountain pass of Tizi-n-Tazazert (2,200m above sea level) through the Anti-Atlas mountains via Iknouen to Tinerhir was more than stunning. The panoramic views of the arid rocky landscape were outstanding from this practically empty quality road.
Arriving in Tinerhir we treated ourselves to our first Moroccan hammam, an essential part of Moroccan culture We found a local public hammam with separate areas for men and women. It cost 25 dirham each which included the soap/clay and exfoliation glove. We paid an additional 15 dirham each to have our own attendant to scrub us, apply the clay and massage us. What a way to get rid of the dry skin and dust from the desert! It is no wonder the women of Morocco have such beautiful skin. I don’t think I’ve ever felt so invigorated, and can safely say never had a massage quite like it.
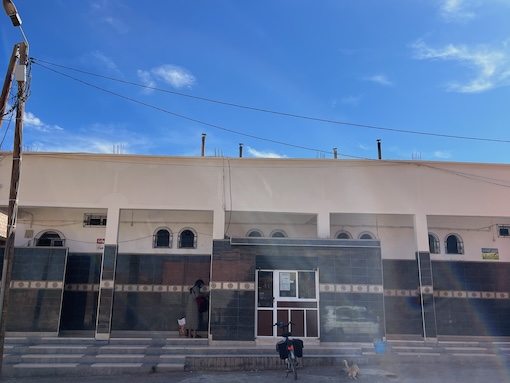
Hamman & Liquor Shop in Tinerhir
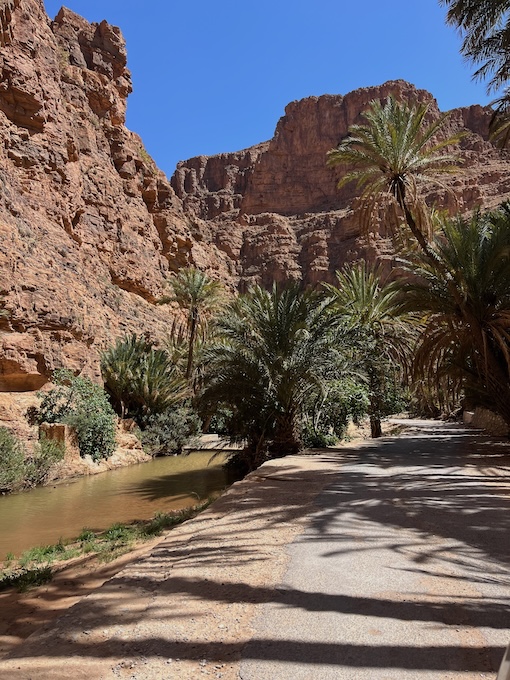
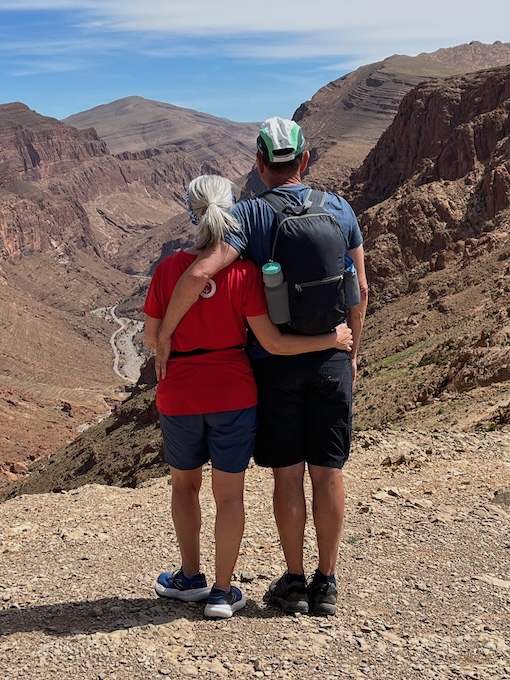
The other bonus of Tinerhir was a liquor shop! The first one we’d spotted in Morocco. We stocked up with a few local beers and some Moroccan wine to try before we drove on to the Todra Gorge. It was at Todra Gorge where we encountered by far the most tourists and coaches we had seen in Morocco so far. The place was mobbed with day trippers, but it did quieten down dramatically at night. Our way of escaping the crowds was to take an early morning run through the towering narrow canyon walls and then hike up to the panorama viewpoint of Jbel Asstef (about 1hr 15mins from the gorge) for 360 degree views of the High Atlas mountains.
Running with donkeys in Todra Gorge & the view from the top
From Todra Gorge we took the R703, a perfectly paved road, north to the Amazigh village of Tamattouchte where we had a lovely overnight stop with a local family. It was the R704 road from Agoudal where we wanted to turn south towards Dades Gorge, that was in doubt. The recent heavy rain had meant the road had been closed for a few days, but our host said we could now pass through.
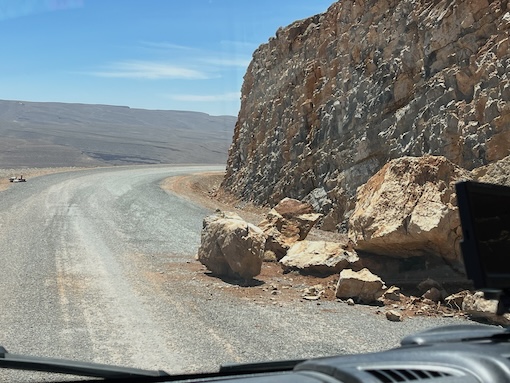
Views, high points, ford crossings, rockfalls – all in a day’s driving!
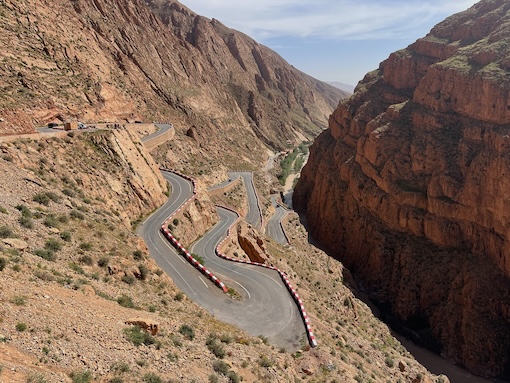
There were a dozen or so low fords to cross, and many rockfall slips, but thankfully we managed to manoeuvre around them. It was a little bit more hairy and narrower on the approach to Dades Gorge, but still very doable in a van of our size. There was little or no traffic until we hit the top of the serpentine road, and even then not very much. More donkeys than vehicles!
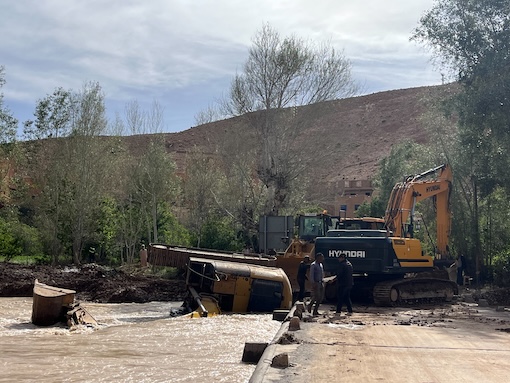
Unfortunately when we got down to the bridge/river crossing (which had been closed for the previous 4/5/6 days depending on who you speak to!) it was closed. A digger working on the bridge had fallen into the river and was in the process of being pulled out. After a short wait they allowed some traffic to squeeze through, us included. After what was a relatively long driving day for us (6-7hrs), we made it unscathed to our park up near the village of Tamellalt.
Serpentine Road & Fallen Digger in the river!
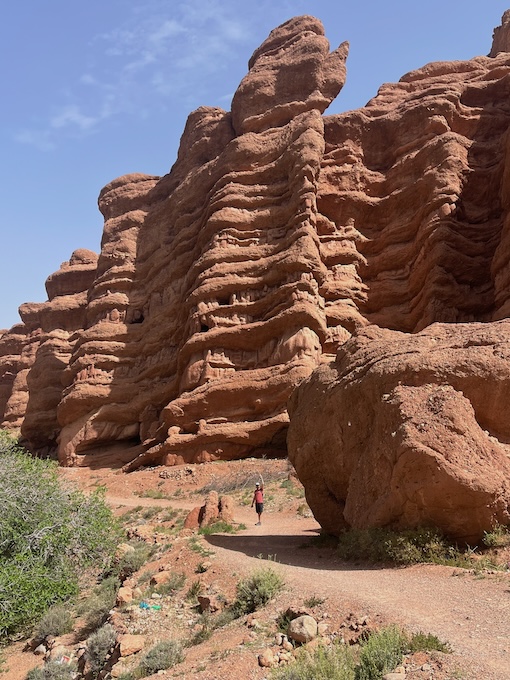
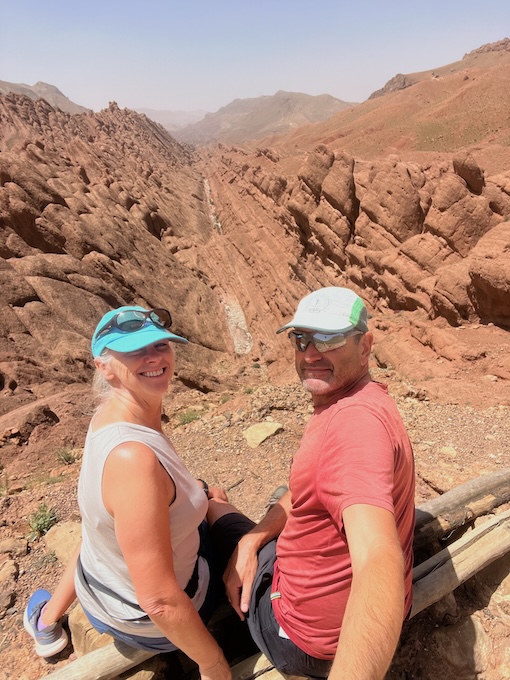
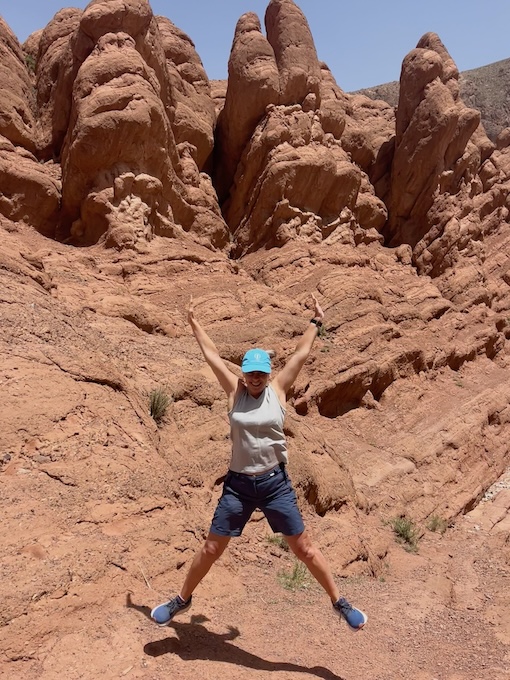
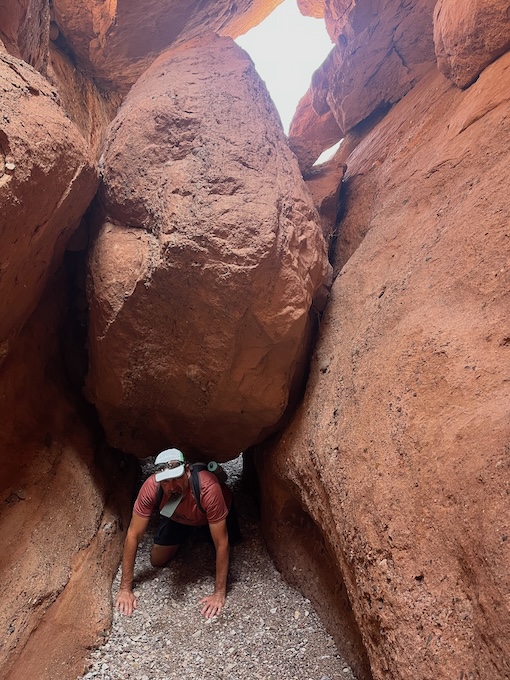
The hiking in this area was superb. Unique and impressive sandstone rock formations rising from the (very flooded while we were there) river bed. The Monkey’s Fingers are like digits of boulders which can be seen from the road. But for the best vistas, and tons more bizarre rocks, it is well worth hiking further up, or around, the gorge. We used the Komoot app to plan our hikes and even with that getting lost is still a real possibility! There was a lot of scrambling and climbing over, and crawling under boulders as we descended down through the canyon walls. An older local gentleman appeared out of nowhere when we were unsure of the way to go. He guided us down a real tricky bit, only to turn up later in the day as we faced crossing the very fast flowing river. He kindly took us one at a time, hand by hand, and led us across the river to avoid getting our feet wet!
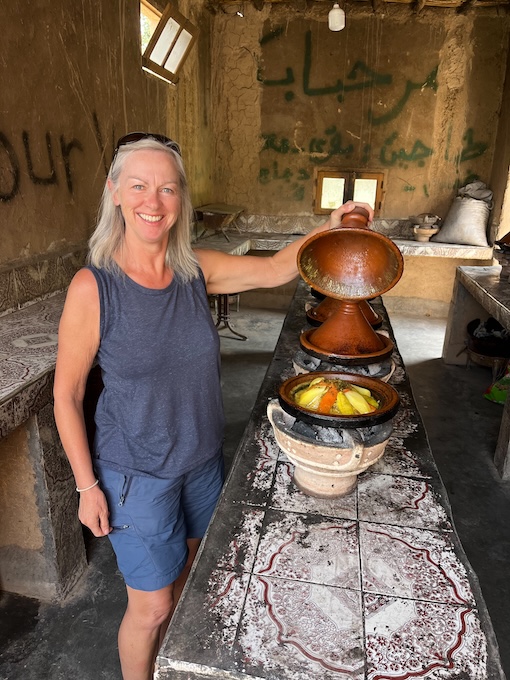
En route to the oasis town of Skoura to see its shady palm groves and mud brick kasbahs, we stopped at a petrol station to have the van washed (a pretty thankless task as it was covered in dust again five minutes later!). And it was here at the least unlikely of places that we had the very best tagine and traditional stone baked bread of our trip!
Best tagine and stone baked bread we had in Morocco
We visited the kasbah, Ait Ben Haddou near Ouarzazate, famed for its use as a backdrop in many movies, early in the morning to try and avoid the heat of the day and the crowds. It certainly got busier as the day went on with coach loads coming from all directions.
Our next move was to head cross country to Tafraoute and the southern mountains of the Anti-Atlas region. An isolated park up just off the road near Azarhar-n-Irs was the perfect spot for a peaceful night and an early morning run. The first 30kms drive of the morning were on a rough gravel road. It took about two hours before we hit tarmac again! Driving up and over the panoramic mountain passes through remote villages with views that went on forever was breathtaking and beautiful before the descent into the tiny dusty town of Tafraoute.
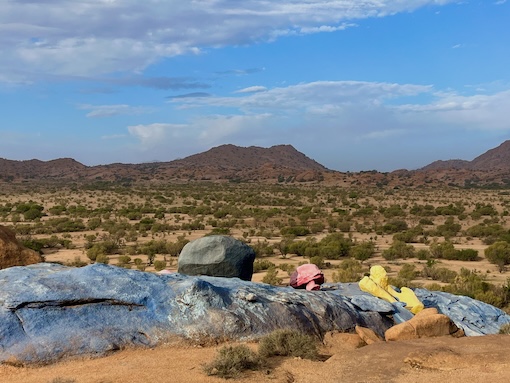
Tafraoute was the perfect place to pitch up for a few days. It was here we took the time to get the bikes out for a bit of riding around the giant granite boulders strewn everywhere. More crazy rock formations, (the Anti Atlas mountains are probably a geologists dream), and the controversial Painted Rocks. So called landscape art, painted in the 1980’s by a Belgian artist in tribute to his wife. The vibrant colours were in stark contrast to the area’s natural earthy tones. To us definitely a negative blot on the landscape and environment, but to others probably an Instagrammable shot!
The amazing Ait Mansour Gorge was our next stop after Tafraoute. Yet another stunning drive navigating a few hairpin bends and down into the steep sided red gorge where we brushed sides with huge leafy palm trees loaded with dates. The oasis of the valley floor where we watched the always friendly locals work, provided plenty of shade in the sweltering heat, and such a peaceful night’s sleep under a starry sky. We drove out the other side of the gorge, passing by mud brick villages clinging precariously to the sides of the rock. It was all like scenes from an Indiana Jones film!
The road from the turning point at Had-d’Afella Ighir was sealed for the most part. There were many sections where the original road had slipped away, but clear and obvious gravel tracks led the way on yet another almost traffic-less scenic road.
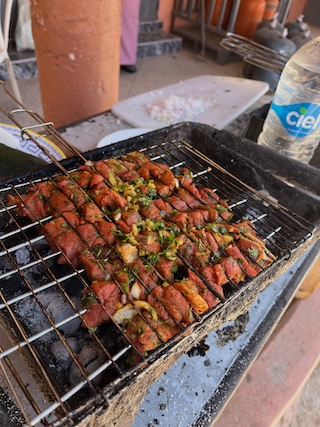
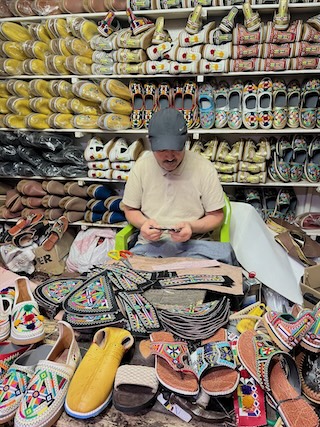
We reached Tiffermit in time for lunch. We picked the meat we wanted from the butcher and his neighbour cooked it for us over the hot coals on the side of the road! Beef kebabs, salad, fresh bread and mint tea all served up in no time! At our request our ‘chef’ then took us to a local shoe maker to buy a pair of the traditional handmade leather Babouche shoes (100 dirham), beloved and worn by all Moroccans, male and female, young and old.
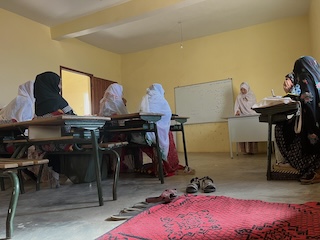
The next part of our journey was all about discovering distant family ancestry, and it took us to the small town of Ifrane Atlas Saghir (Anti-Atlas) in southern Morocco, once home to Africa’s most ancient Jewish community. We were on a search for the site of where ancestors of Dave’s cousin’s husband were among the 50 Jews who burned to death by jumping into a fire to avoid converting to Islam under the ruling of the tyrannic Sultan. (You can read more about the legendary story here: https://moroccanjews.org/home/sites-of-jewish-interest/anti-atlas-mountains/ifrane-anti-atlas-oufrane/.
On our quest for information we ended up being invited in to a classroom of local Amazigh women who were learning to read and write Arabic. We joined in and learned how to write our names too! Although the Jewish Mellah in Ifrane Atlas Saghir has long since been abandoned, the Jewish history of the area has been preserved. The lovely young teacher who spoke English helped us track down the key holder of the restored synagogue so we could organise a visit. This local man also guided us to the Jewish cemetery. At first glance it looked like a field full of rocks to us, but on his guidance we could see clearly the Hebrew inscriptions on the headstones, some of which were more than 2,000 years old.
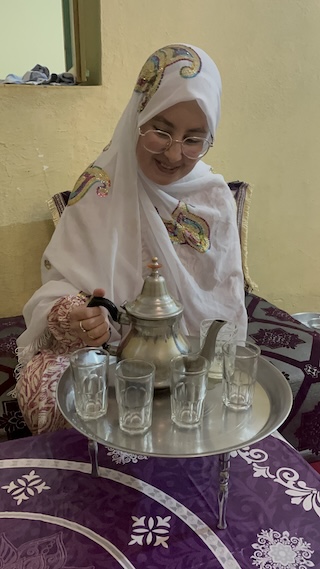
Not only did the young teacher help us find the information we were looking for, she very kindly invited us to her home for tea with her family. A sumptuous affair with copious amounts of mint tea, dates and nuts, and lots of home baked biscuits. A very treasured memory of real Moroccan hospitality and kindness. This was followed in the evening when we parked up near the local police station with offers of help for anything we needed. The Moroccans are undoubtedly the most welcoming and genuinely kind people we have met in all of our years travelling.
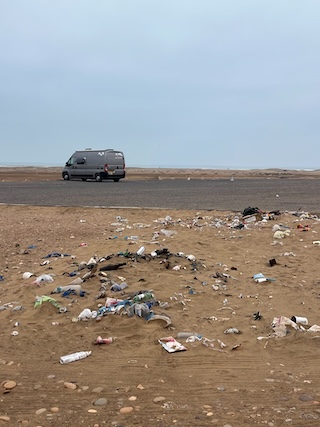
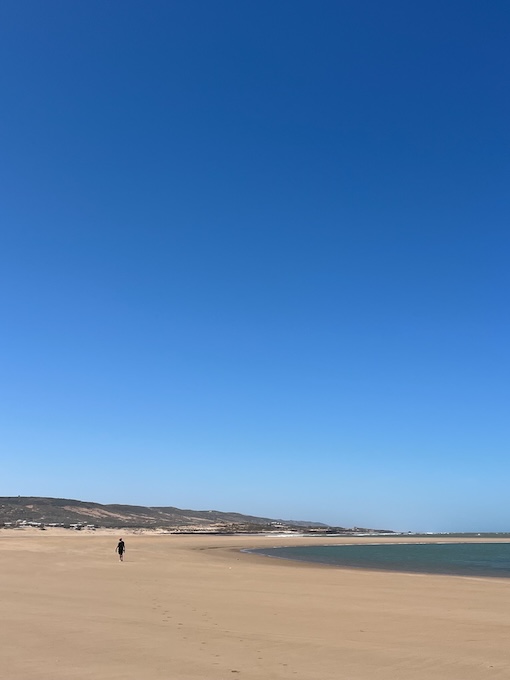
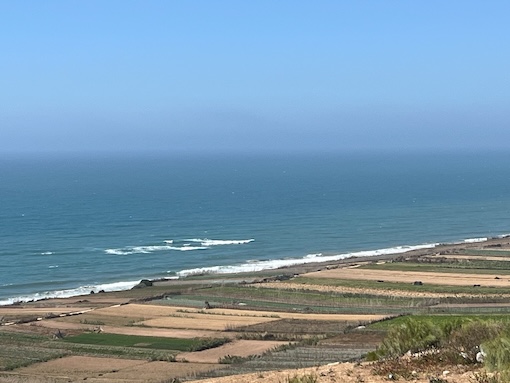
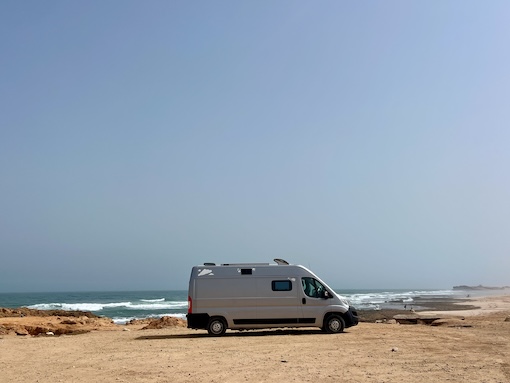
As we headed towards the Atlantic Coast, we missed the largest camel market in Morocco, held in Guelmim every Friday, by a day. That’s something to do next time! We drove the long empty roads (except for seeing the occasional camel) as far as Plage Blanche where the Sahara literally meets the sea. After weeks of blue skies and sunshine we hit this long stretch of wild beach on a very grey day, made more miserable by the amount of rubbish and stray dogs around. With limited visibility and motivation to move, a couple of runs on the 40km stretch of hard packed sand was as much as we did here. It was onwards on the scenic coastal road to Sidi Ifni and blue skies once again!
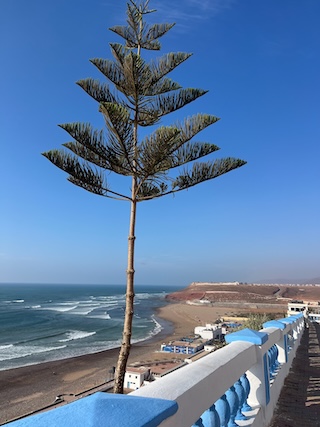
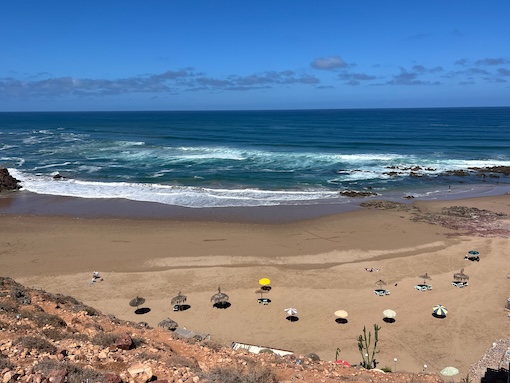
Sidi Ifni was a lovely wee seaside town to spend a few days eating fish and seafood, something that was to become a habit for our final couple of weeks in Morocco! We even found a restaurant by the beach that served alcohol, and not at exorbitant prices. We also had the chance to get our awning fixed by fabulous local tradesmen for a fraction of the price it night have cost elsewhere.
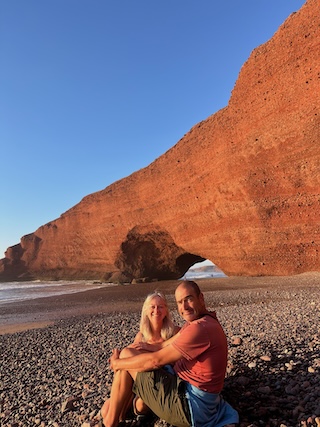
The nearby Plage de Legzira was a stunning place to watch the Moroccan sunset through the natural rock arch formation. Its a steep climb down to the beach (and back up), but worth it.
Sidi Ifni and Plage de Legzira
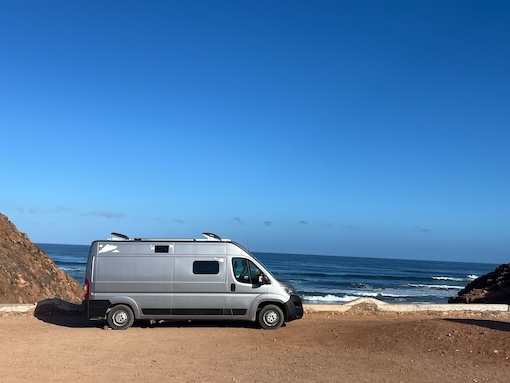
We continued on the coastal road and were spoiled with a perfect park up by Aftas Beach near Mirleft. Great for runs and walks along the clifftops too. The only downside was the sea was like a washing machine! Dave still has the scars from being tossed and turned and tumbled through the waves!
Aftas Beach
We hit Tiznit, once home to a thriving Jewish silversmith community, in the hope of checking out some Amazigh antique silver jewellery, but sadly it was a Sunday and most of the medina was closed. The timing probably saved us a small fortune!!! Instead we diverted to the Souss-Massa National Park for a sunset over the river. From there it wasn’t long before we hit the traffic going into the sprawling seaside city of Agadir. The seaside area had tonnes of holiday resort type hotels and villas, mostly relatively low-rise buildings, but construction and development is well underway in the city in anticipation of hosting some of the Africa Cup of Nations games later this year, and the FIFA World Cup in 2030.
The 10km beachfront promenade (or long sandy beach) was an ideal morning running route. And if that’s not enough steps for you, a visit to the giant Souq Al Had will up your daily total before you know it! We only stayed one night in Agadir, beside the pétanque club in the eclectic Talborjt neighbourhood, and for what its worth, really enjoyed it.
After Agadir we took the short jaunt up the coast to Tamraght, where the sea was full of surf schools, and the beach chockablock with camels!!! We walked the 5km paved trail all the way to Taghazout,and back,passing by a string of luxury hotels en route. And we don’t think we’ve ever seen as many surfboards (in and out of the water) anywhere else in the world! Surf shops and surf schools around every corner!
Finding a place for fresh drinking water in this area was a challenge. We tried a few places that were listed on Park 4 Night, but to no avail. There is a real shortage of water in this area. Thankfully a local gardener answered our prayers and allowed us to fill up from his hose. The Moroccan people truly go out of their way to help you.
Week 8 of Morocco in a camper van
Tamraght – Taghazout/Anchor Point – Imsouane – Sidi Kaouki
With a tank of fresh water from the gardener in Tamraght we returned to the cute and colourful fishing/surfing village of Taghazout in the van and pitched up for a few nights at Anchor Point.
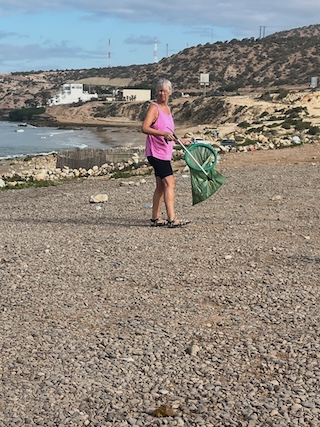
Great sea views and lots of local day trippers. The down side is the sheer volume of rubbish left behind. Many Moroccans are completely unaware of the negative impact of throwing rubbish behind them. And granted often there are no bins, but in this case there were. Our litter picker was in constant use in this area! The upside of course is that these ever friendly people, mostly groups of men picnicking together, always offered us to join them for tea and fruit.
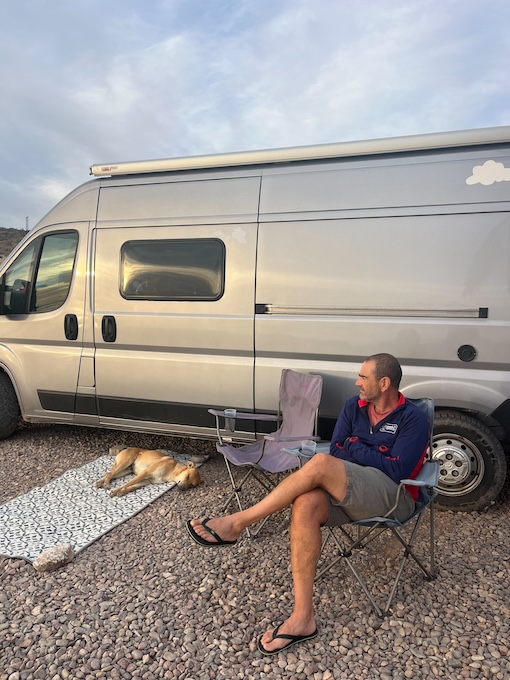
The stray dogs are another major issue in this area. We had a different dog/dogs sleep outside our van everyday. Besides giving them water and food, we chose not to touch or pet them. Most of the dogs we encountered were well fed and not aggressive, but rabies is rife in this part of Morocco so it is best to avoid contact with all stray animals. Please learn from my experience by reading this blog post on the importance of being vaccinated against rabies if you are planning a trip to Morocco.
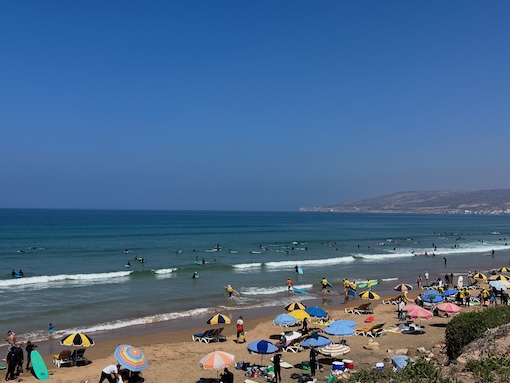
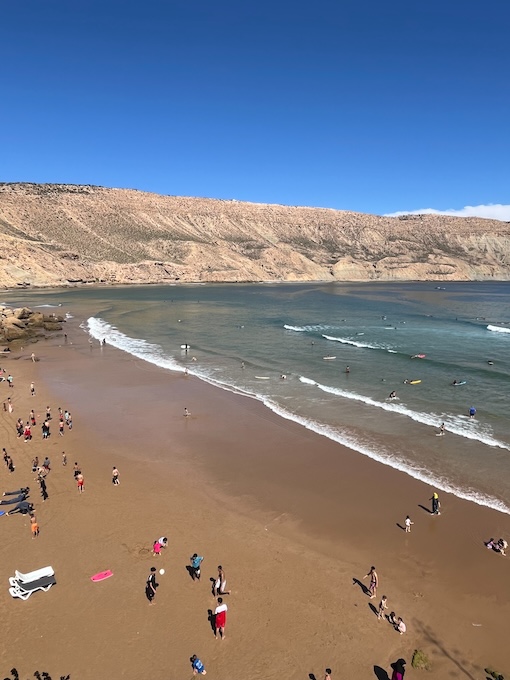
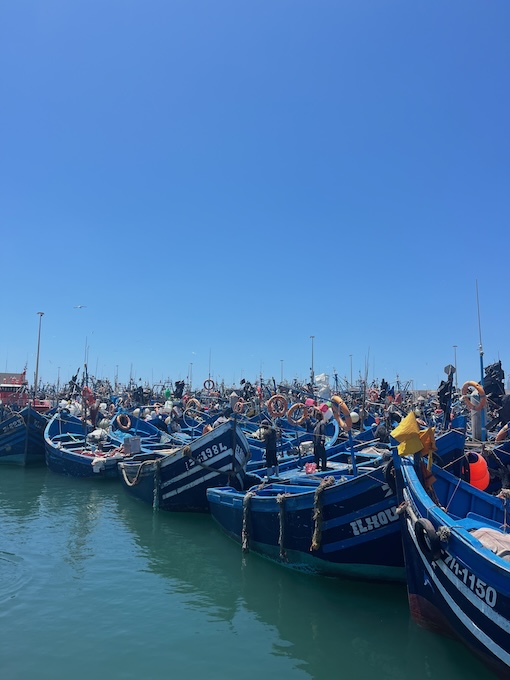
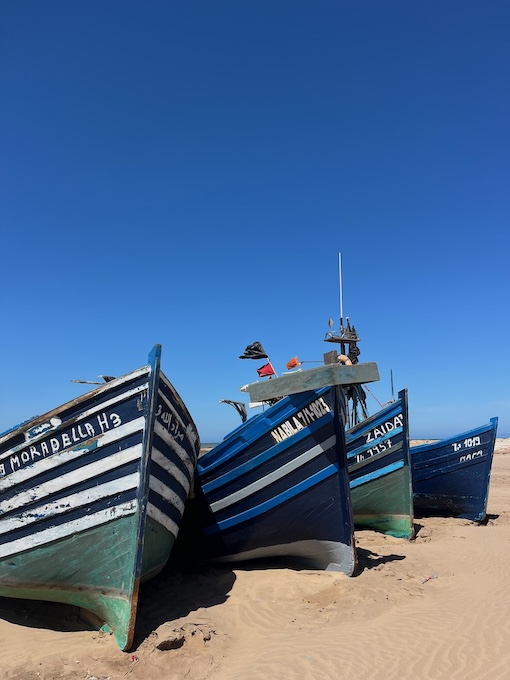
From Taghazout it was another scenic coastal drive north via Tamri, where we stopped for a roadside tagine, before dropping down into the idyllic laid back surfers town of Imsouane. The busy port with the traditional blue wooden fishing boats constantly being towed in and out of the sea by tractors, is sat in between the two very different surfing bays. La Bay with its long waves often dubbed the longest wave in Africa, can be seen from great vantage points up on the cliffs to watch the surf come in. La Cathedrale Point is for more expert surfers, and an ideal spot to watch the sunset.
Rather than surf we spent time on the beach, swimming, running, and sampling the freshly caught catch of the day each lunchtime!
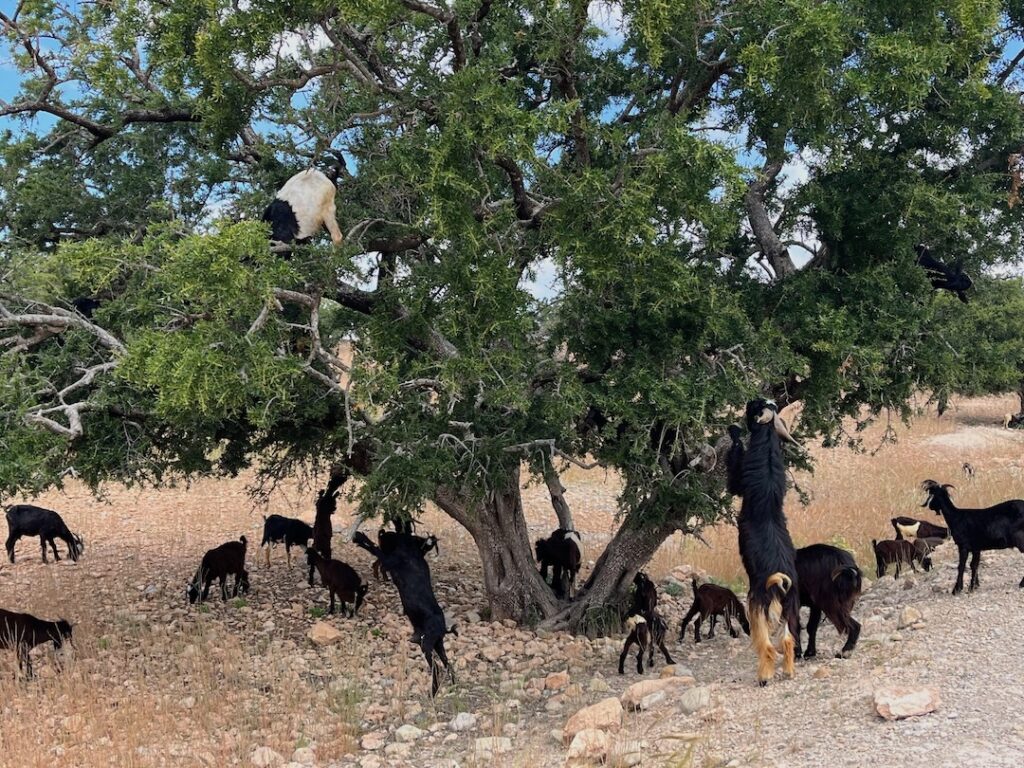
Driving north from Imsouane on the N1 (south of Tamanar) we were lucky enough to spot several herds of tree-climbing goats grazing on the argan trees endemic to this area. It wasn’t long before we were regularly being waved down by locals selling their argan oil products on roadside stalls!
We went from goats in trees to camels on beaches (again)! This time at Sidi Kaouki, 25kms south of Essaouira on the Northern Atlantic Coast. (We had heard that Essaouira was not camper van friendly, which is probably true in the high season, but in early May there were definitely (paid) places to park for both day time and overnight).
Week 9 of Morocco in a camper van
Sidi Kaouki – Essaouira – Plage de Bhaibah – Had Dra – Marrakech
We pitched up at Camping Soleil at Sidi Kaouki for a few nights. The small village, and wild, windy, and empty beach (apart from the occasional camel) was only a five minute walk away. There is a bus service to Essaouira. The small mini bus takes about 25 minutes to the medina and cost us 10 dirham each. The larger bus on the way back was slower (about 40 minutes) and two dirham cheaper!
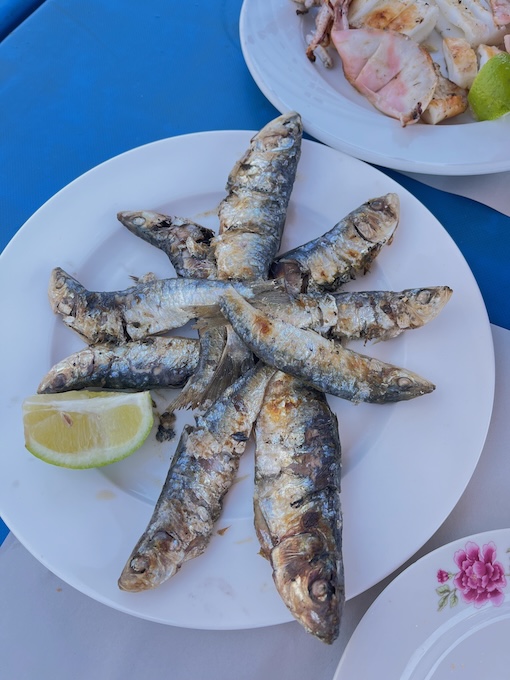
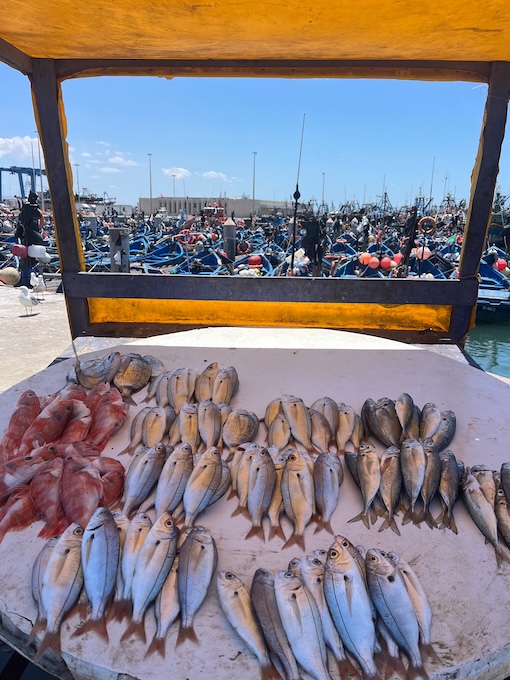
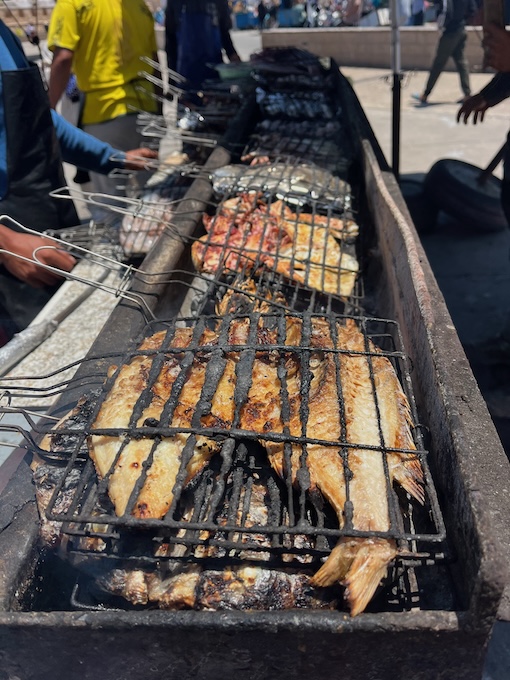
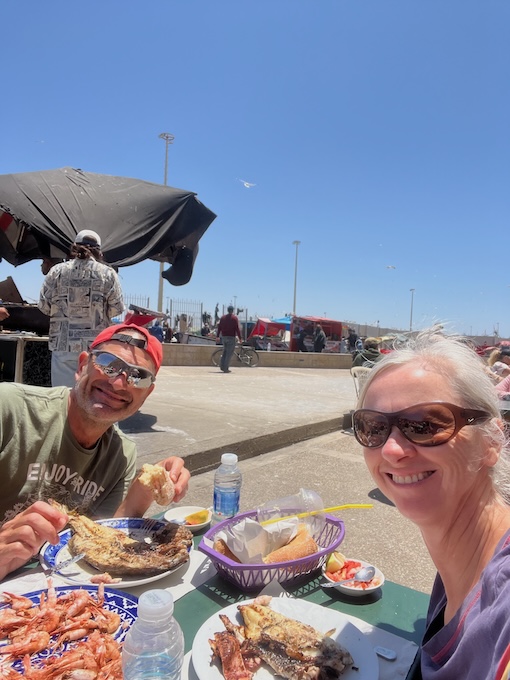
Be prepared to be blown away in Essaouira, both literally and figuratively! There is a really cool, but traditional vibe, and laid back feeling to this blue and white (small) city, with a fantastic fresh fish scene. In the buzzing port we bought a fresh catch of enough prawns, calamari and dorado to feed both of us for 100 dirham. We paid an additional 20 dirham per rack (3 racks) to have it cooked over hot coals and served alongside bread, salad and water. But hold on to your hat at the table, the wind whips up from the Atlantic and blows everything with it!
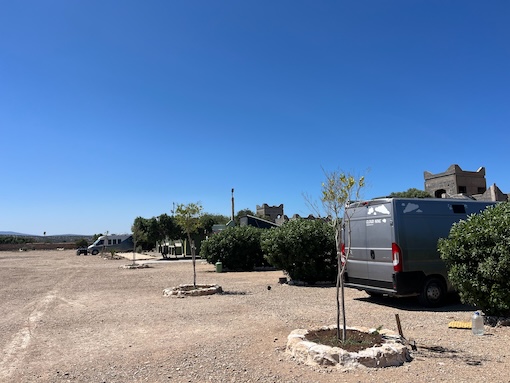
We splashed out on another campsite, Mogador Oasis, this one with a pool, in Plage de Bhaibah, less than an hour’s drive north of Essaouira. Our timing meant we were there for the Moroccan tradition of “couscous Friday”, a bit like fish on Fridays in Ireland! We had freshly made couscous delivered to the van for lunch! We were treated to deserted beaches for long walks, sundowners on the deck, and got to watch the local fishermen building and repairing their traditional blue wooden fishing boats.
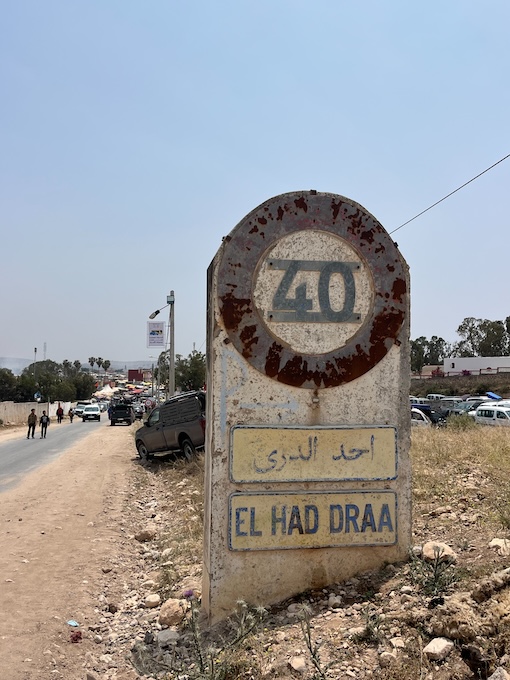
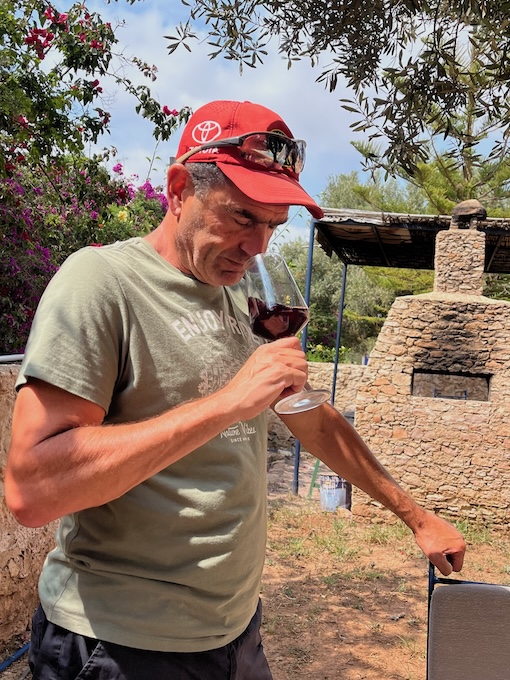
From here we headed inland through the countryside on our way to Ounara do a bit of Moroccan wine tasting at Les Domaines du Val d’Argan, a vineyard created by Charles Melia, the owner of Font du Loup in Châteauneuf-du-Pape. But before we could get there we came across the town of Had Dra and the road we wanted to take was closed. Nothing else for it, but to park up and see what was going on.
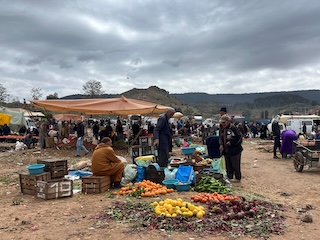
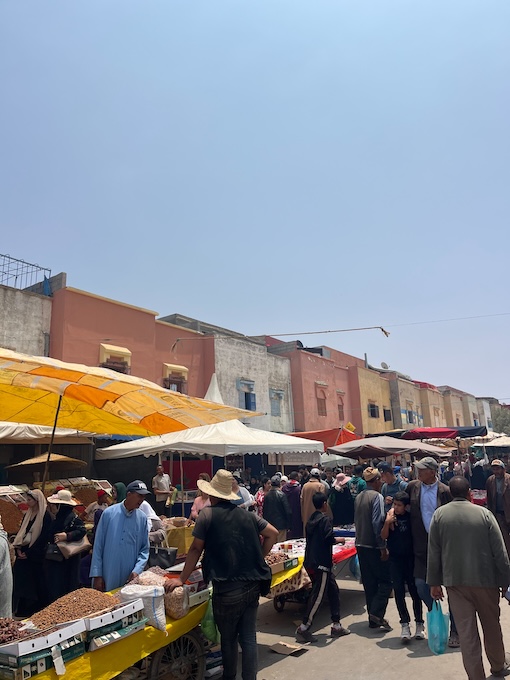
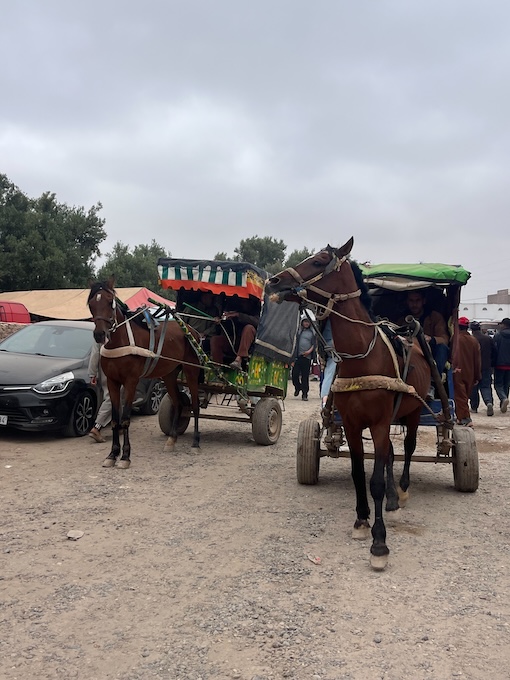
There were horses and carts, and donkeys and carts everywhere, all loaded with people. The noise was deafening from stall after stall of market traders shouting through loud speakers. This was like no place else we’d seen in Morocco so far. Turns out this was more than just the weekly souq.
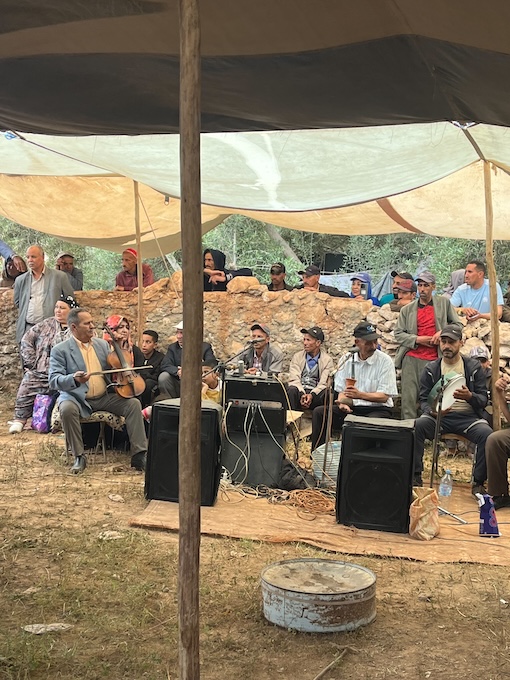
We’d arrived in the middle of a 3-day festival and it felt like everyone in Morocco was here, or making their way here by the bus load! Unfortunately the language barrier meant we didn’t really understand what the festival was about, but something about it travelling to 40 different places in the region/country. There were tents of entertainers, musicians, and dancers, a parade of men on horses carrying muskets, pipes and drums as if they were going to battle, and food tents full of animals that we didn’t dare try. It was such a magnificent insight to Moroccan culture, and definitely up there with the highlights of our trip.
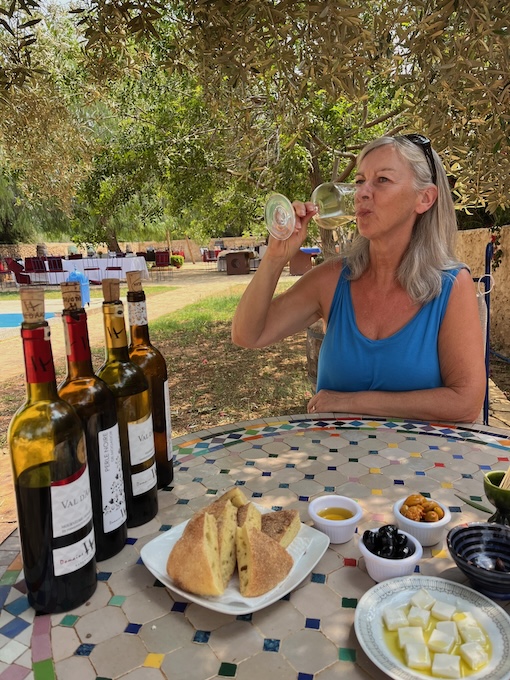
We eventually managed to drive through the melee, got parked up at the campsite, and made it to the vineyard just before it closed. We paid 420 dirham each for wine tasting. The staff left us sitting alone by the pool with four bottles of wine, bread, olives, cheese, and oils to try as they headed off to the festival!
Wine tasting at Les Domaines du Val d’Argan
The following morning we squeezed into a grand taxi with half a dozen locals to soak up more of the crazy festival atmosphere. We left the mayhem behind at lunch time and drove into Marrakech by mid-afternoon on a Sunday. The traffic in Marrakech was not nearly as bad as we’d anticipated, in fact it was a breeze compared to Had Dra!!! But it does pay to have your wits about you, and two pairs of eyes definitely help.
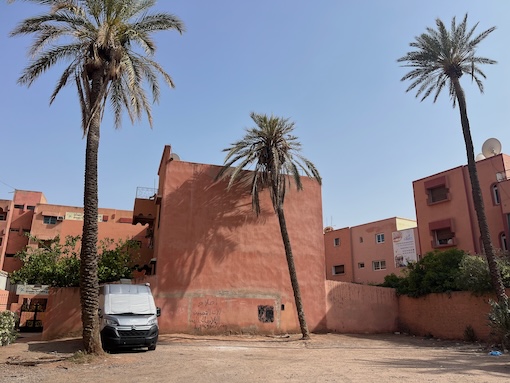
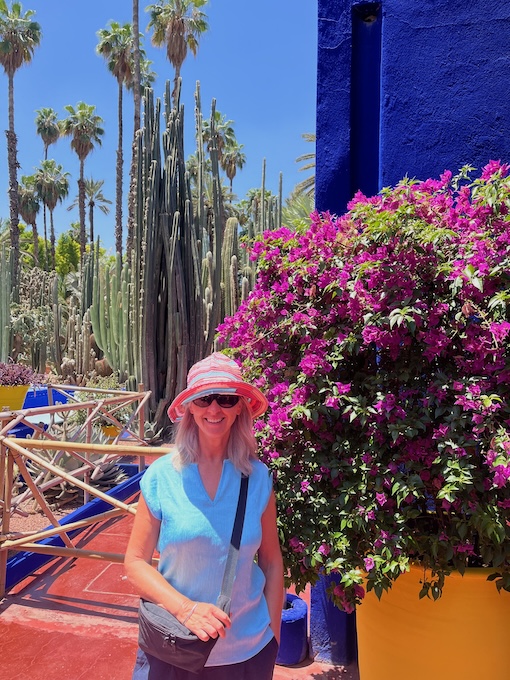
For our first three nights in Marrakech we choose to park up north of the city in a quiet neighbourhood about a half hour walk from Djemaa El Fna, and very close to Jardin Majorelle and the Yves Saint Laurent museum. The combined ticket for the gardens and museums at 330 dirham per person we felt was way overpriced, especially as the Wifi to access the QR codes for English interpretations in the museum wouldn’t work, but the gardens were lovely. Tickets are available online only and need to be booked in advance. We only learned this when we turned up without a ticket and there was no availability! Also the museum is closed on Wednesdays.
The ‘free’ medina walking tour we did with Ismael from Marrakech with Locals [https://marrakechwithlocals.com/] was really great and money well spent.
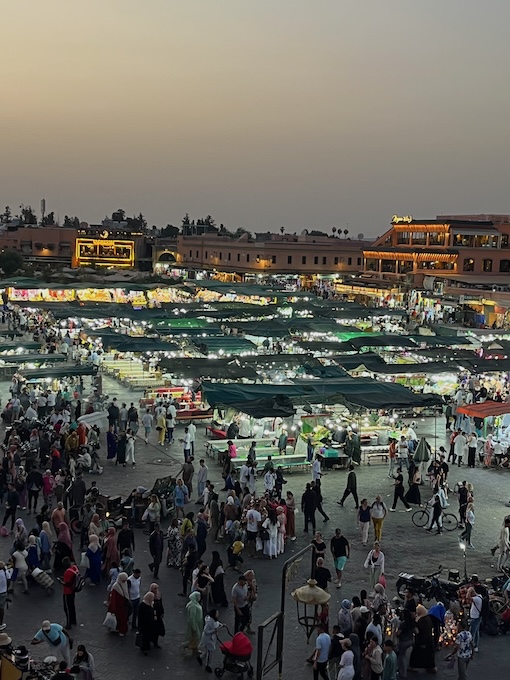
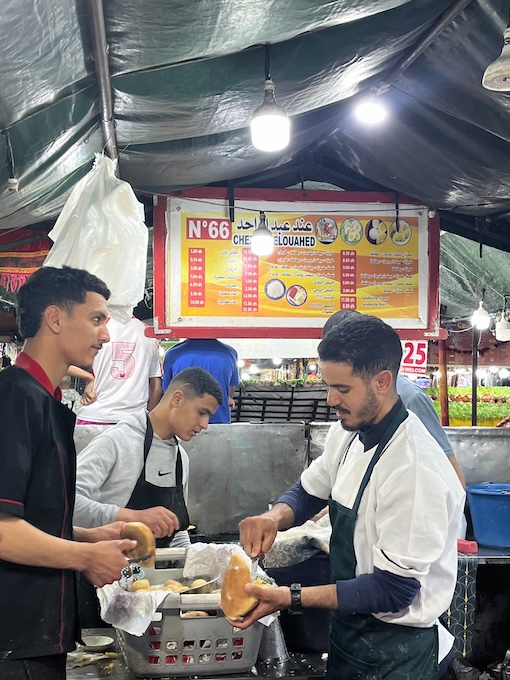
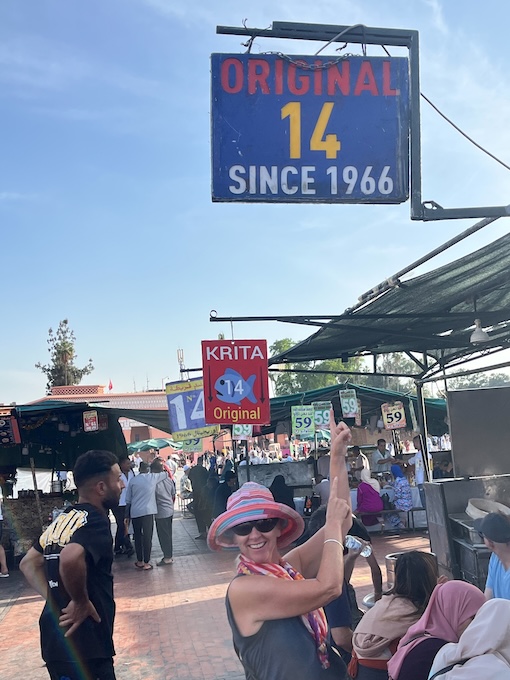
The street food stalls in the main square of Djemaa El Fna are great value and such a good opportunity to sit down and share a table and a chat with local people. The stalls start opening up from about 5pm, and its fascinating to watch them being wheeled in and built up, before being dismantled again at the end of the night. We can recommend Stall 14 for fried fish, and Stall 66 for bread stuffed with boiled egg and potato – cheaper than chips!
If you’re a meat eater then lunch at Chez Lamine Hadj Mustapha just off the square is for you. We had the Tangia Marrakachia, not to be confused with the typical tagine, and the Mechoui Lamb. Slow cooked in the fire of a hamam, both were melt in your mouth meats. It was the most expensive meal of our trip at 380 dirhams (about £30), nothing fancy, but so tasty, and well worth it.
Week 10 of Morocco in a camper van
Marrakech – Oualidia – El Jadida – Azemmour – Dar Bouazza – Rabat – Asslah – Tanger – Tanger Med
Our final week in Morocco!
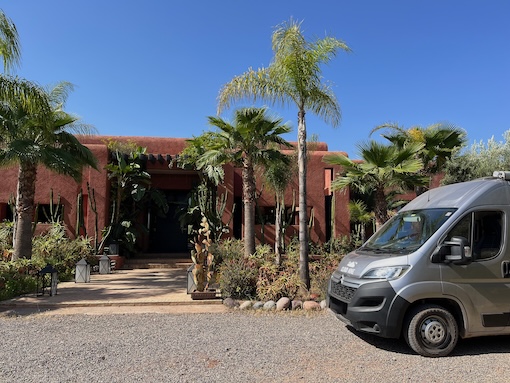
Marrakech is kind of crazy, but leaving it to nearer the end of our trip meant it was less daunting and overwhelming than it might’ve been if it was your first stop in Morocco in a camper van. A couple of nights relaxing by the pool at Camping Le Relais on the northern outskirts of Marrakech was a chilled way to unwind from the sensory overload of this crazy city. Plus we had the absolute privilege of being hosted for a night on the most peaceful property outside the city by a couple who had stayed with us in our Portrush B&B many moons ago!
Campsite parking and parked up at friends place
From Marrakech it was back to the North Atlantic coast, and on the recommendation of our friends we headed cross country to the Oualidia area. This is where the farming communities and fishing villages live side by side. Everything seemed to be growing here in the neatly planted fields which roll gently downhill to meet the sea. Beautiful walking/running trails with views in all directions, and the beaches/lagoons were the perfect spots for swimming. The fish and seafood in the Oualidia area was up there with the best we’ve ever had. Fantastic free places to park up, plus great value campsites like Camping Plage Mrizika behind the sand dunes for 50MAD per night. If we hadn’t had to make moves back towards the UK for the MOT we would’ve definitely stayed in this area longer.
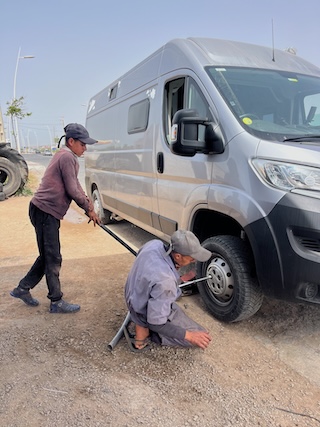
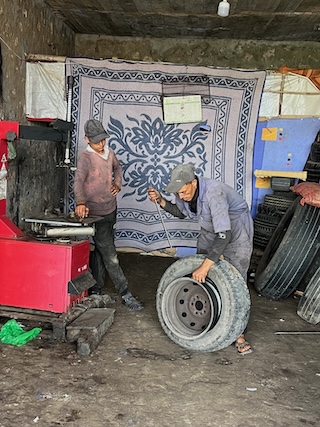
It was time to start making our way north towards the ferry, but before we did we had our first ever puncture in CloudNine to get fixed! An emergency visit to a tyre shack at the side of the road and within 10 minutes the father and son team had removed the screw, patched the tyre up and had us back on the road for less than a fiver!
We stuck to the coastal road heading north, and we made a couple of stops. One to walk the ramparts of the historic Portuguese city of El Jadida, where we watched kids dare each other to make the jump into the water below. The other was to see the street art in Azemmour, but it was barely worth it. We had a perfect seaside pitch in Dar-Bouazza for the night, and the next morning we avoided Casablanca and took the toll road (153 dirham) to Morocco’s capital city Rabat. We were at the point where we’d had enough of historical sites and souks, and fatigue was definitely setting in. The only thing we did in Rabat was visit the National Museum of Photography, and we were the only ones there!
By this stage the average daily temperature was reaching 35C+ and the air conditioning in the van hadn’t been working since we arrived in Morocco! In the search for shade and somewhere to get the a/c fixed we parked up at a campsite in Asilah for our penultimate night of this 10-week trip. We got neither, but we did cool off with a swim in the sea.
The first half of our final day in Morocco we spent negotiating the traffic in Tanger trying to find a mechanic to fix the air conditioning! Thankfully we did as within 24 hours we were driving through southern Spain in 40C degree heat!
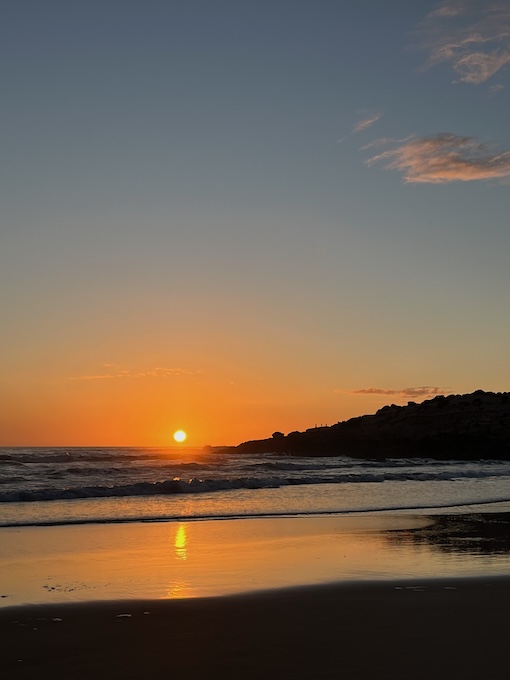
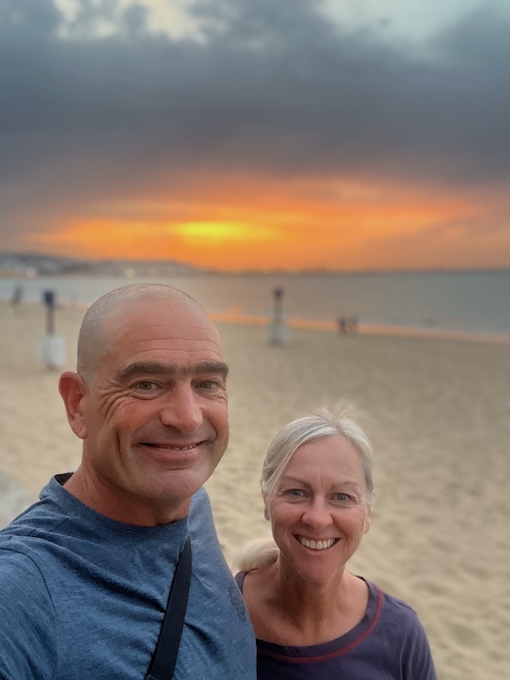
Tanger looked like a thriving vibrant city with throngs of people (we saw loads of cruise ship tourists), but we explored very little. We finished our day with a nice sunset walk on the beach to reflect on our fantastic time in this amazing country. After the most disturbed sleep of the entire trip (lots of boy racers hooning through the car park the entire night) we got up with the sunrise and made the short drive to the port at Tanger Med for the ferry back to Algecerias in Spain.
Fresh haircut & final sunset in Morocco
Leaving Tanger Med Port
At Tanger Med Port we recommend you allow enough time before your scheduled ferry departure to get your ticket validated. The ferry company we were travelling with (Armas Transmediterranea) didn’t open their booth for validating tickets until 8am. Once your ticket is validated you can go through customs and passport control. Then there is mandatory vehicle scans through the x-ray machine which can only take two or three vehicles at a time – this is where the queue can build up. Once your vehicle is scanned the sniffer dogs do their thing before you can proceed to boarding your ferry.
10 weeks in Morocco in a camper van
Our 10 weeks of travelling in Morocco in our camper van were so special and so memorable. Morocco was the 28th country we have visited in our self-converted camper van, Cloud Nine, and the 55th country we have travelled in together.
The Moroccan people might be the friendliest people we have ever met on all of our travels to date.
We stayed 72 nights in Morocco. We stayed in a mixture of guarded car parks, free park up spots, campsites and auberge homestays. The majority of places we found on the Park4Night app.
We spent a total of MAD2,935/£238 on overnight accommodation, an average of MAD41/£3.30 per night.
We covered a total distance of 4,572km/2,840 miles. [Check out our blog post on Driving a camper van in Morocco.]
We spent MAD4,775/£386 on diesel. Diesel was on average between MAD10-11 per litre or less than £1 per litre.
We’ve no idea what we spent on eating out, but whatever it was, it was worth it!
Highlights of Morocco in a camper van
Our highlights in no particular order:
Having a traditional hamam
Hiking/running through valleys, gorges and canyons and mountains
Walnuts – the best we’ve ever tasted!
Staying in the Sahara Desert, both in the camper van and in a tent
Meeting the local people and being invited to homes for tea
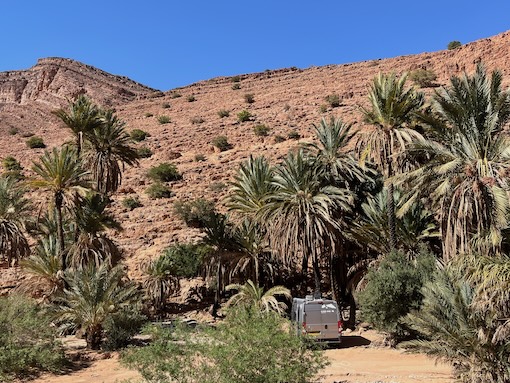
Sleeping under the shady palm groves in an oasis
Berber pizza
Eating fresh fish and seafood caught and cooked by local fisherman
Wandering through the mazes of medinas in small towns and cities
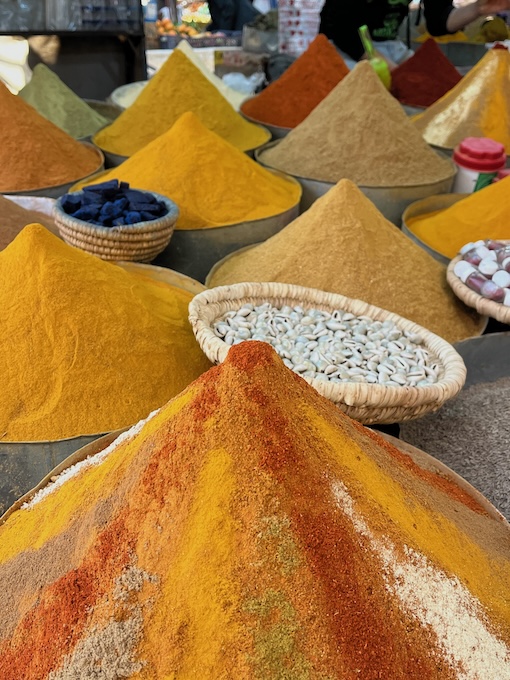
Shopping in the local souks for fresh fruit and veg
Festival in Had Dra
Lowlights of Morocco in a camper van
The lowlights in no particular order:
Sand and dust – get used to it, it gets everywhere, and we mean everywhere! The van will forever carry bits of Morocco!
The stray animals – heartbreaking to see the number of stray dogs and cats trying to salvage scraps to survive
Rubbish – unfortunately you’re never far from a pile of rubbish in Morocco whether you’re in the middle of a medina or in the middle of the desert, its everywhere
If you’ve read this far, thank you! And if you’re going to Morocco in a camper van, have a fantastic trip. Let us know how you get along with your itinerary.
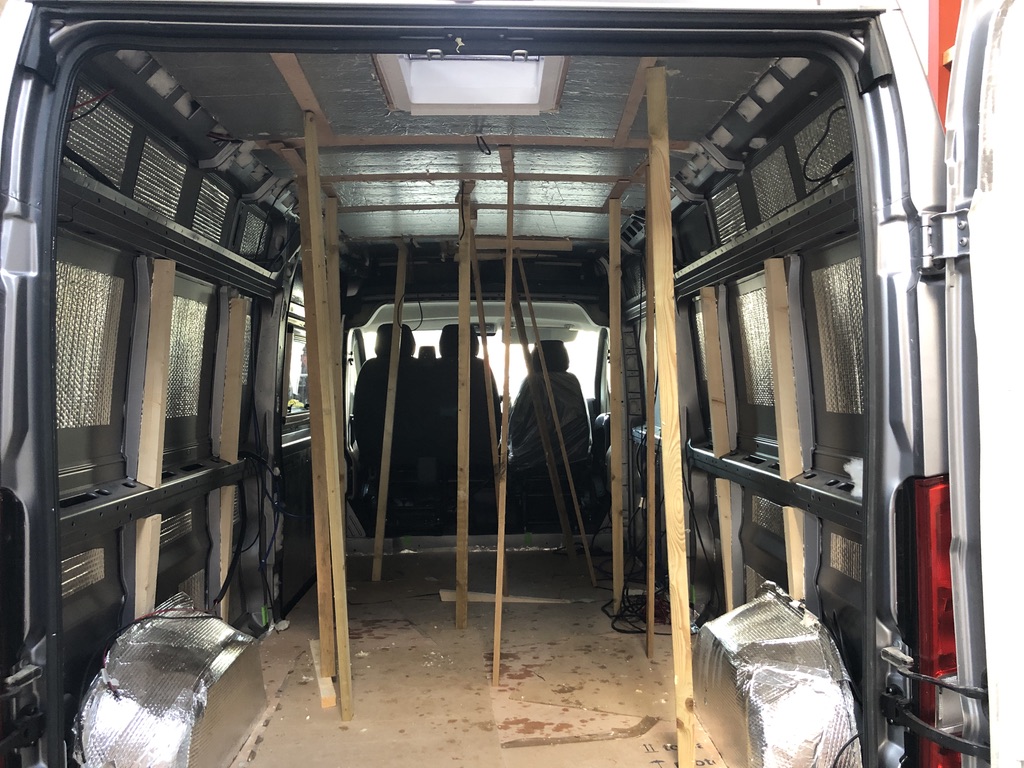
First up we had no experience and no idea where to start on how to build a camper van! That’s where YouTube came in handy. We spent hours sifting through hundreds of YouTube videos on how to build a camper van. Some of it was relevant to us and our van, but so much of it wasn’t. Our logic told us to start from the floor up. After all you’d never start building a home without putting some foundations in first!
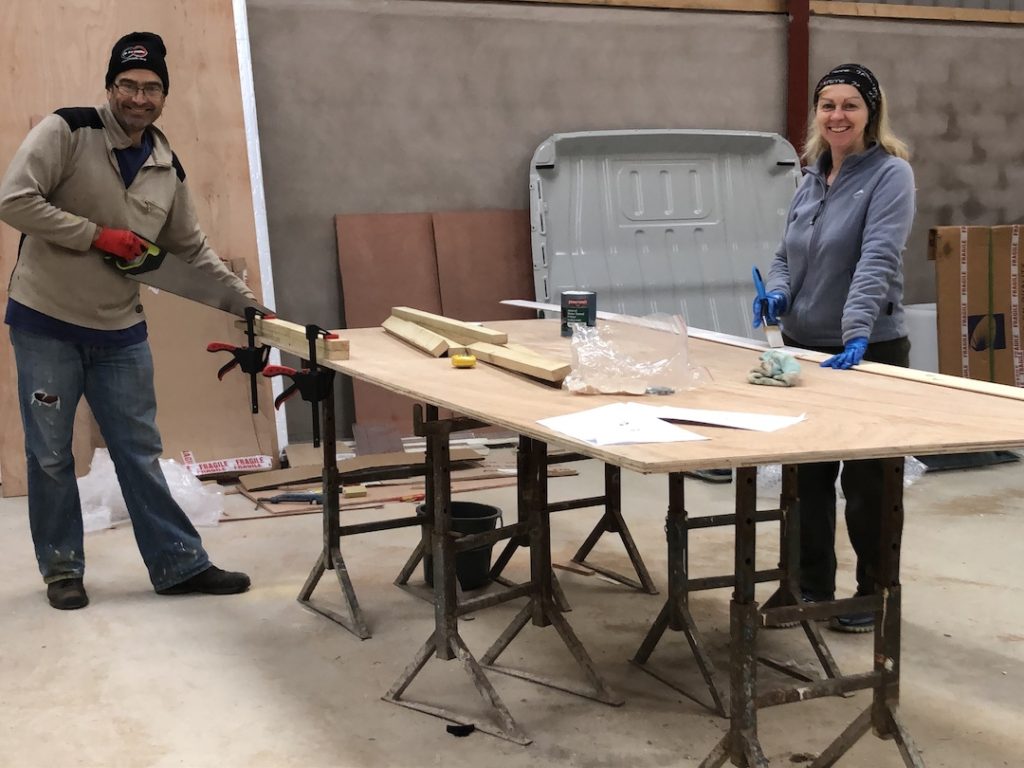
Secondly we had no garage to work in! That’s where friends come in handy. A friend very kindly gave us the use of his brand new shed to work in. It was less of a shed, and more of a barn the size of a 5-a-side football pitch! We had oodles of space to spread out, and we could work on the build whatever the weather. And we can tell you it was cold! We take our hats off to anyone who managed to build a camper van in their driveway or on the street, especially if, like us, they built it during the winter.
Armed with the internet and a roof over our heads we started our camper van build the first week of December 2020. Here follows the very rough step-by-step process we used to convert a Citroen Relay panel van into a camper van. There is no guarantee that the same process would work for you, but it might give you a starting point.
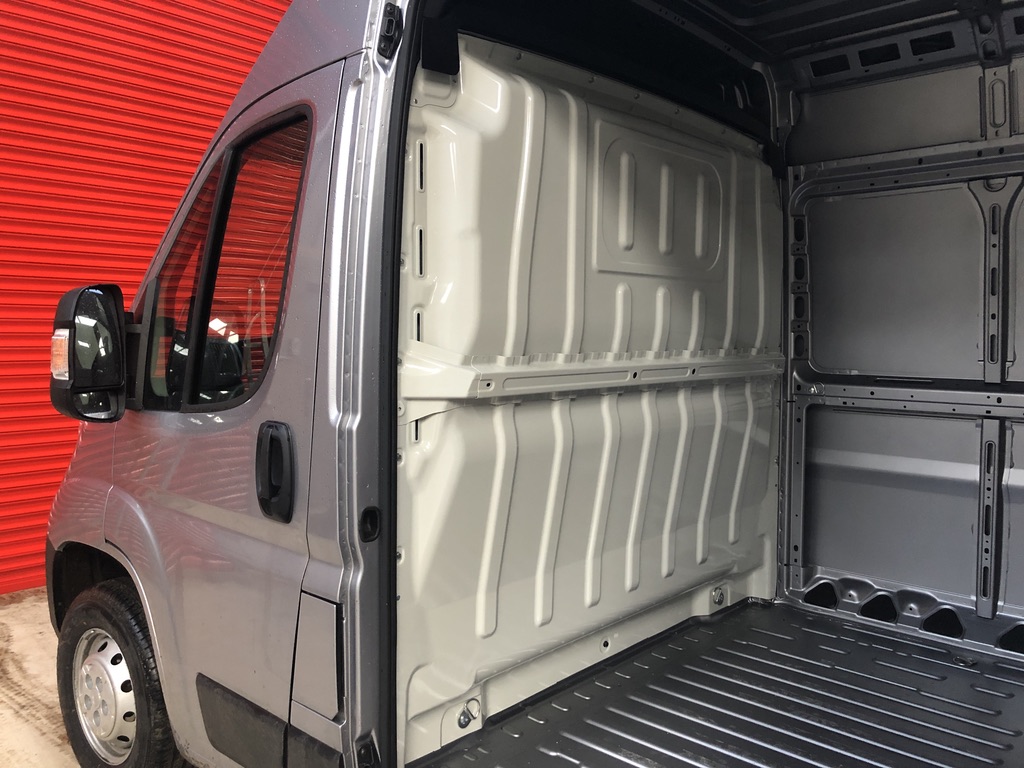
It’s worth saying here that we did have at least a vague design of the layout we wanted before we started the build! We’d gone as far as creating a mock layout of the main features using cardboard boxes to get a feel for how it would all fit. Keep in mind our Citroen Relay van was brand new so we didn’t have to degrease it or treat any rust spots in preparation for the build.
If you want to know why we chose a Citroen Relay van for our camper van build then head over to this blog post.
This post may contain affiliate links. As an Amazon Associate we earn from qualifying purchases.More info in our Privacy Policy.
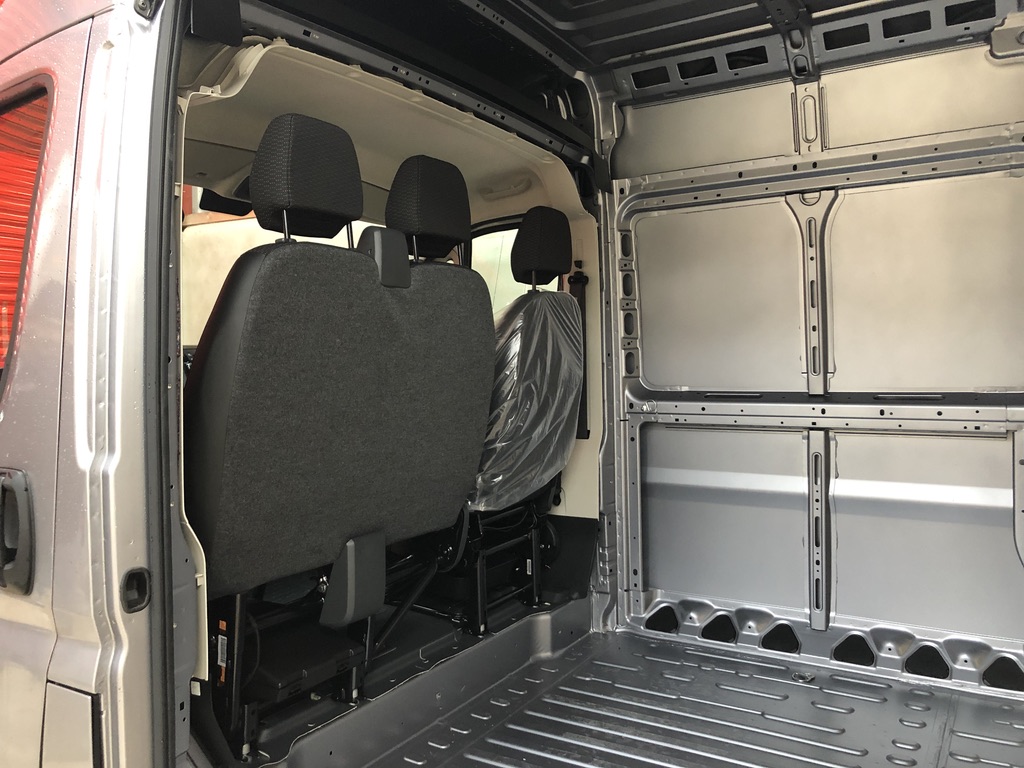
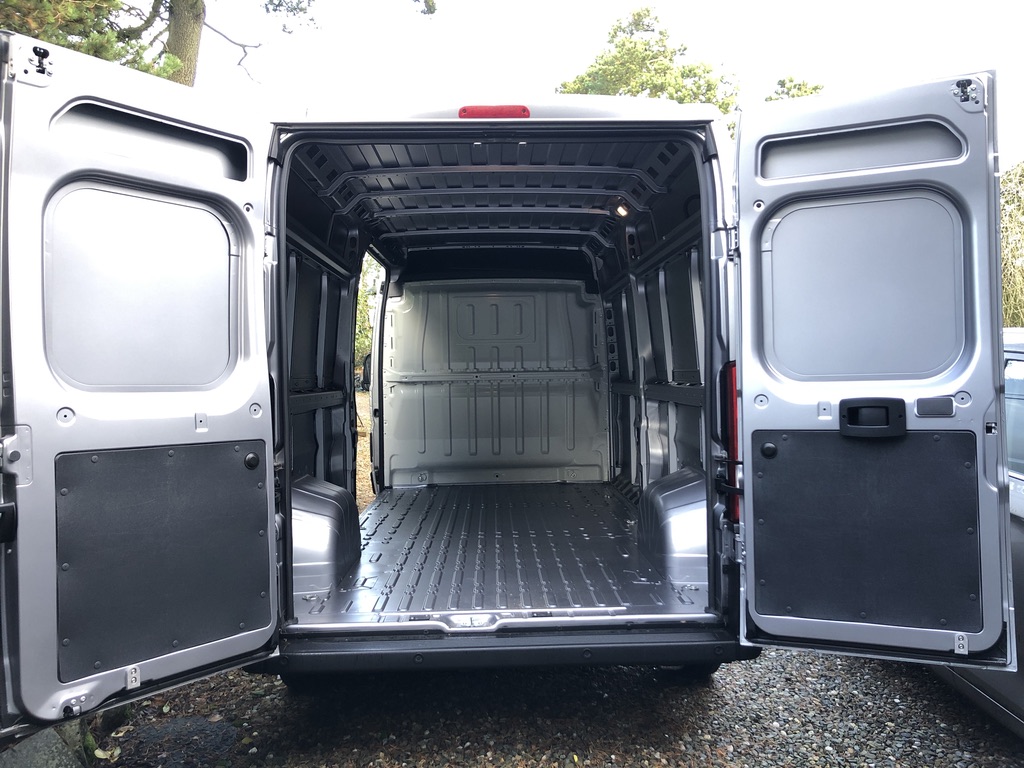
The first thing we did was we removed the bulkhead – the divider between the cab and the rear of the van. In our van design we wanted the area between the cab and the rest of the van to be open so that eventually we could have a walk-through area. This would mean on a rainy day (of which there are many in the UK) we could walk from the cab into the back of the van without having to open the side doors.
It also means you have quick access to the cab should you need to drive away from a park up in the case of an emergency, particularly at night time. Plus it gives you more space to work in during the build process!
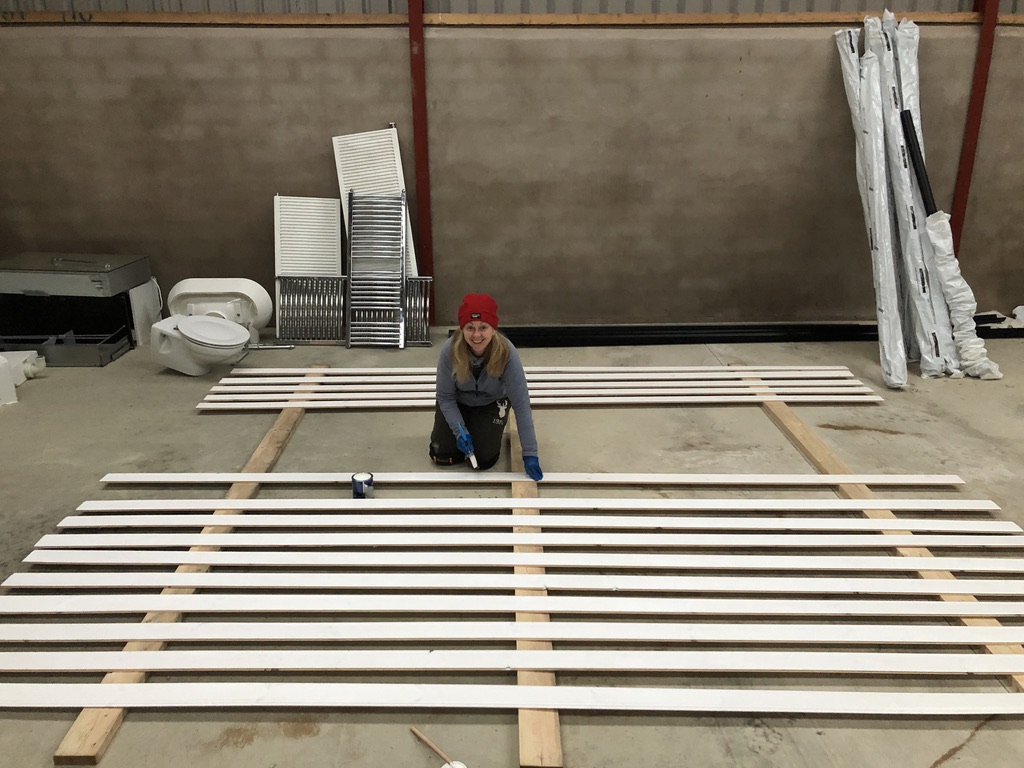
Laying the floor
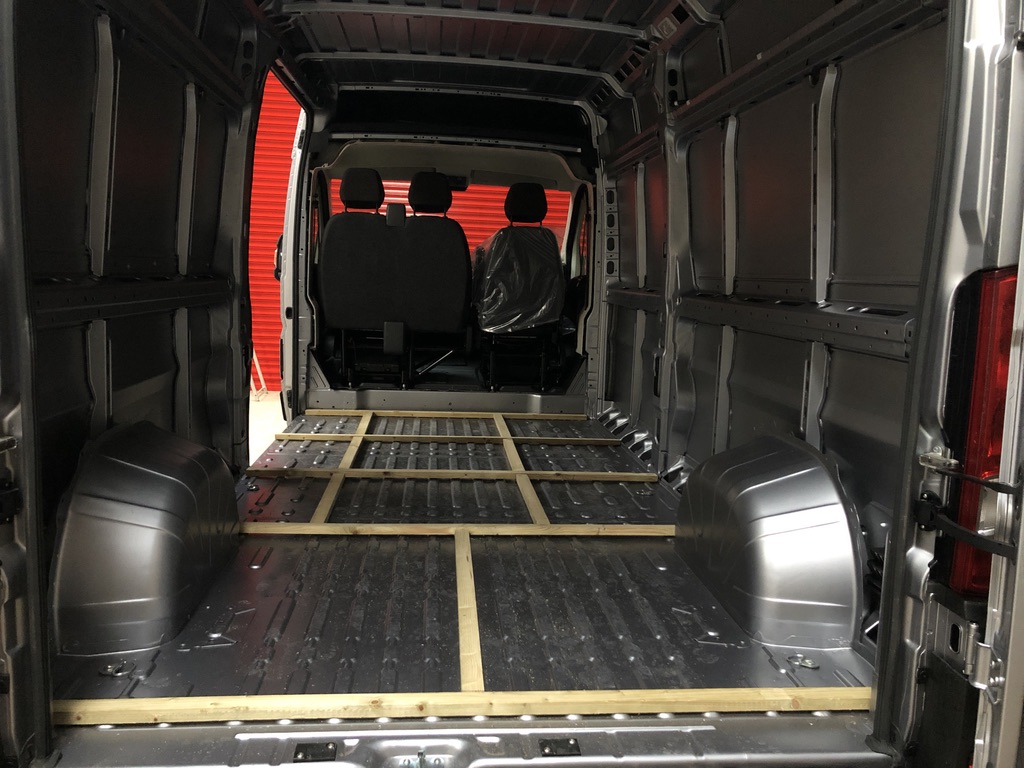
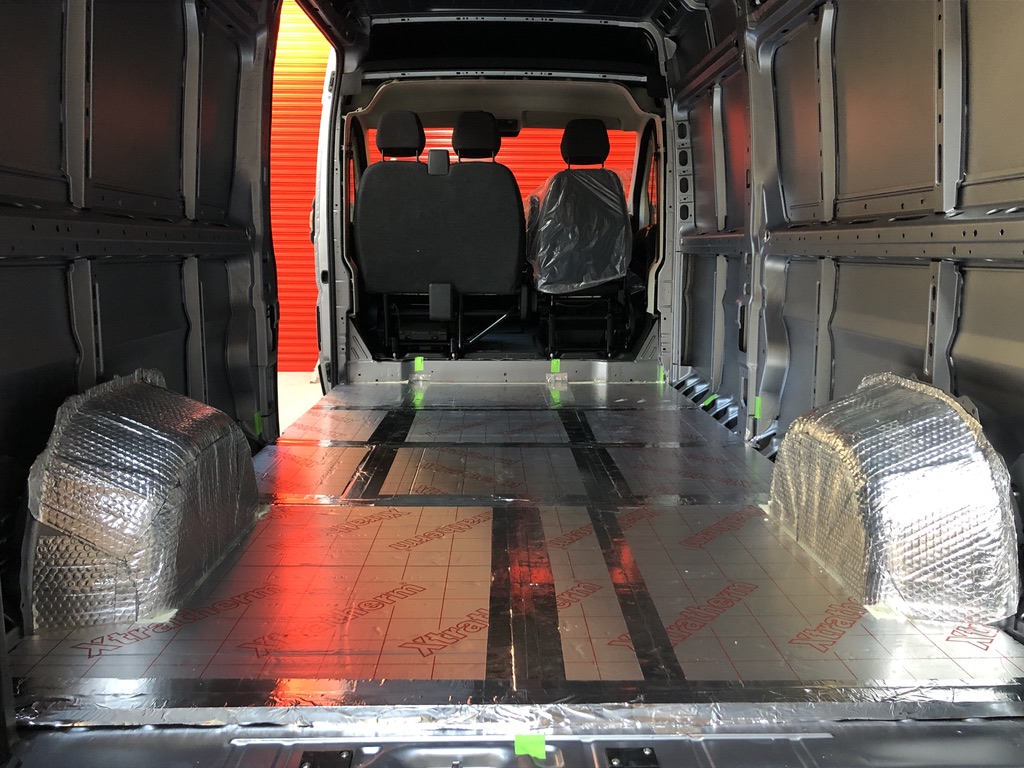
Next up for us was laying the plywood floor – having a level and insulated floor to work on rather than the cold metal corrugated van floor made sense to us. Plus it made it much easier to stand on in winter!
We laid a grid of 2×1 battens using Sikaflex 552 adhesive to fix them to the floor (we didn’t want to drill any unnecessary holes in the floor). We filled the floor grid with rigid insulation boards (25mm thick) and sealed them with aluminium foil tape to create a vapour barrier before we screwed the 12mm ply boards to the battens.
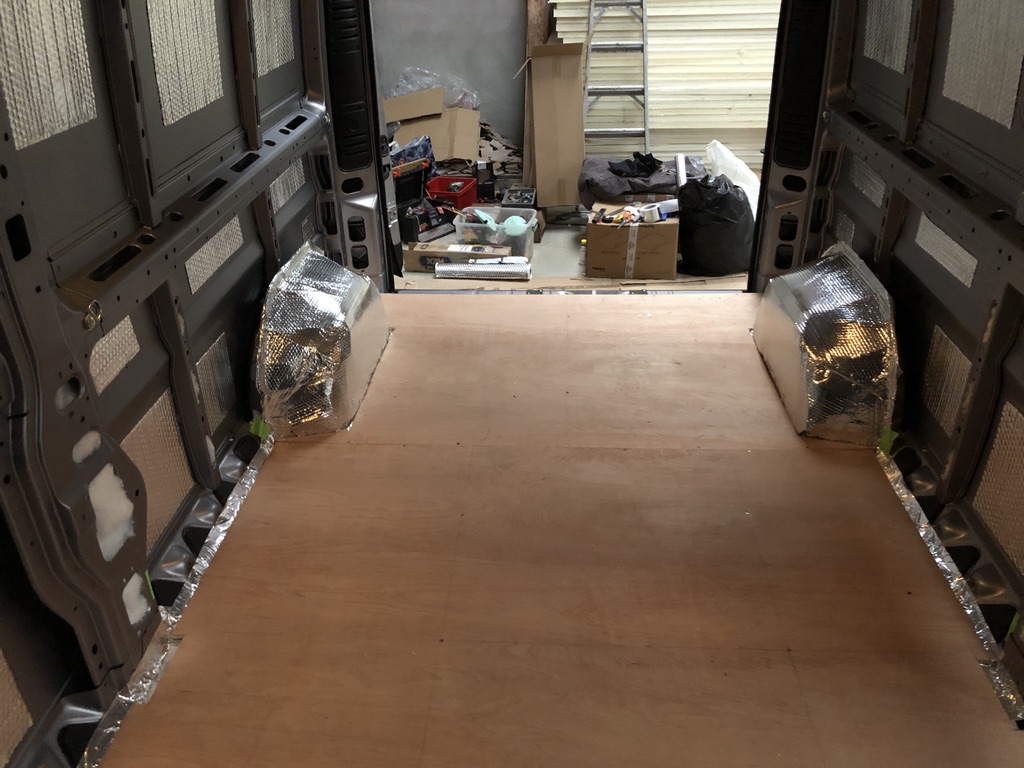
The top floor covering we left to near the end of the build process for two reasons – 1. it would likely get damaged while we work on the van build, and 2. it didn’t make logical or economical sense to us to lay a top floor covering the entire length of the van when at the end of the build you would only see a tiny portion of it.
Sound deadening
A tin van is always going to sound tinny, but adding sound deadening mats to the walls can help to reduce some of the noise, and provide a little extra insulation. We opted for Dodo Mat Sound Deadening and applied it to the wall panels, the overhead cab, the ceiling and the wheel arches. A relatively cheap and easy job to do, made easier by investing in a long reach mini paint roller to smooth out the mats and get rid of any air bubbles.
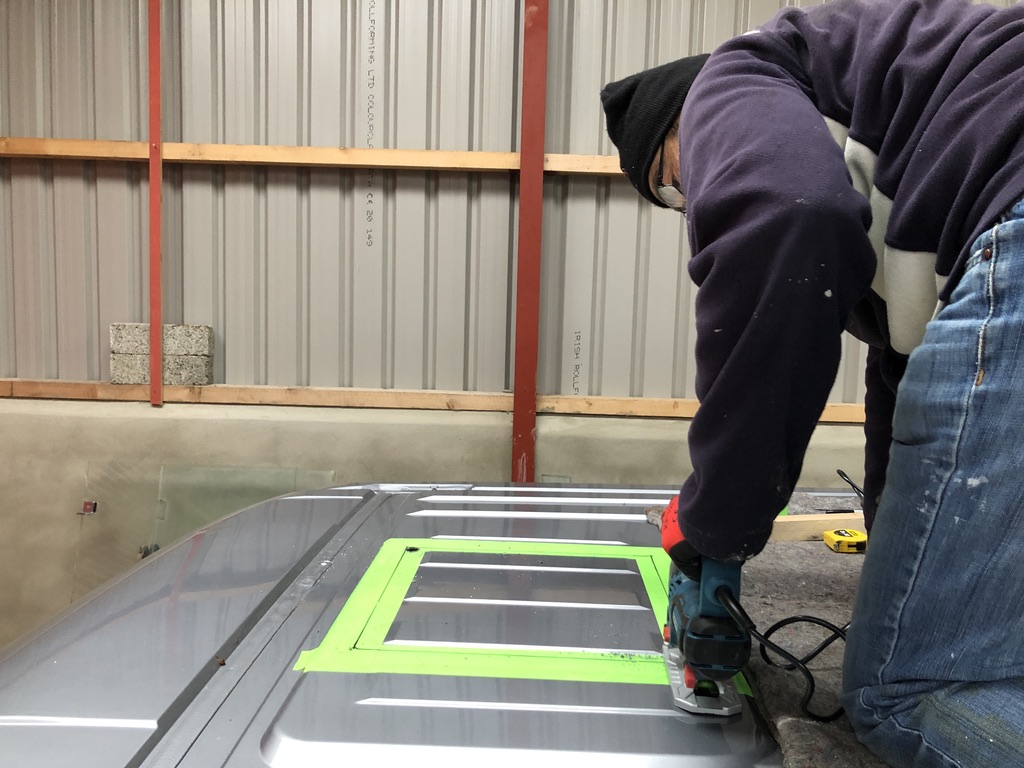
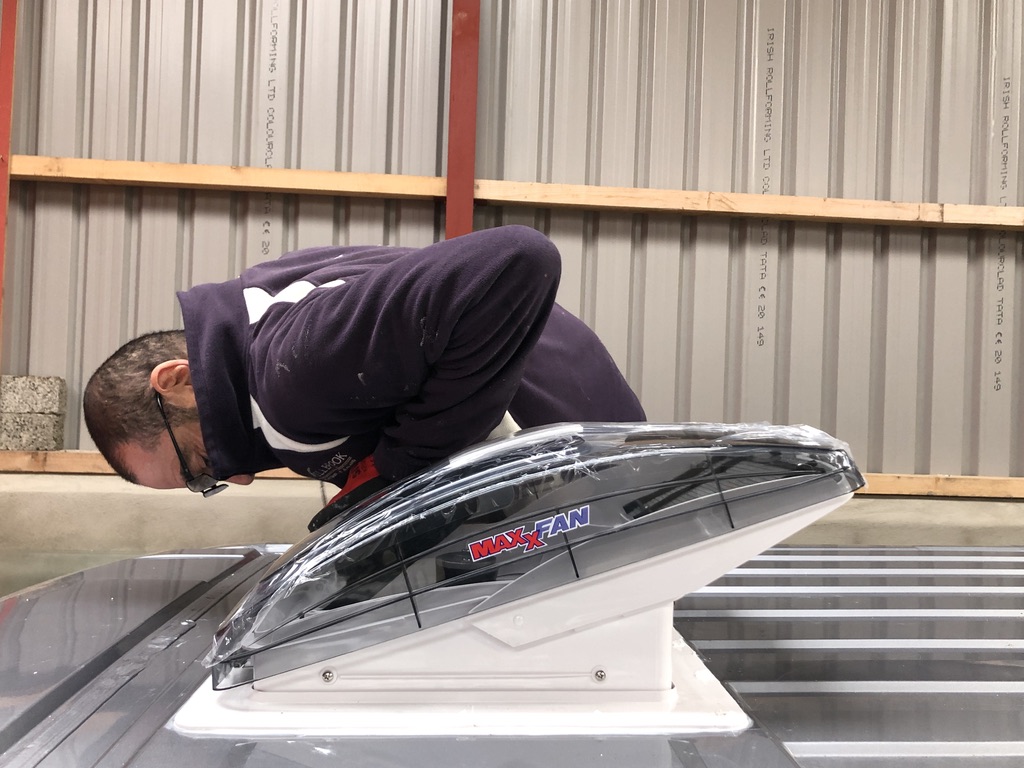
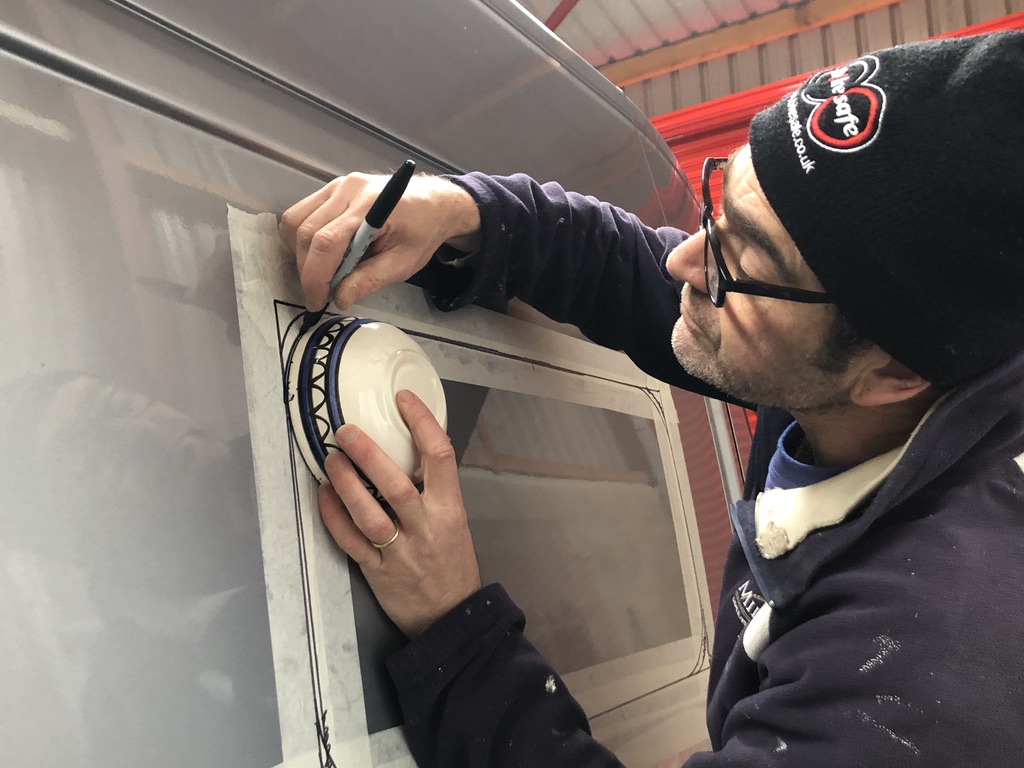
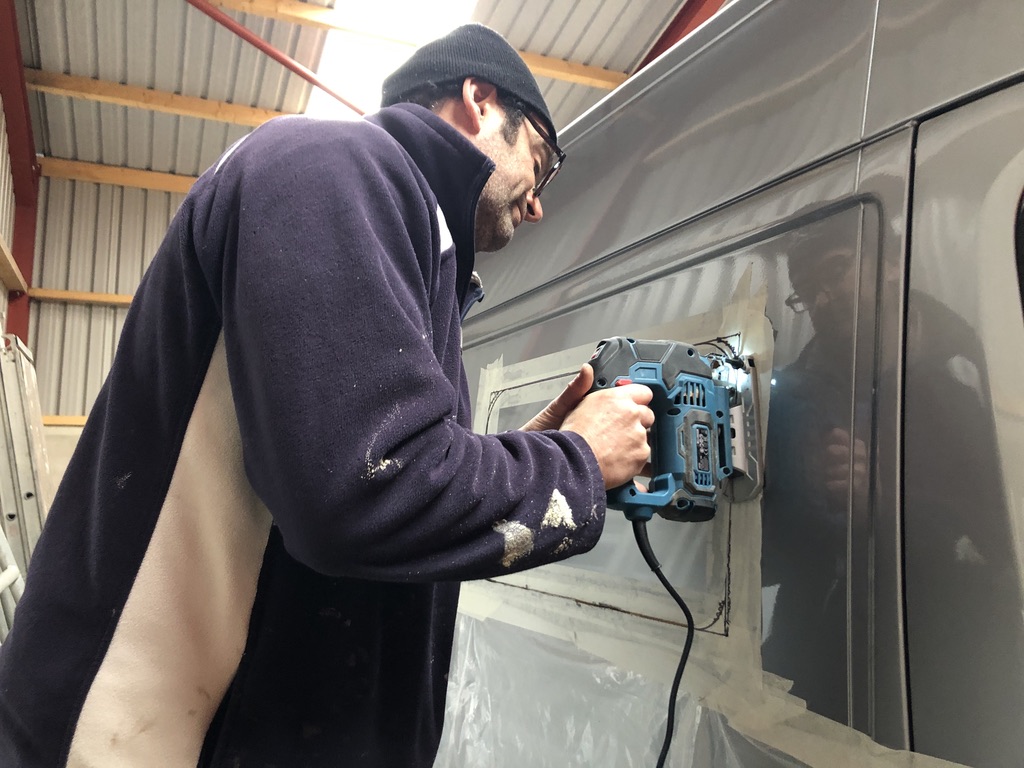
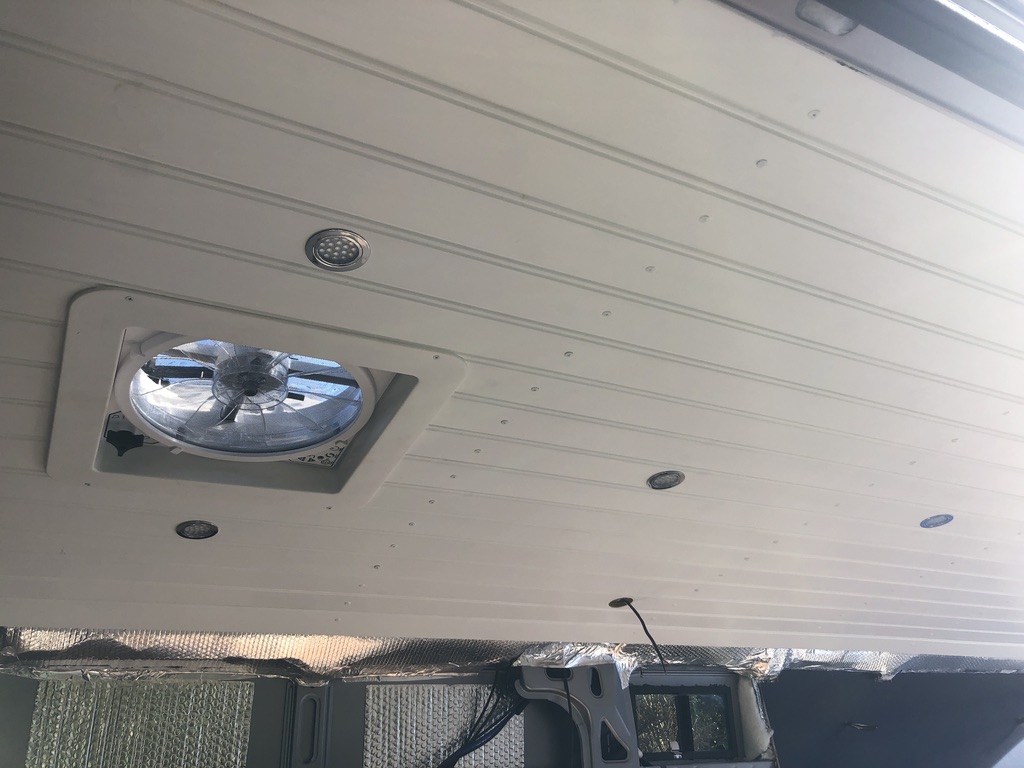
Installing the roof fan, sky light and windows
These jobs were scary! Cutting that first hole in the van is a tense moment to say the least. Make sure you measure at least twice as you can only cut once! We must’ve measured and re-measured a hundred times!
Remember as you cut into the metal, the jigsaw creates loads of tiny metal shards and it is best to clean these up as soon as possible before they create potential rust hazards.
We chose the Maxxair Roof Fan Deluxe 400x400mm with remote control, and the same size Maxxair SkyMaxx sky light with built in blind and flyscreen.
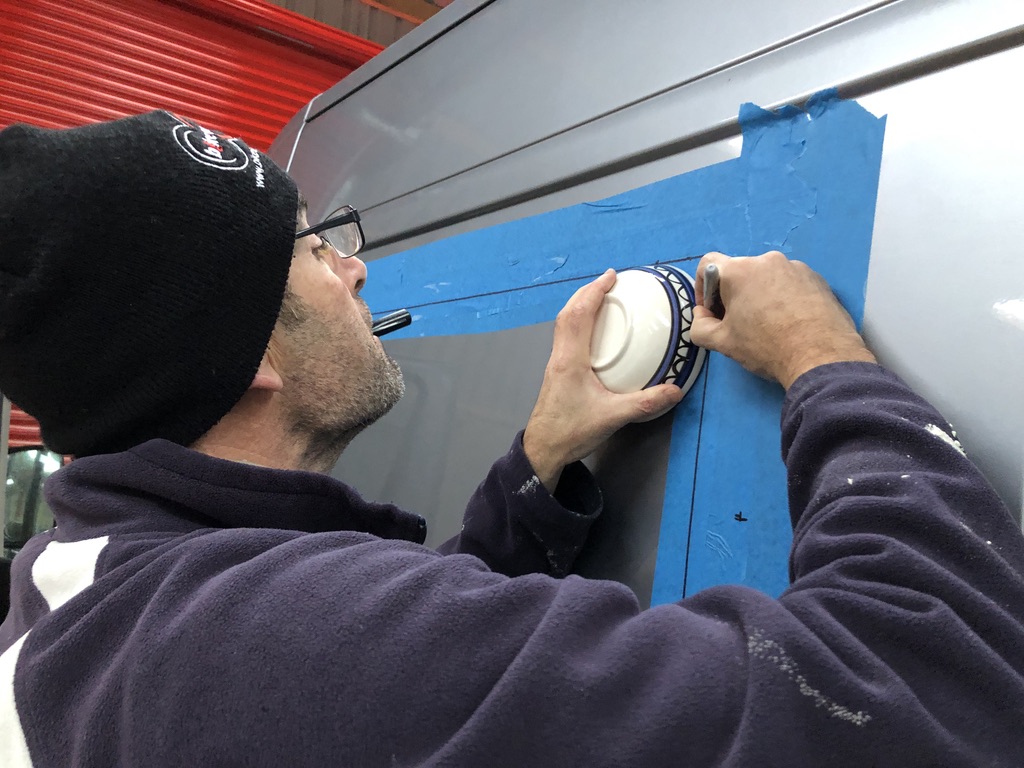
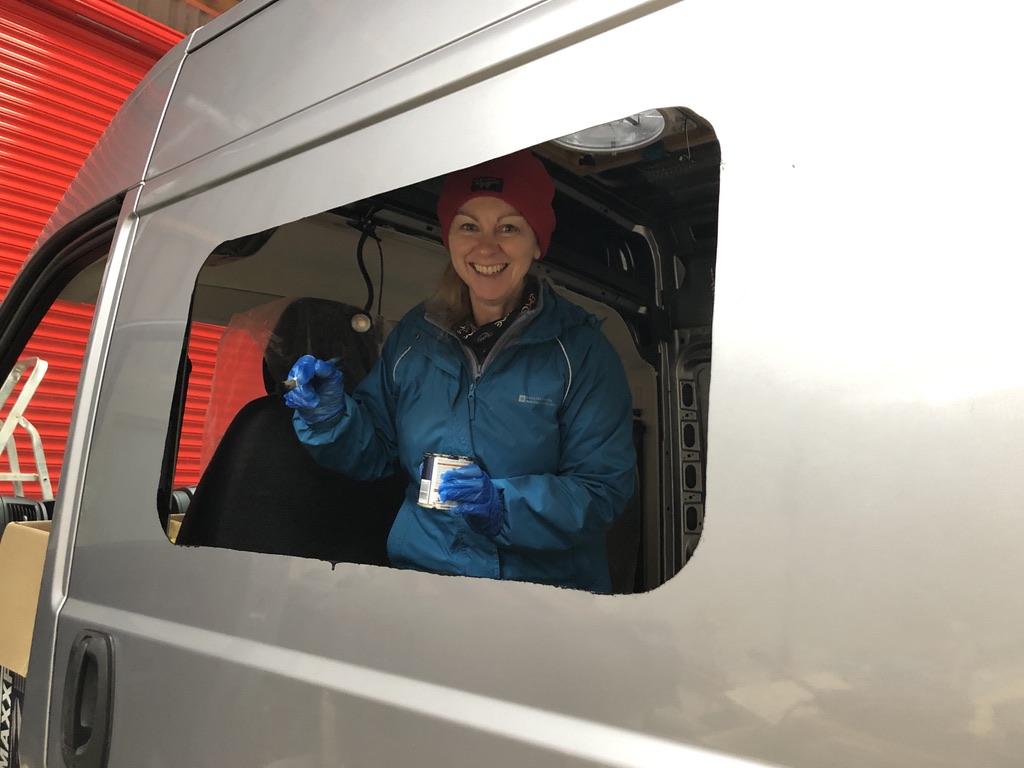
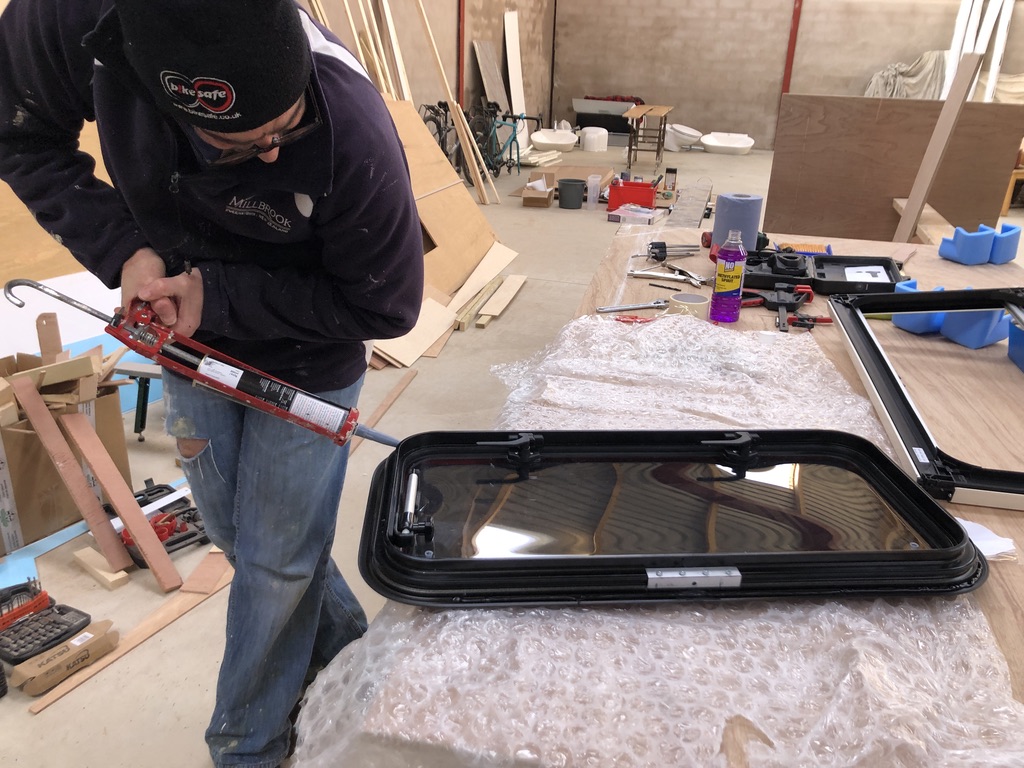
We wanted opening windows rather than glass panels, and shopped around until we found the Polyvision Aero windows we liked. They weren’t cheap, but are double glazed, tinted, and come complete with mosquito nets and blinds. We fitted one window (900x450mm) in the sliding door, and the other window (700x350mm) in the opposite wall.
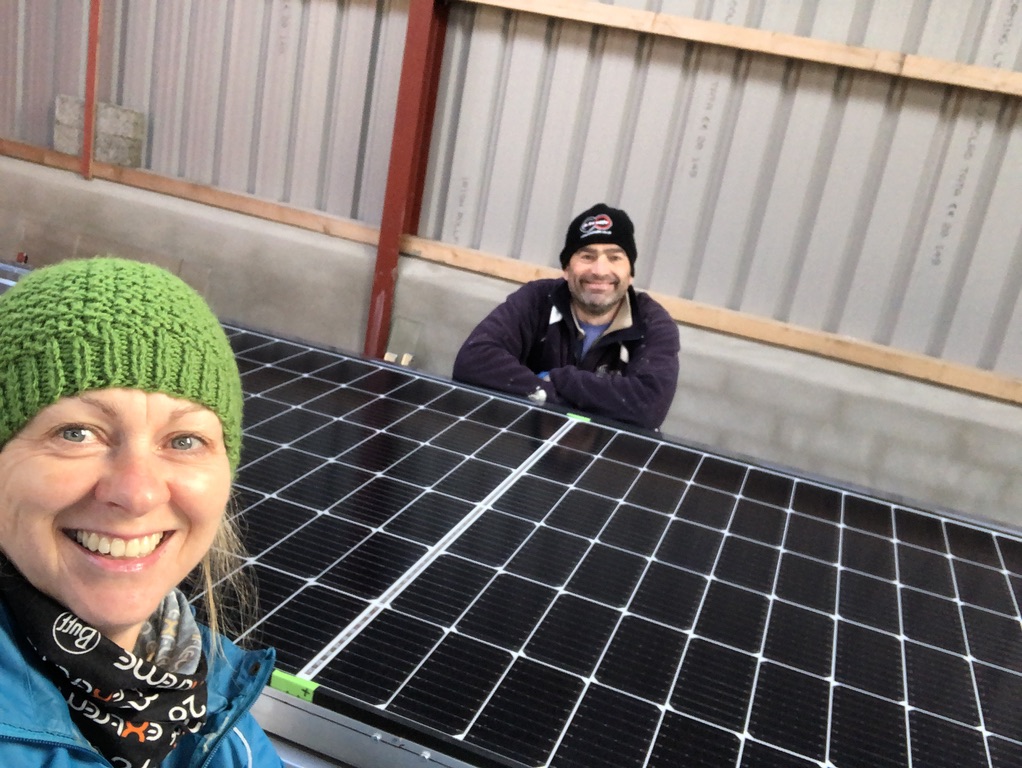
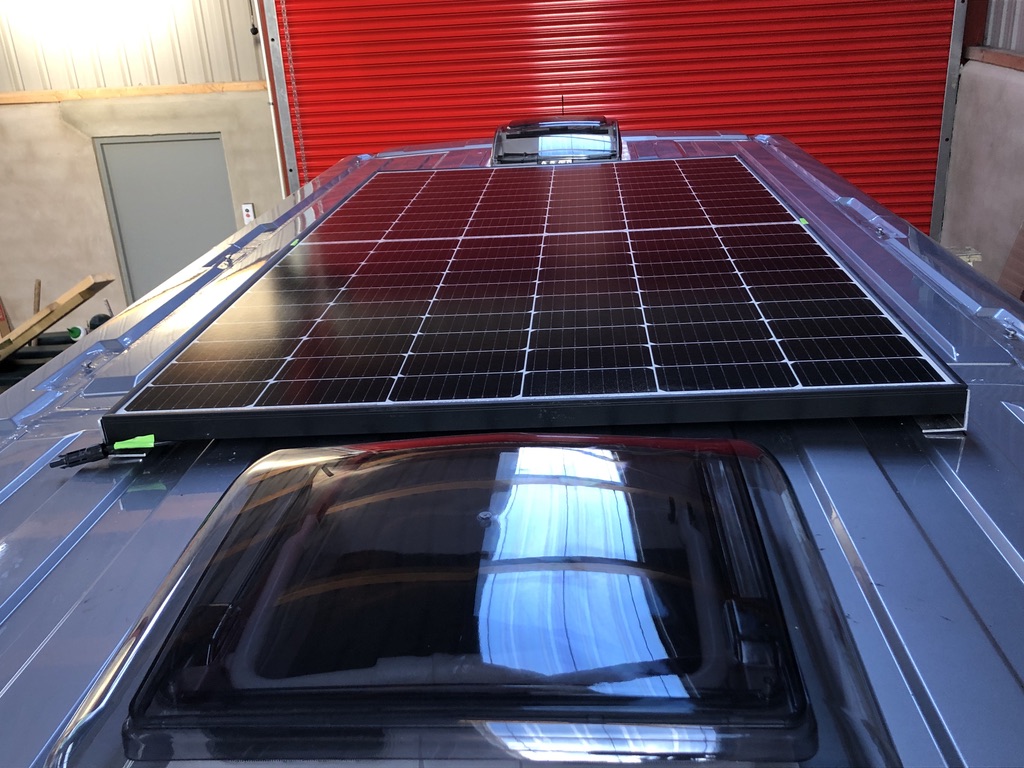
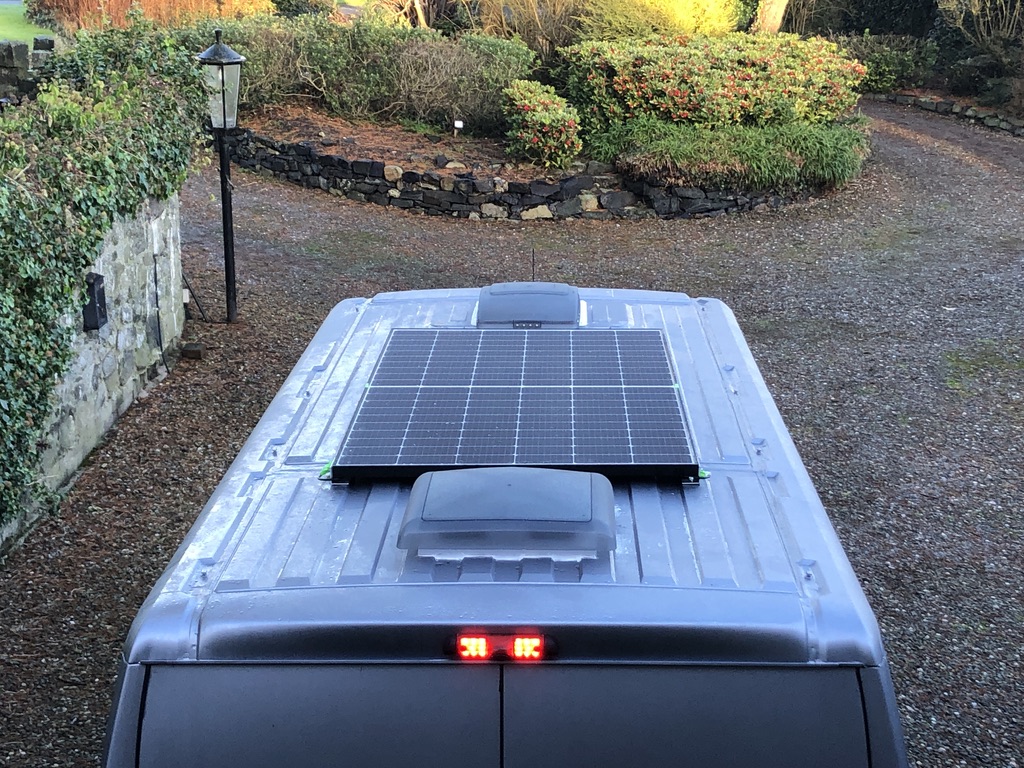
This was definitely a job for the two of us! We bolted the solar panel to aluminium quadrant brackets and then used the same Sikaflex 552 waterproof sealant to attach it to the roof. The panel we fitted was a Longi 370W split cell solar panel from Plug In Solar.
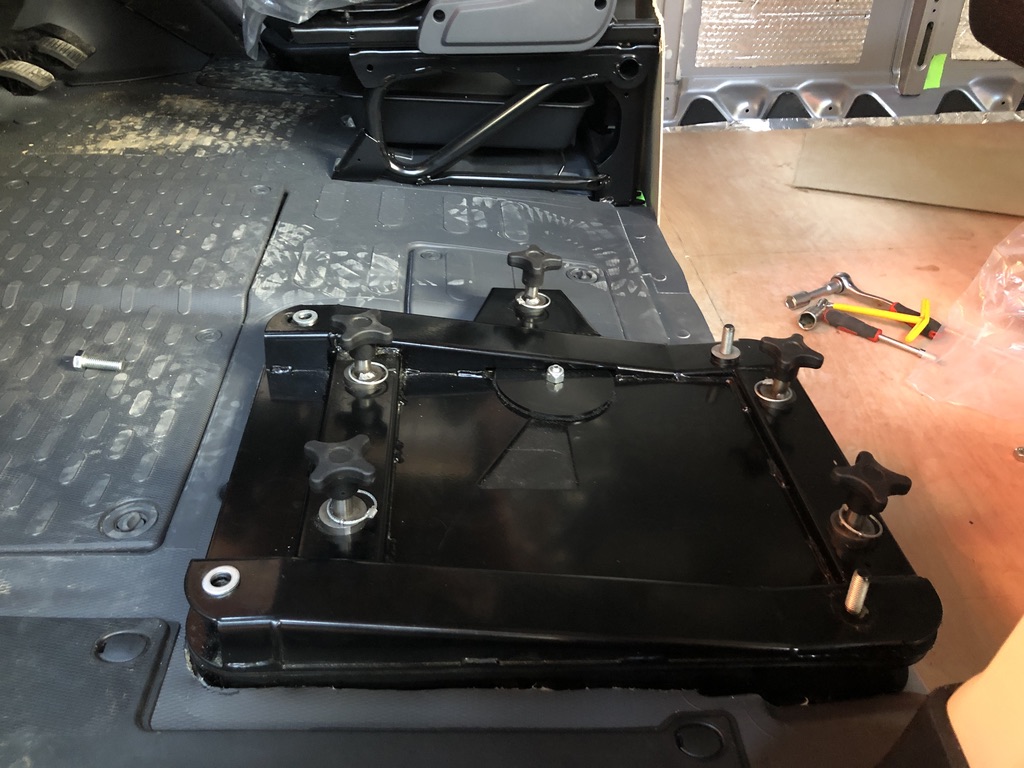
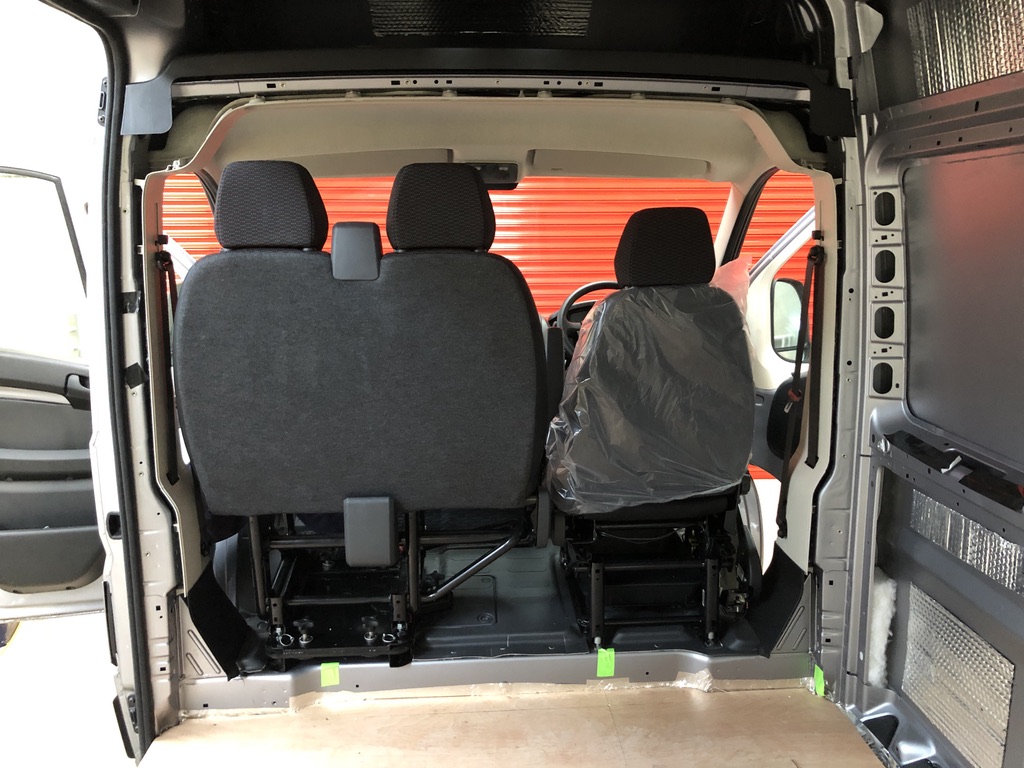
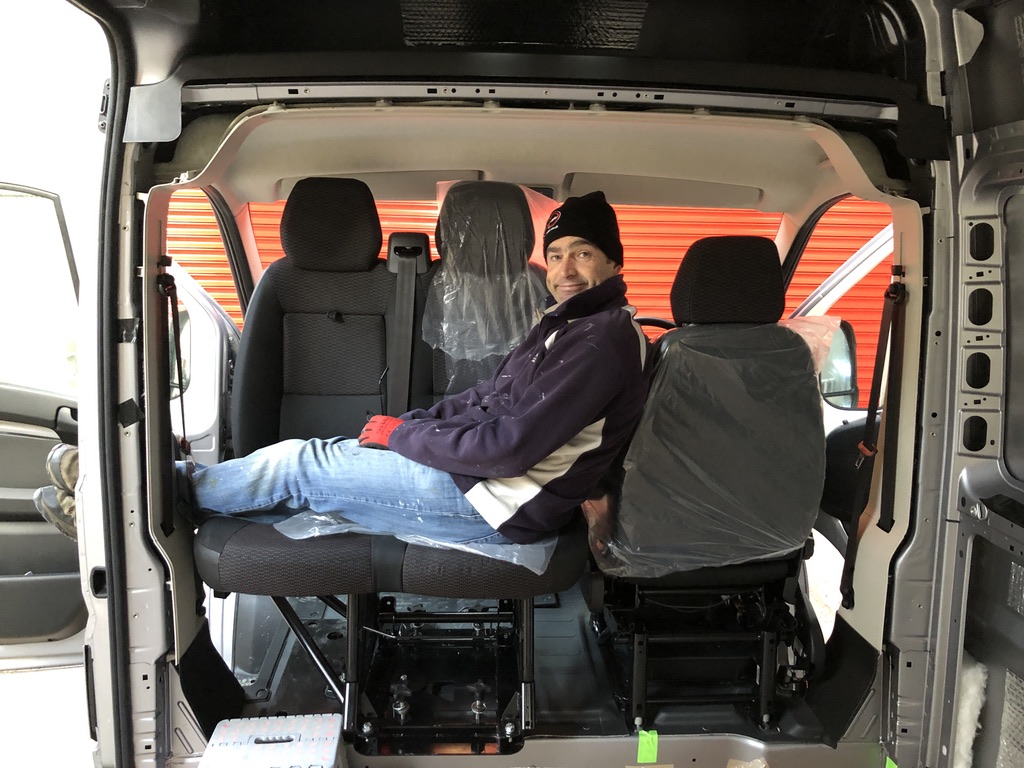
Adding a swivel base to the passenger seat
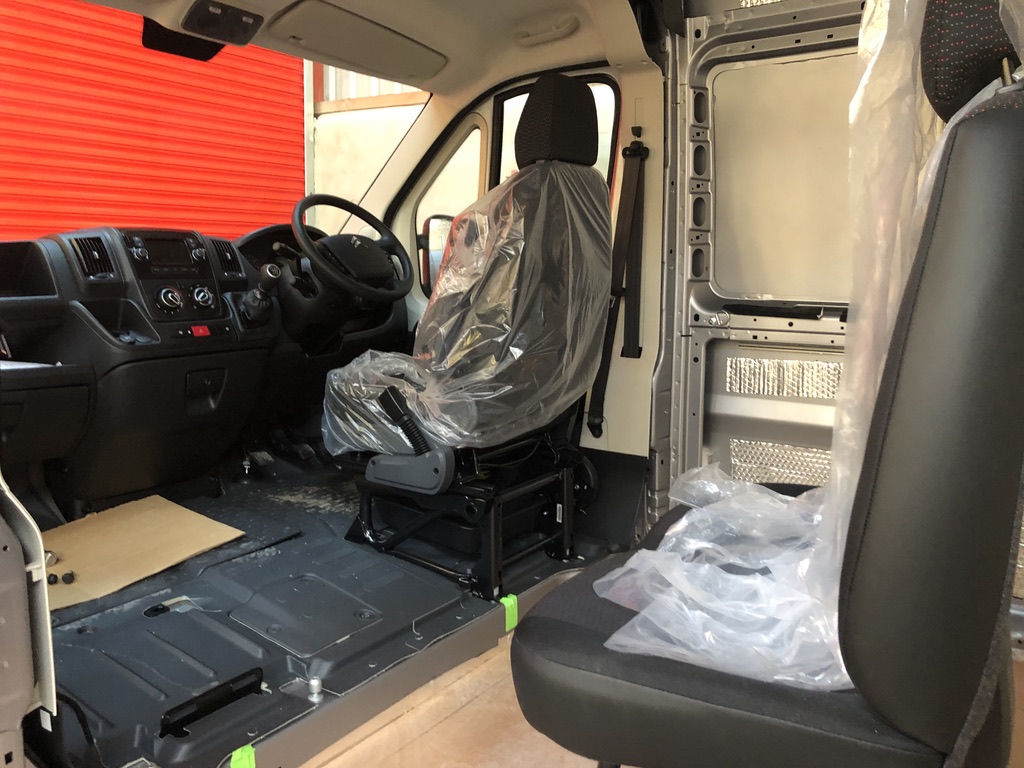
Our Citroen Relay van came with a fixed double passenger seat, or bench seat as they’re sometimes called. Ideally we wanted to replace it with a single swivel seat, but finding one at a reasonable price during the lockdown of 2020 was proving impossible. Instead we opted for a swivel base for the double seat from Custom Shop Designs.
It’s a bit cumbersome and adds a bit of extra height to the passenger seat which means my feet can’t touch the floor, but it will do until we find a replacement single seat we can afford.
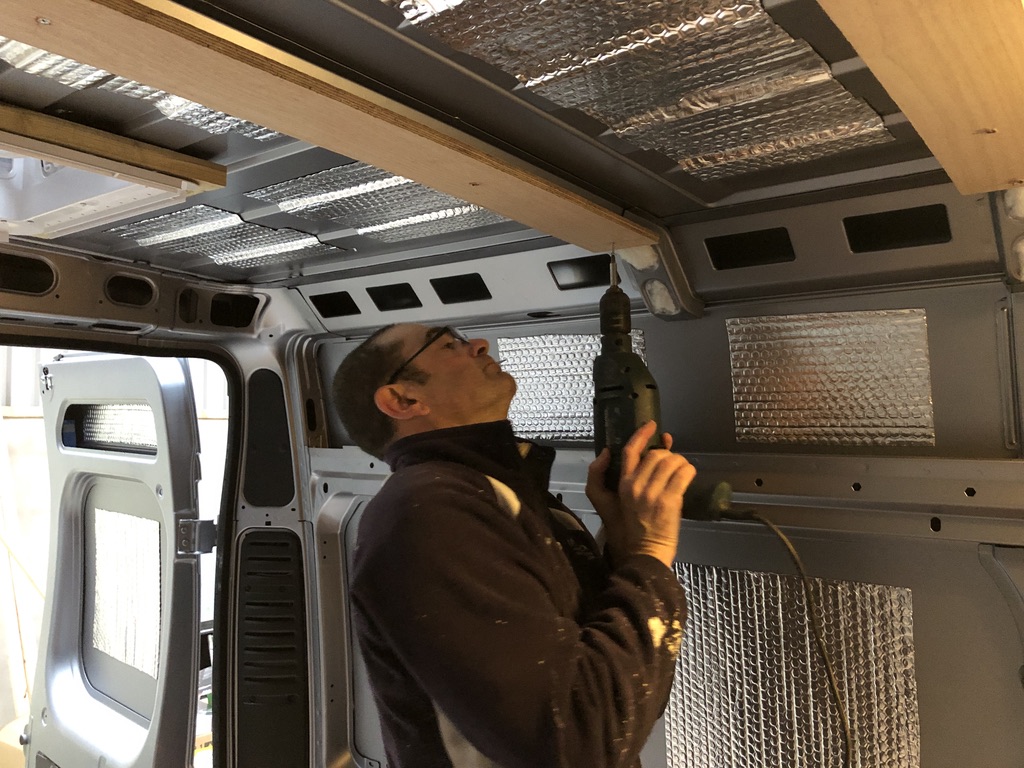
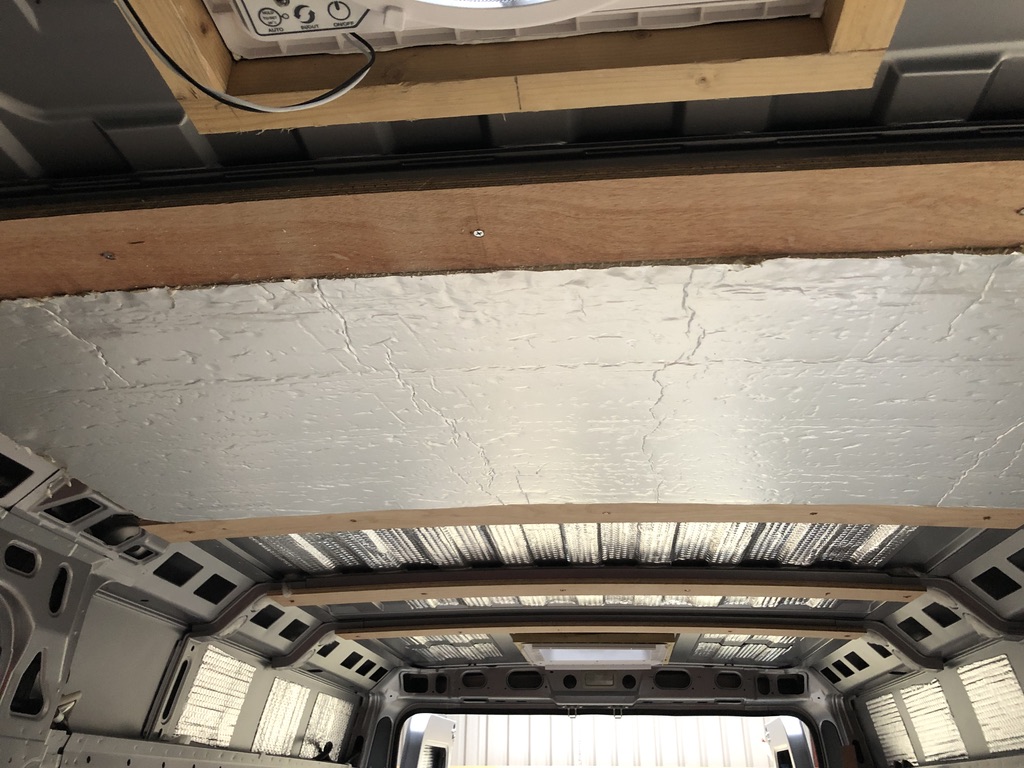
Ceiling battens & insulation
We used 15mm hardboard as battens widthways across the ceiling and glued and screwed them to the ribs of the van. We filled the ceiling with 40mm rigid insulation boards and sealed it all with aluminium foil tape to create a vapour barrier.
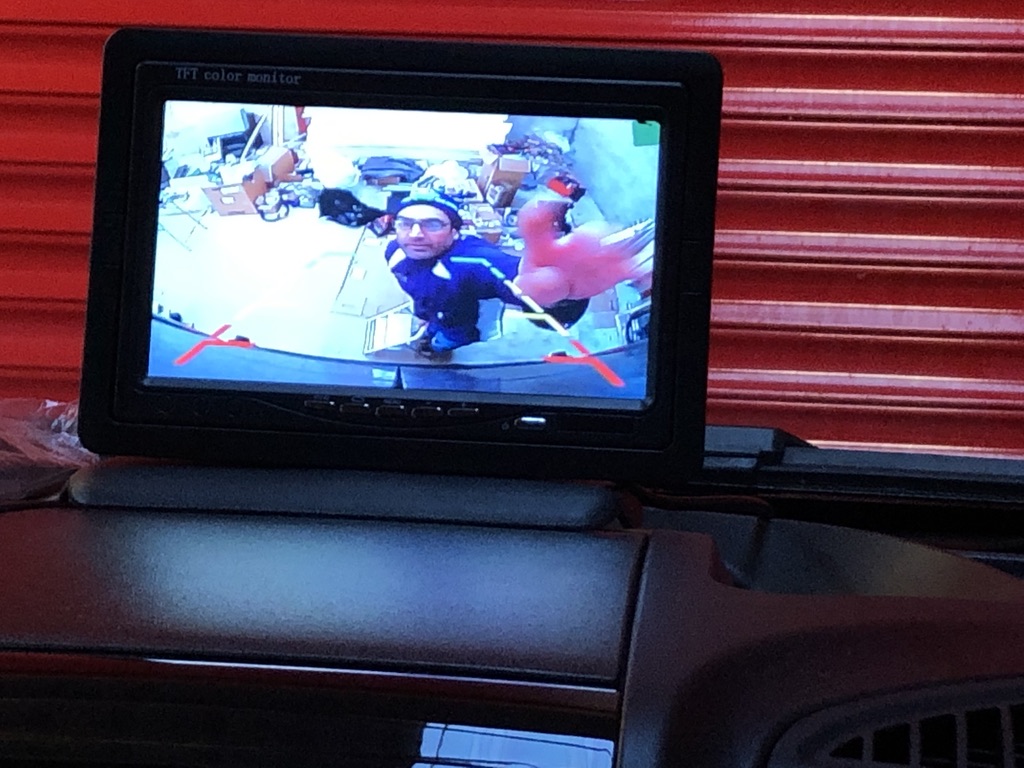
Installing a reversing camera & dash monitor
With no rear view mirror in the van, the reversing camera and dash monitor was an early priority for us. This was the first of many things we ordered only to find when they arrived they were not the items we ordered! Anyway when we did eventually receive the right camera, the installation was pretty straight forward. Although we have to admit it was a little scary when faced with the van fuse box and the decision of which wire to cut!
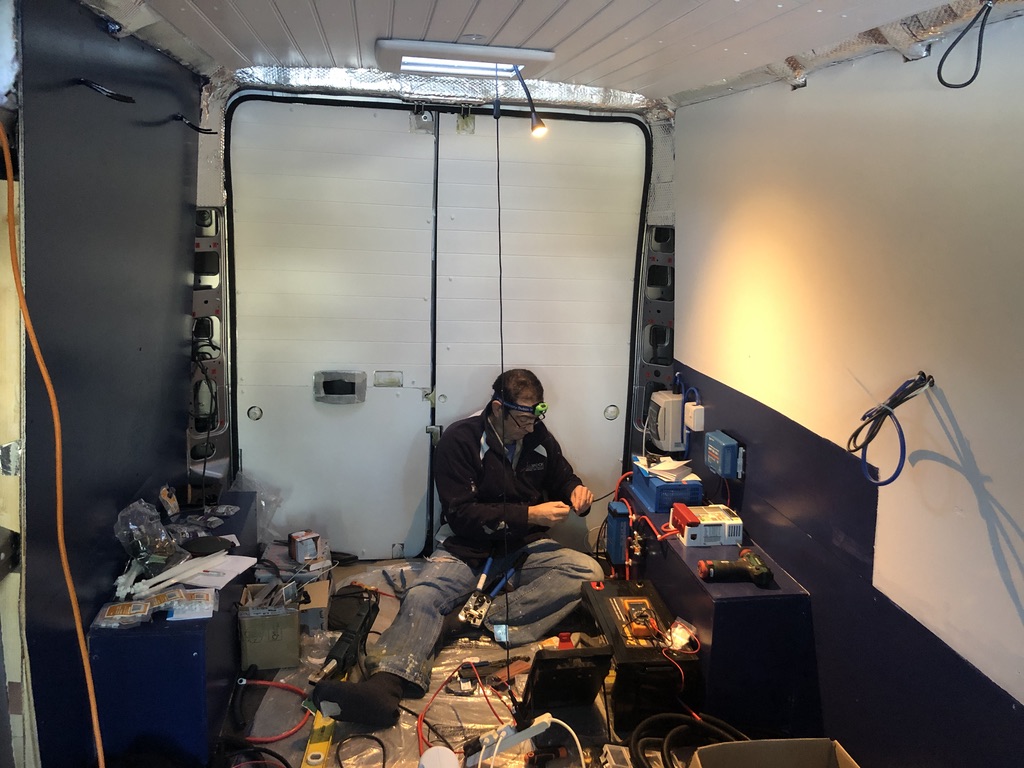
Electrical System – first fix
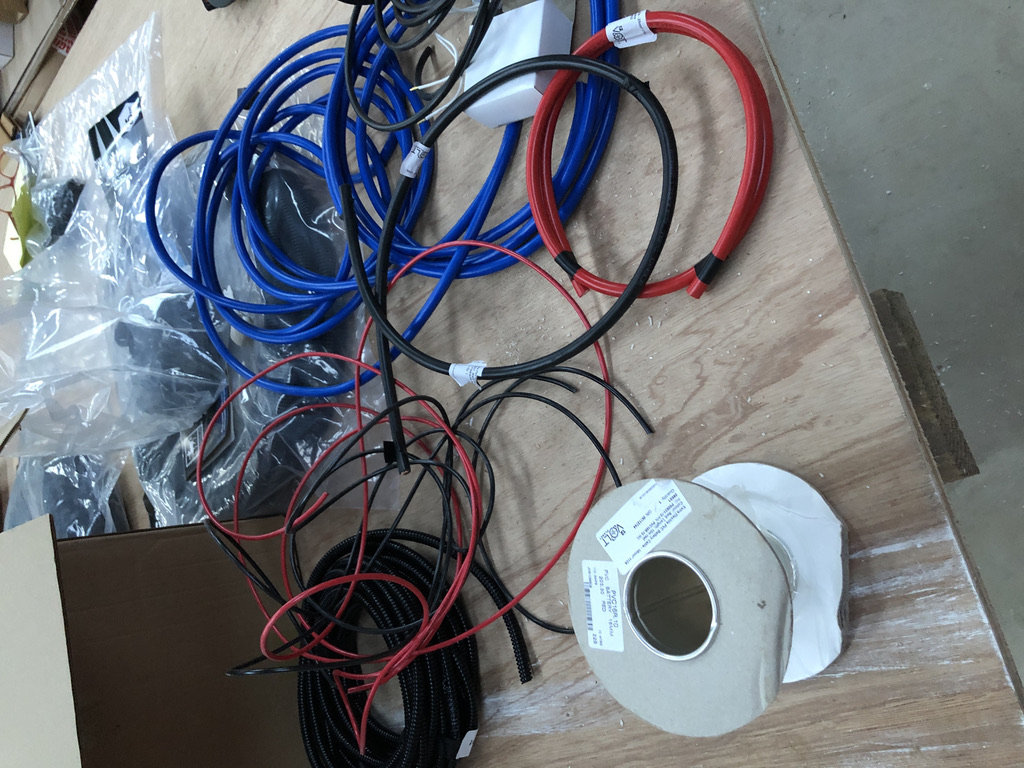
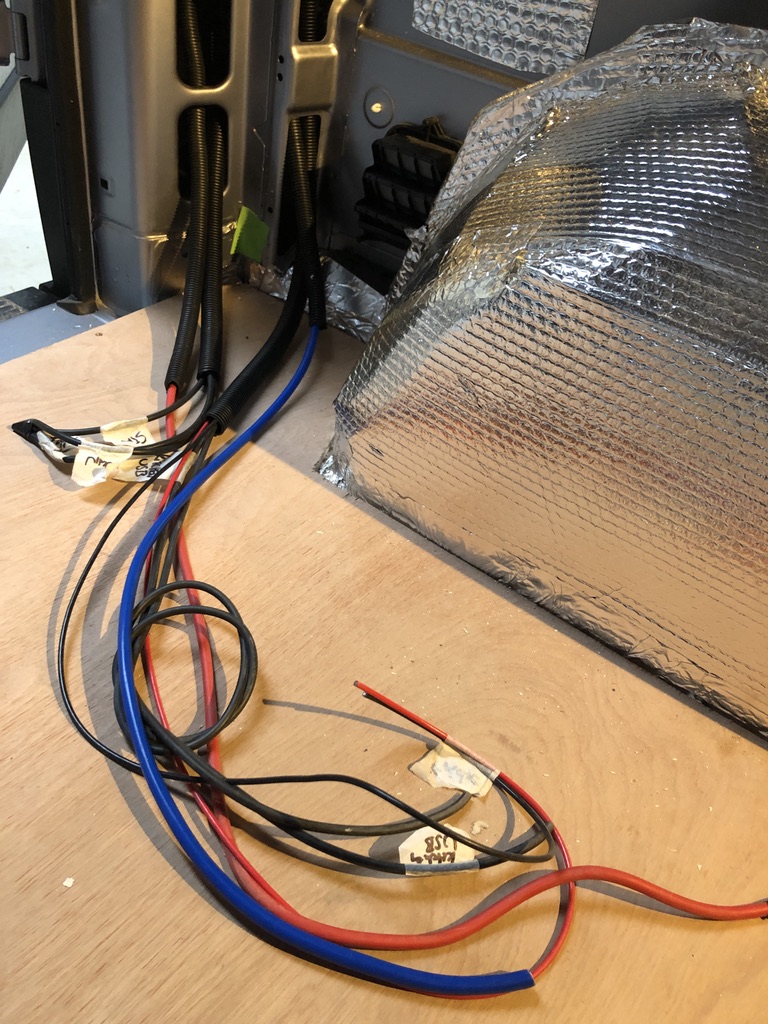
The next stage in our van build process was to do the first fix electrics so that all the cables and wires could be in place and hidden before we started ply-lining the van.
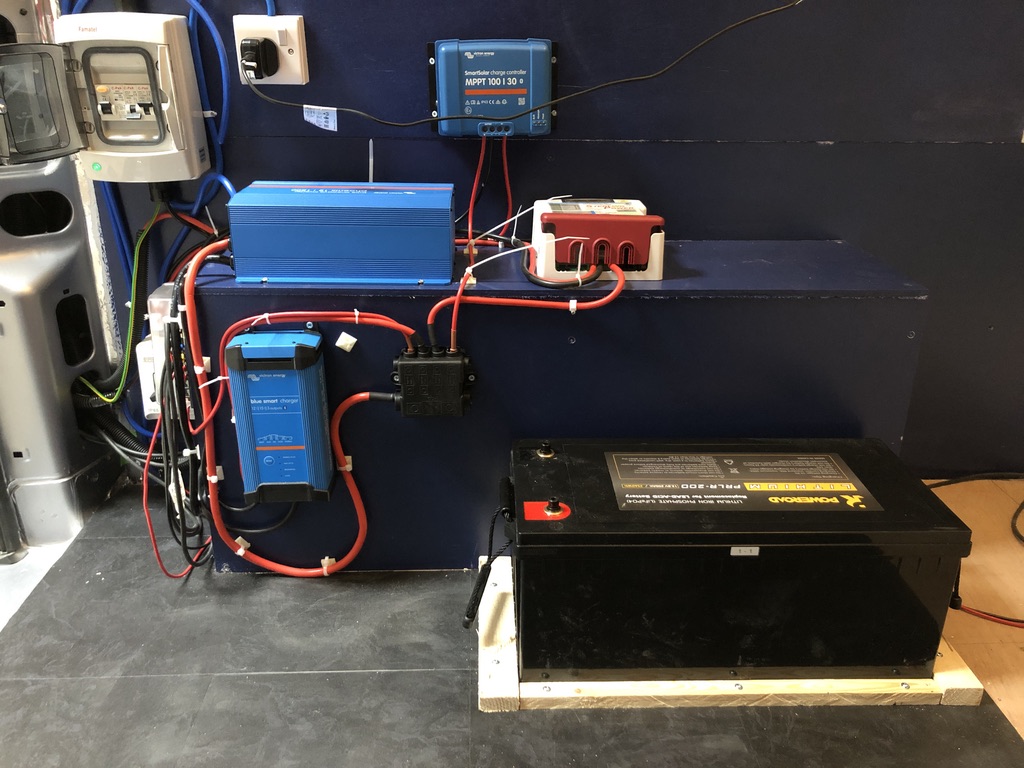
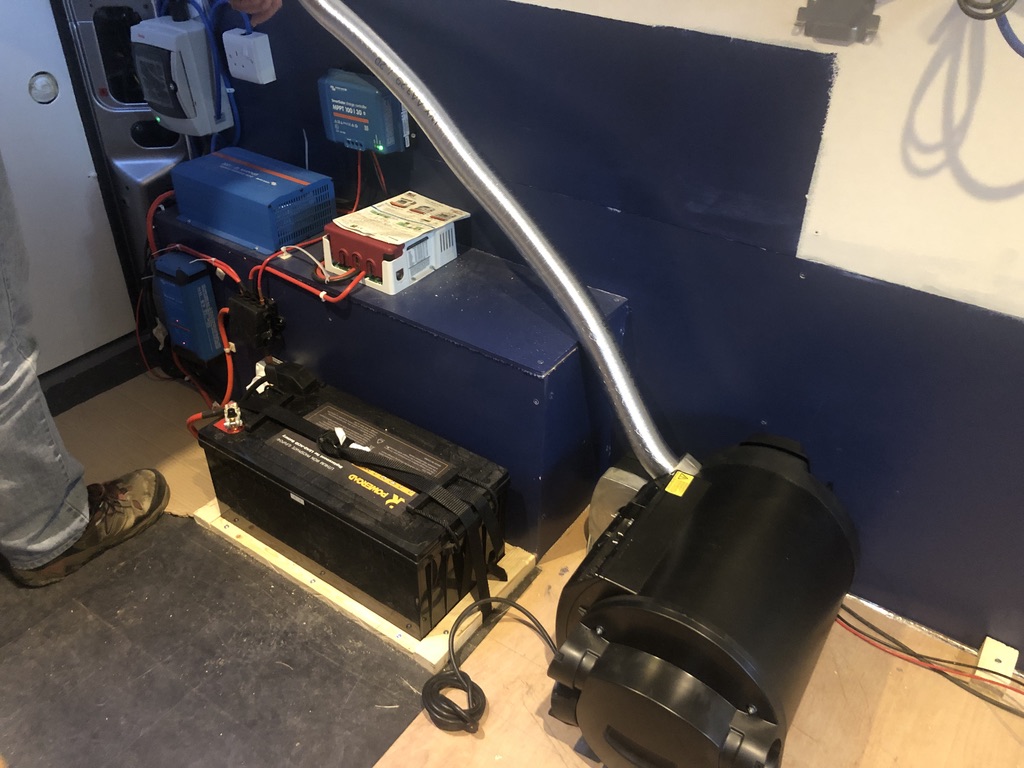
Our primary aim was to design and install a 12v and 240v electrical system as well as a solar power system so we could live off-grid. This is where being members of the Self Build Motor Caravanners Club came into it’s own. Dave was able to draw up a diagram of our planned electrical system and get feedback from some of the experts in the group before we started running cables and wires through the sides and roof of the van.
We have to say the folks at 12 volt planet where we bought the majority of our wiring products were also very helpful, and the expertise from Alpha Batteries was invaluable when choosing our lithium battery.
Rear doors
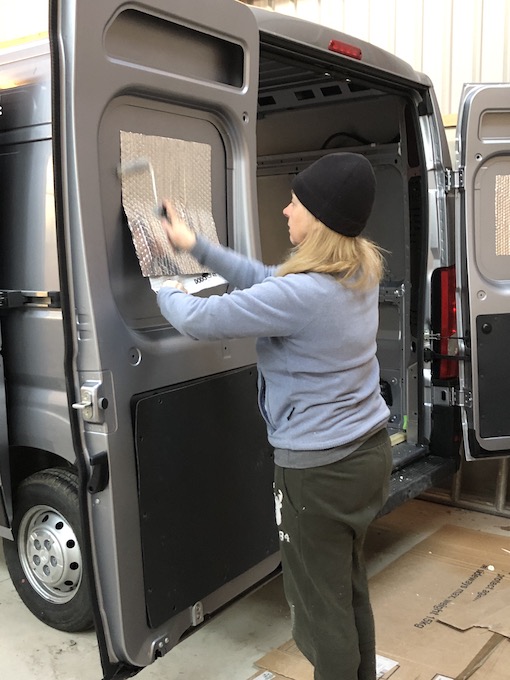
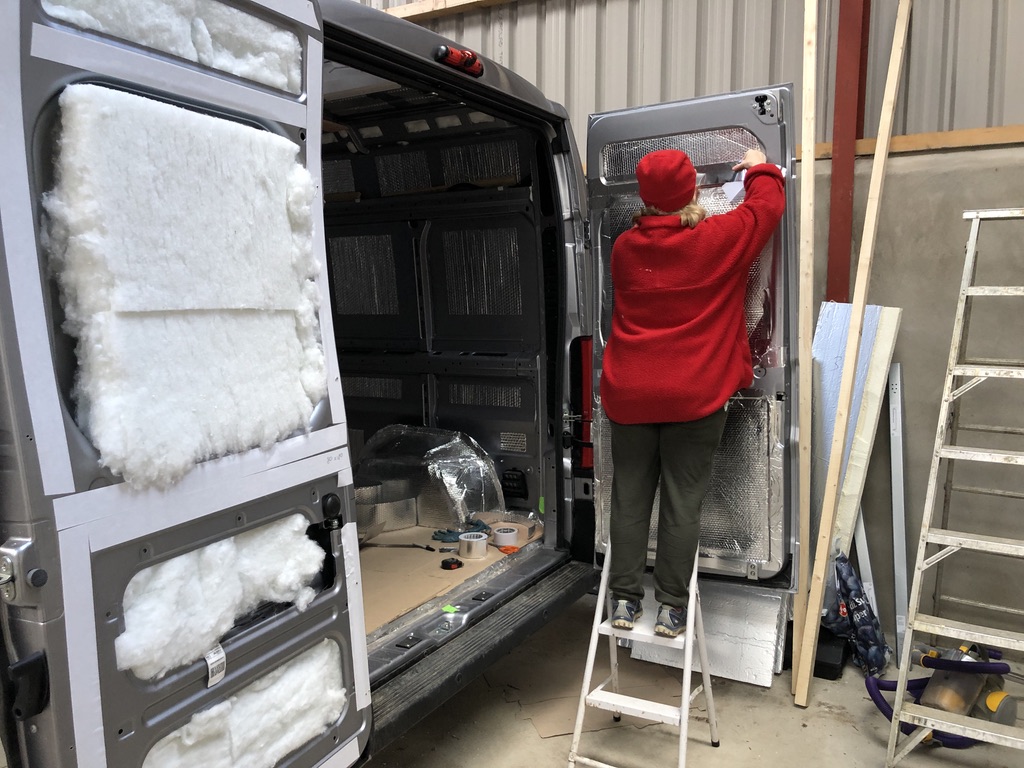
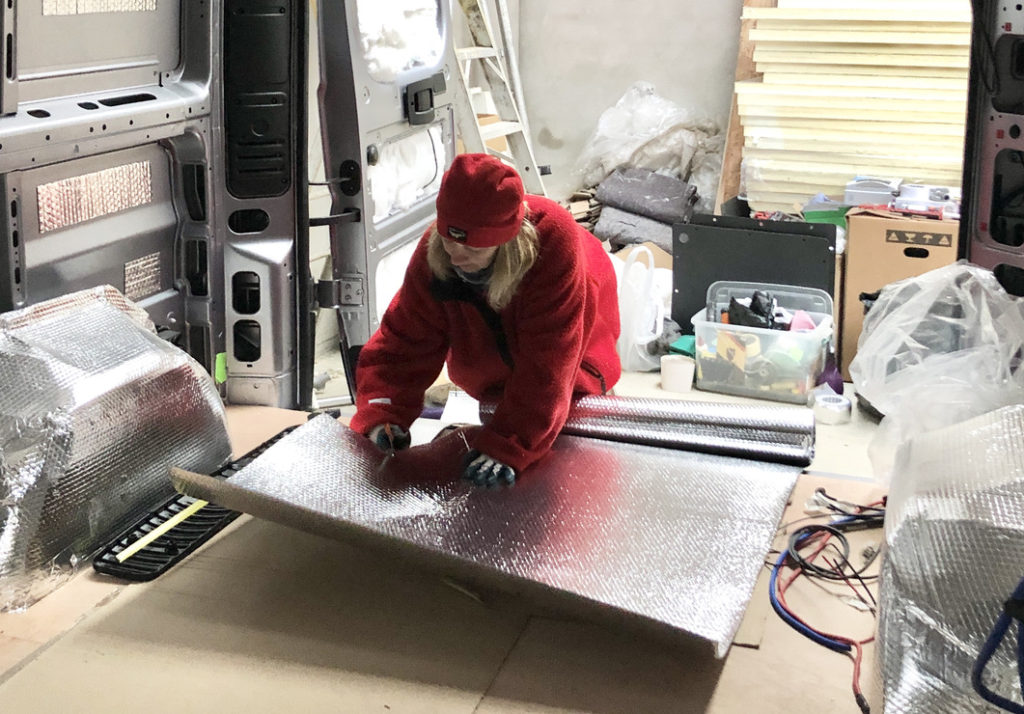
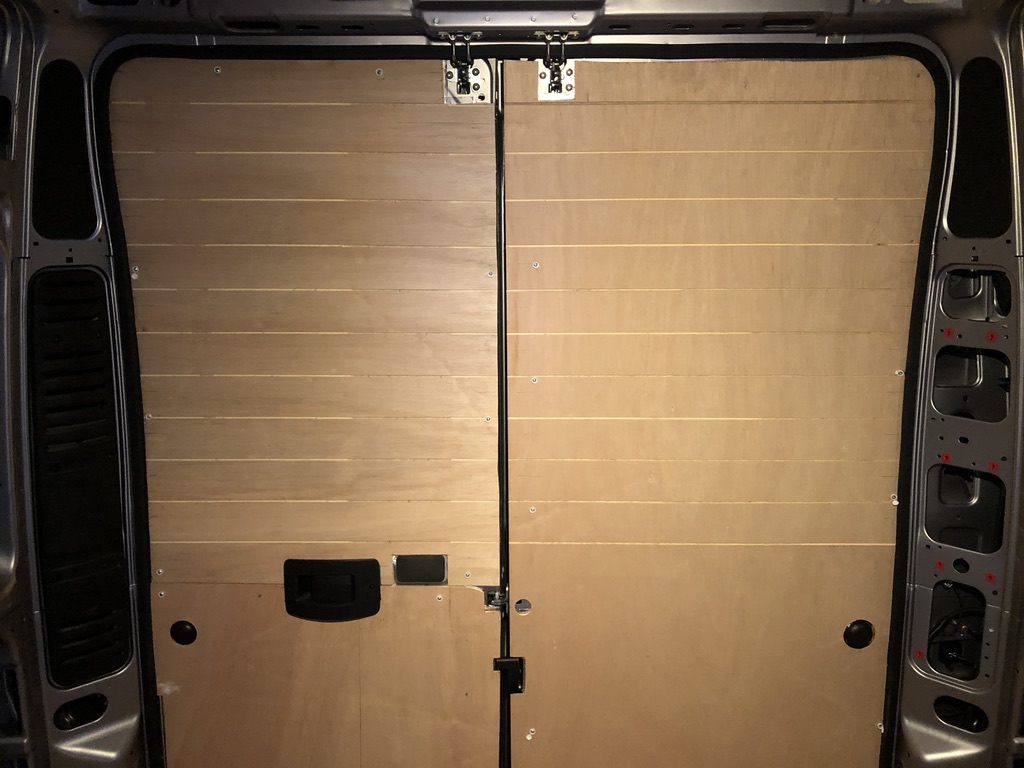
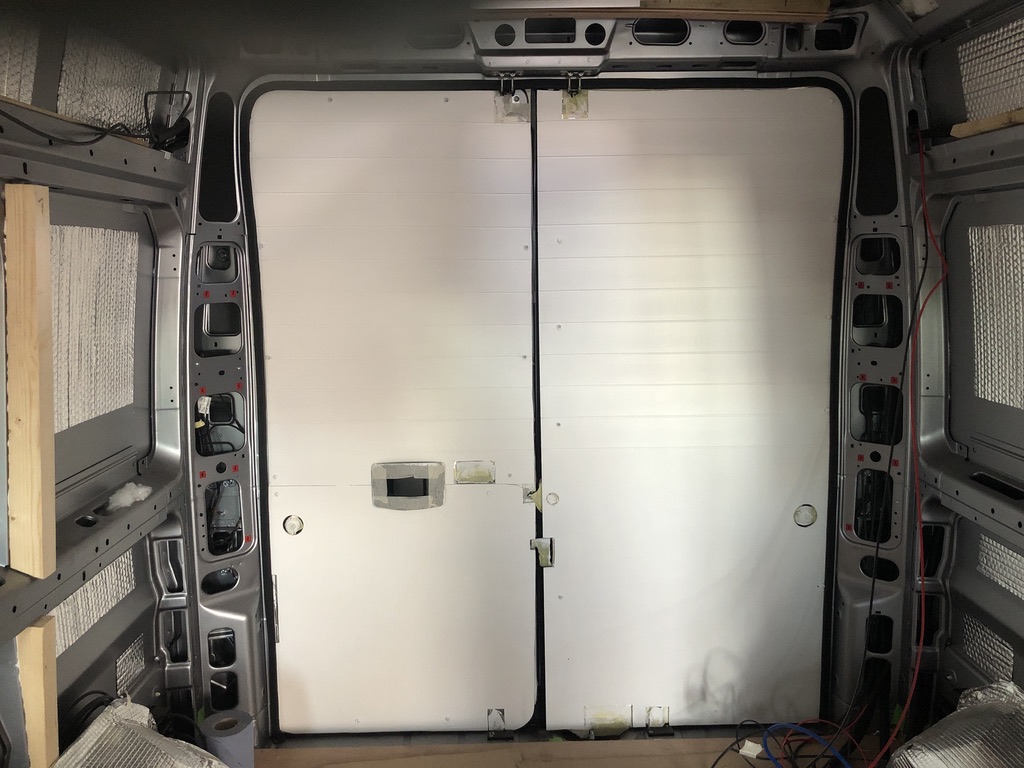
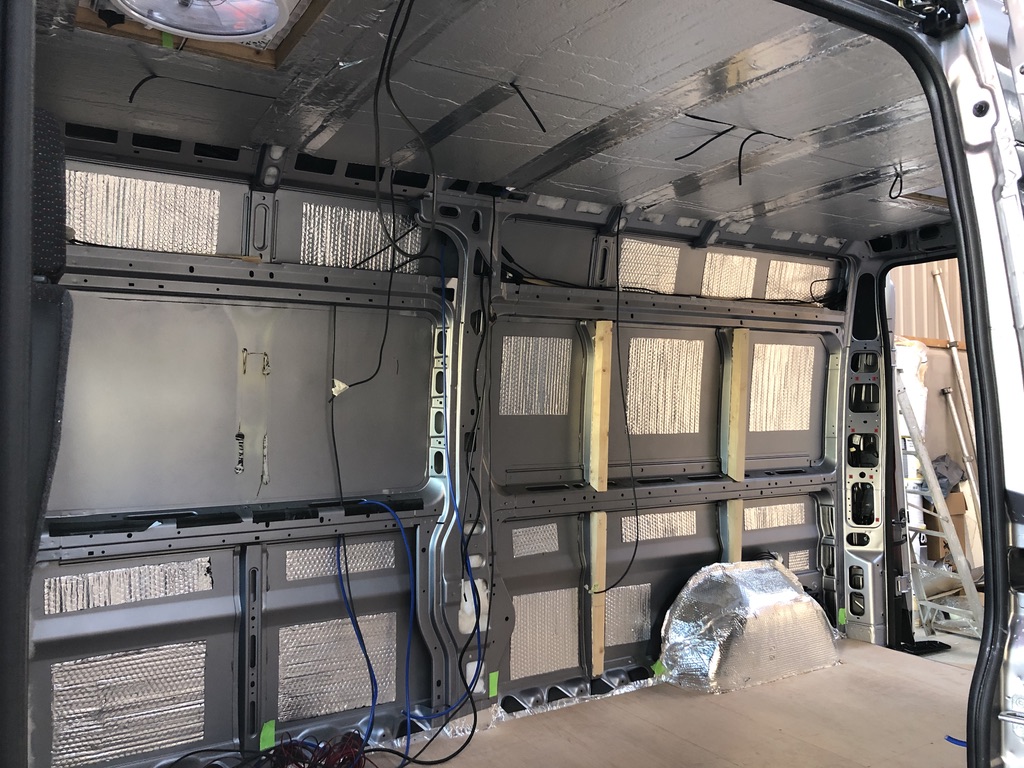
We used rolls of recycled plastic bottle insulation to fill all the gaps in the doors. We lined them with Dripex double aluminium bubble foil insulation sealed with silver tape to create a vapour barrier. We cut the rear door panels from 6mm plywood and used a router to create a tongue and groove effect on the upper half of the panels.
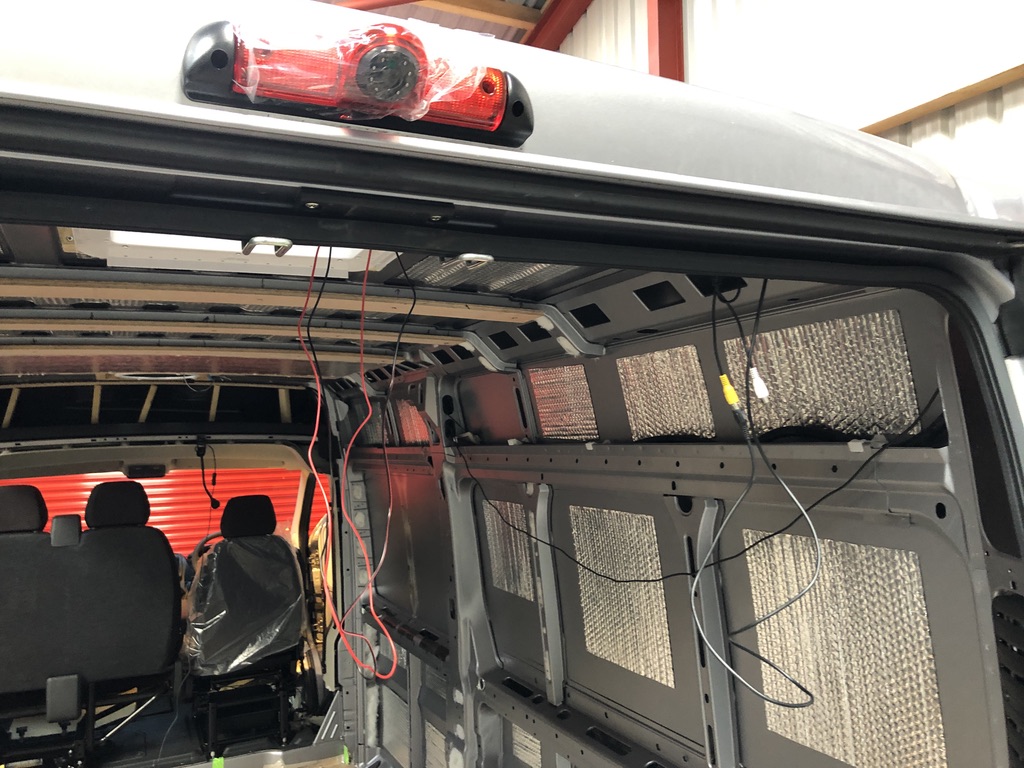
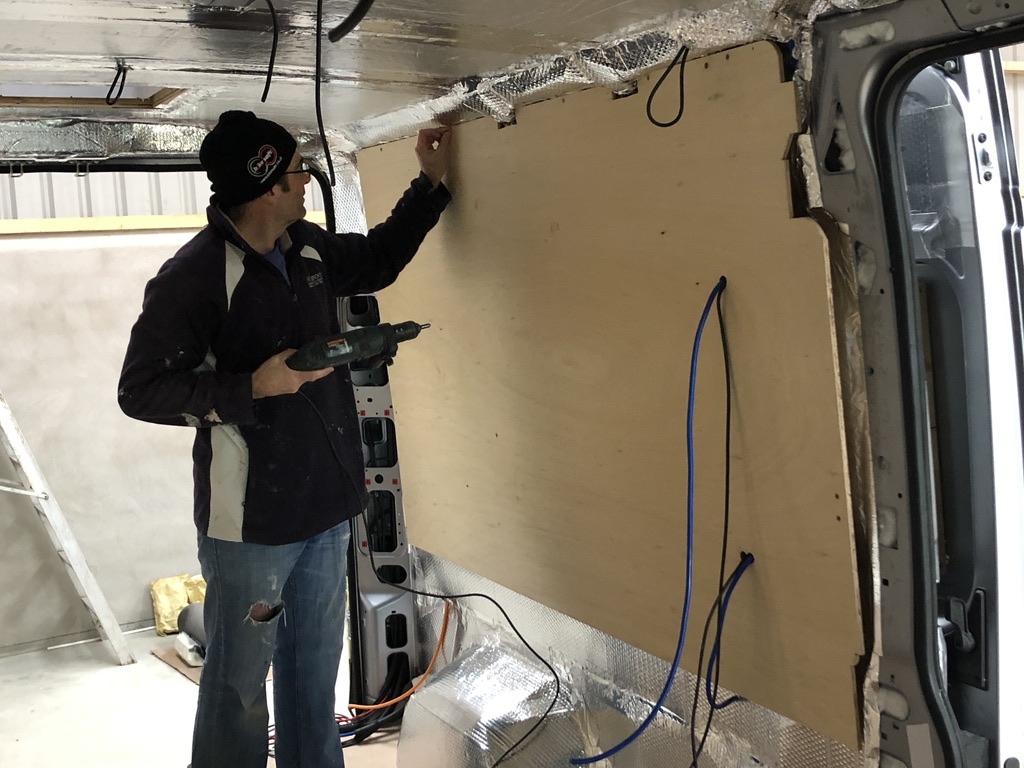
Walls
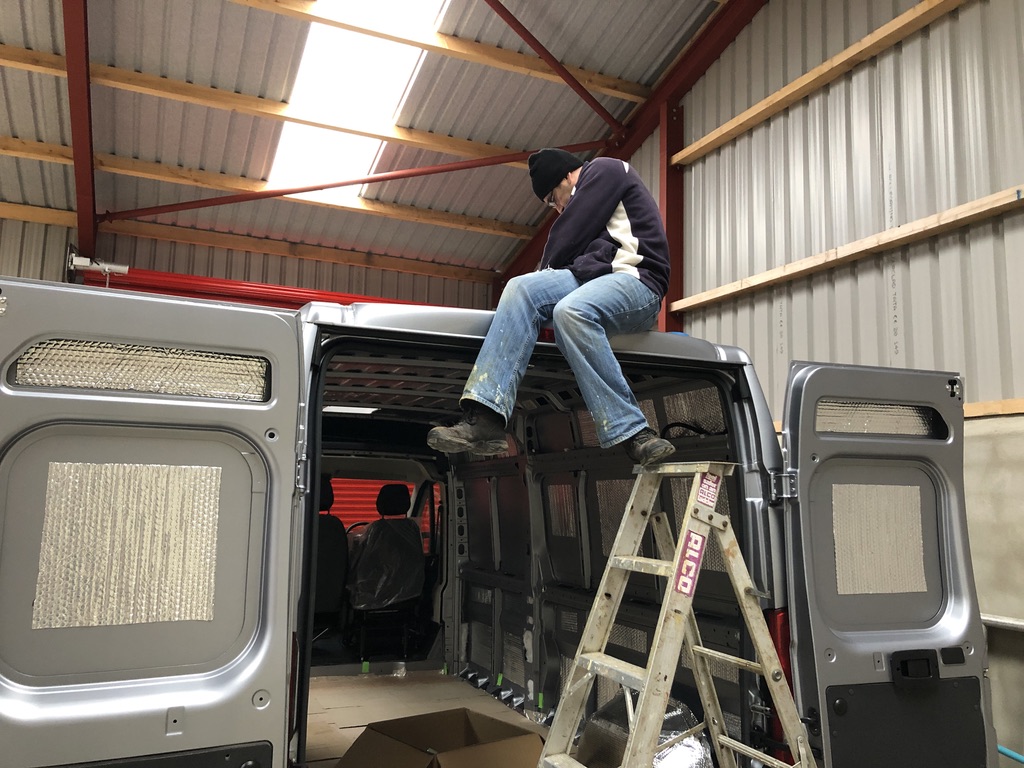
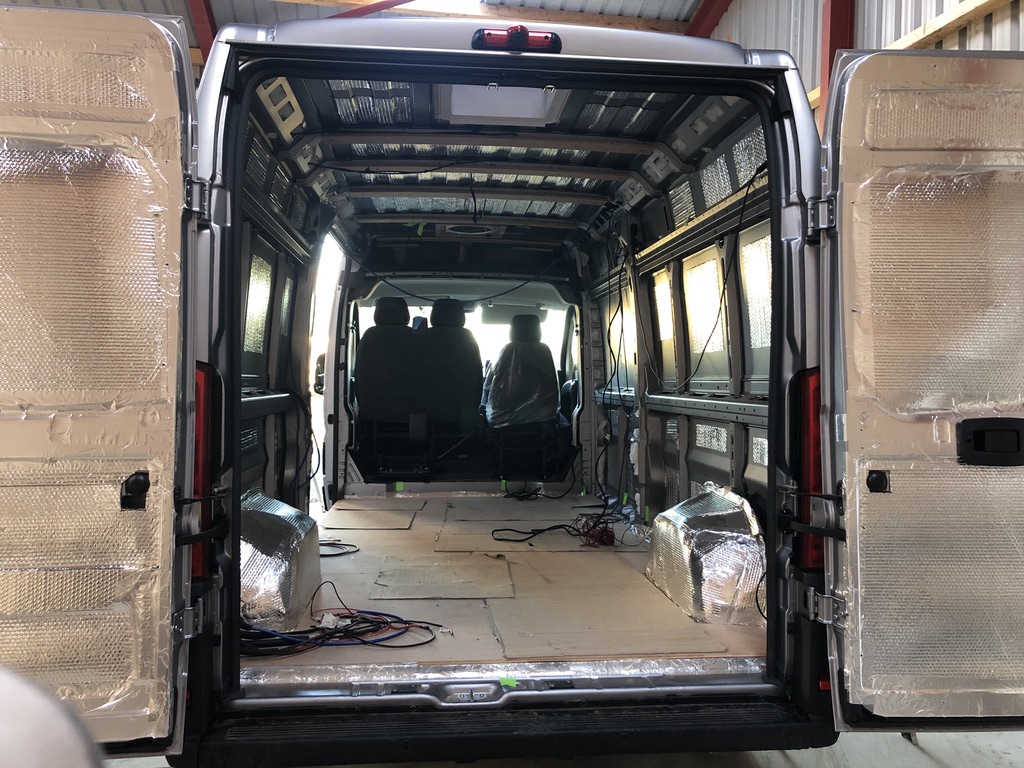
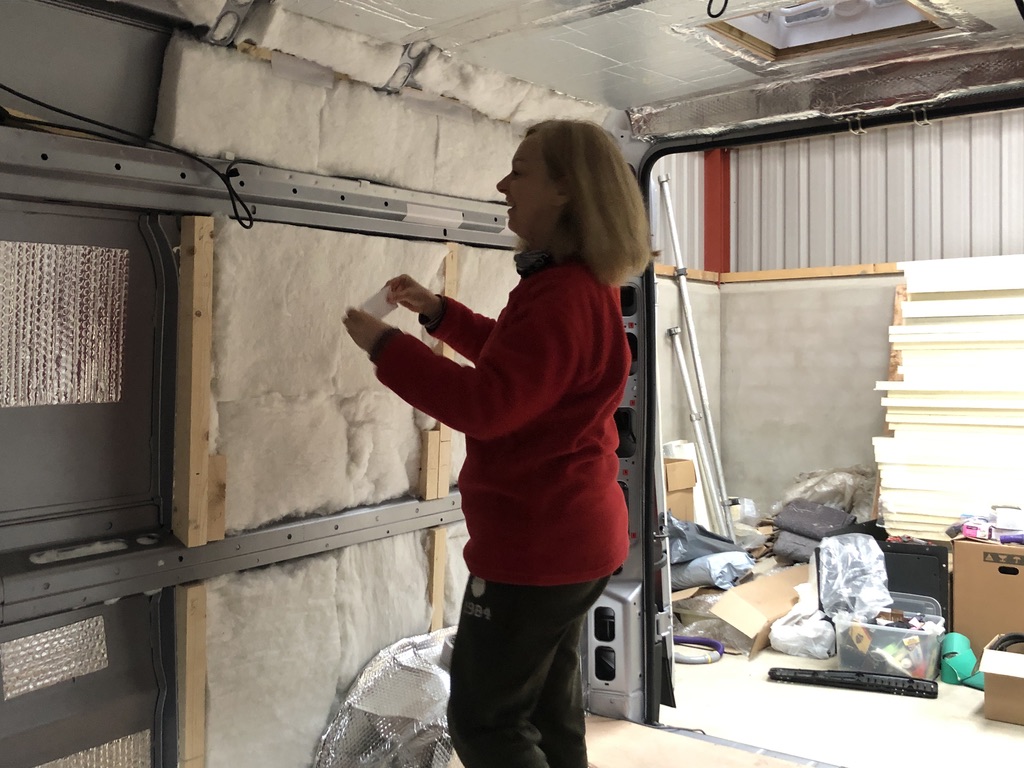
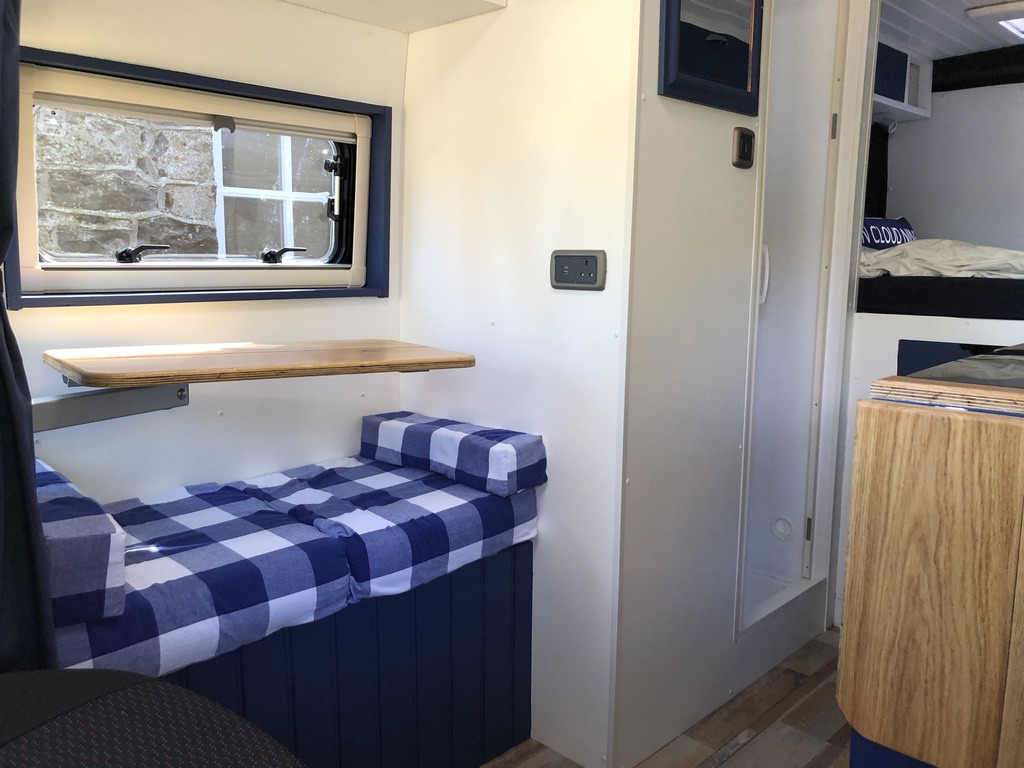
The same recycled plastic bottle insulation as in the doors was used to fill the wall cavities before we glued the timber battens to the ribs of the van. We screwed in extra reinforcements on the bed area – you never know it might see a bit of action!!! We covered the insulation from top to bottom with the Dripex silver bubble foil and once again sealed that with silver tape to create the vapour barrier. What was a tin can van was now starting to look more like a silver spaceship!
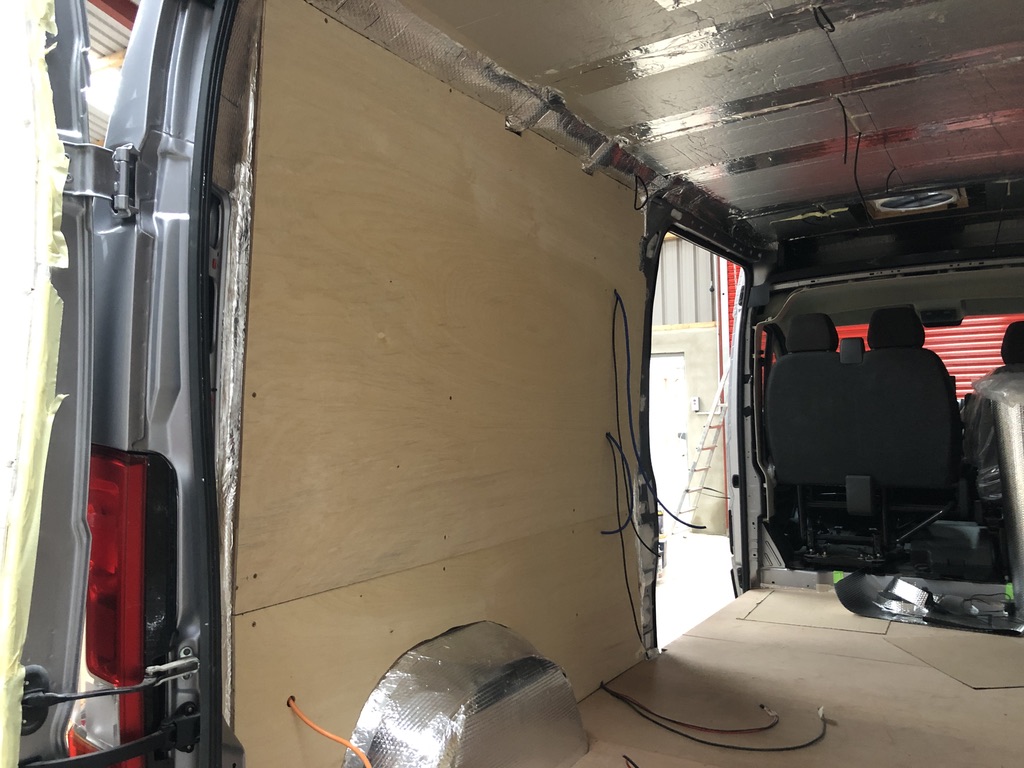
We cut our wall panels from 9mm plywood, and they took a bit of fitting and refitting after we realised we’d put a couple of the kitchen electrical cables in the wrong spot!
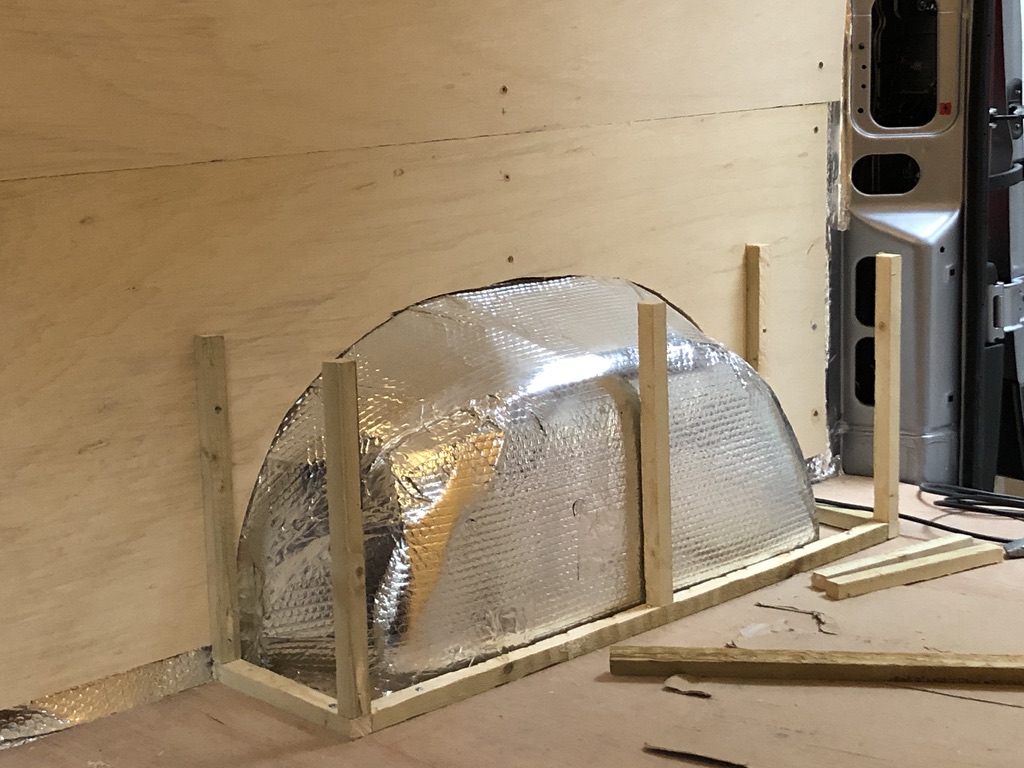
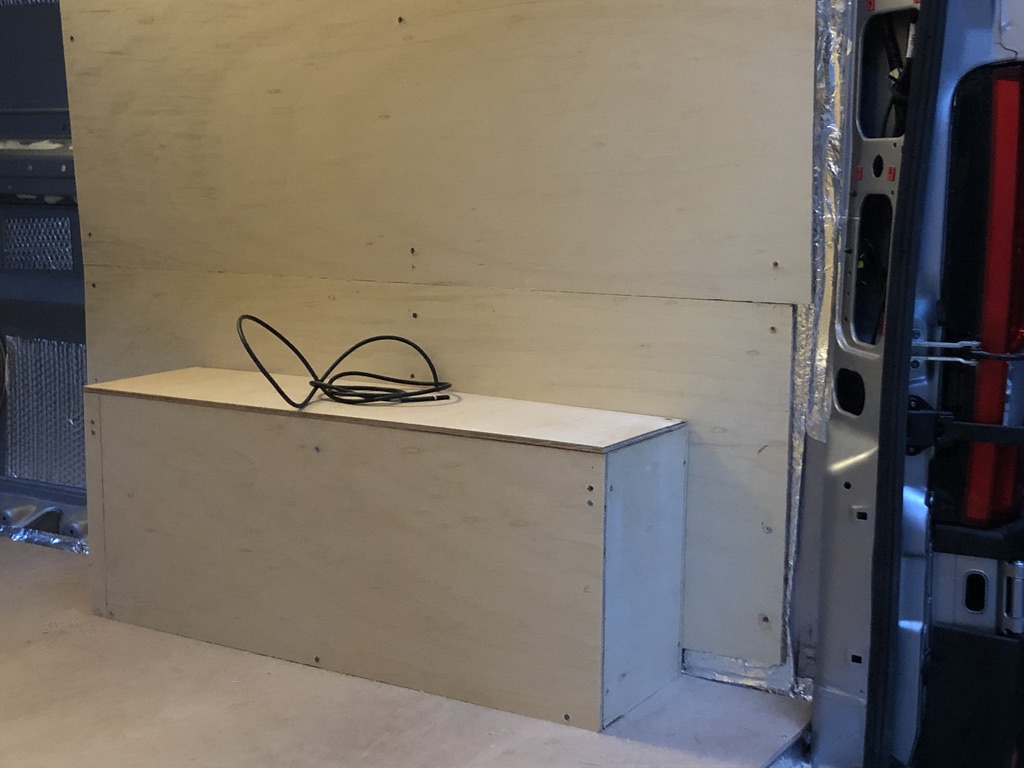
Wheel Arches
A relatively simple job in the scheme of things was to cover the wheel arches and box them in using plywood. The tops are removable so we can easily access the tyre jack tool kit stored in there.
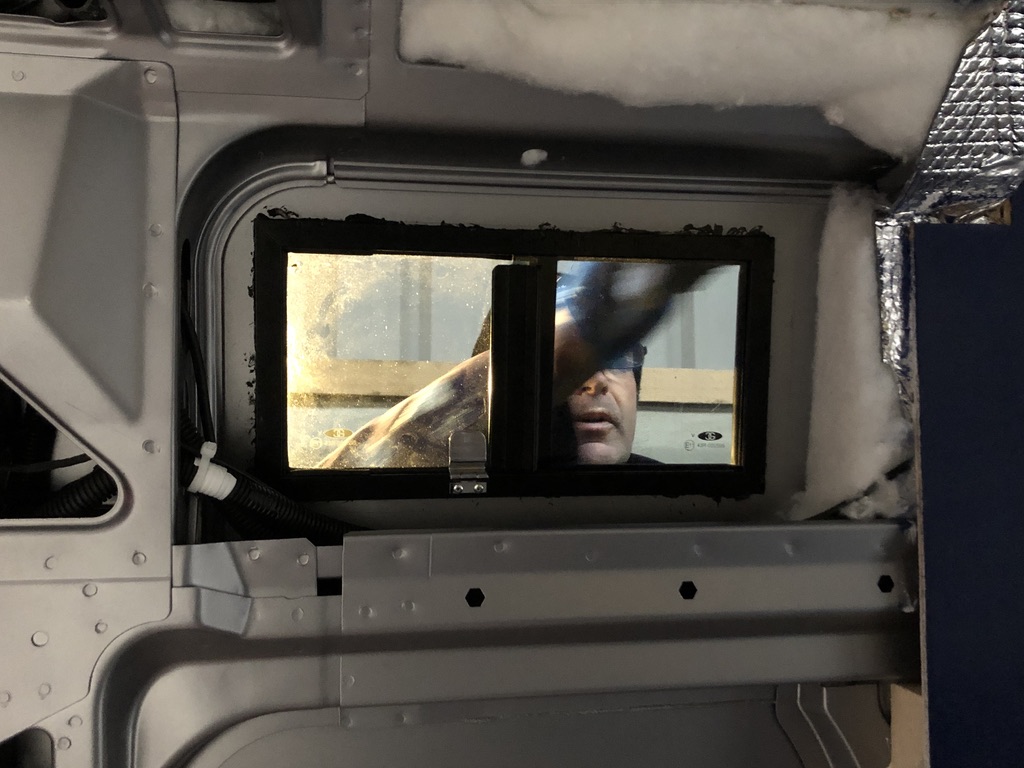
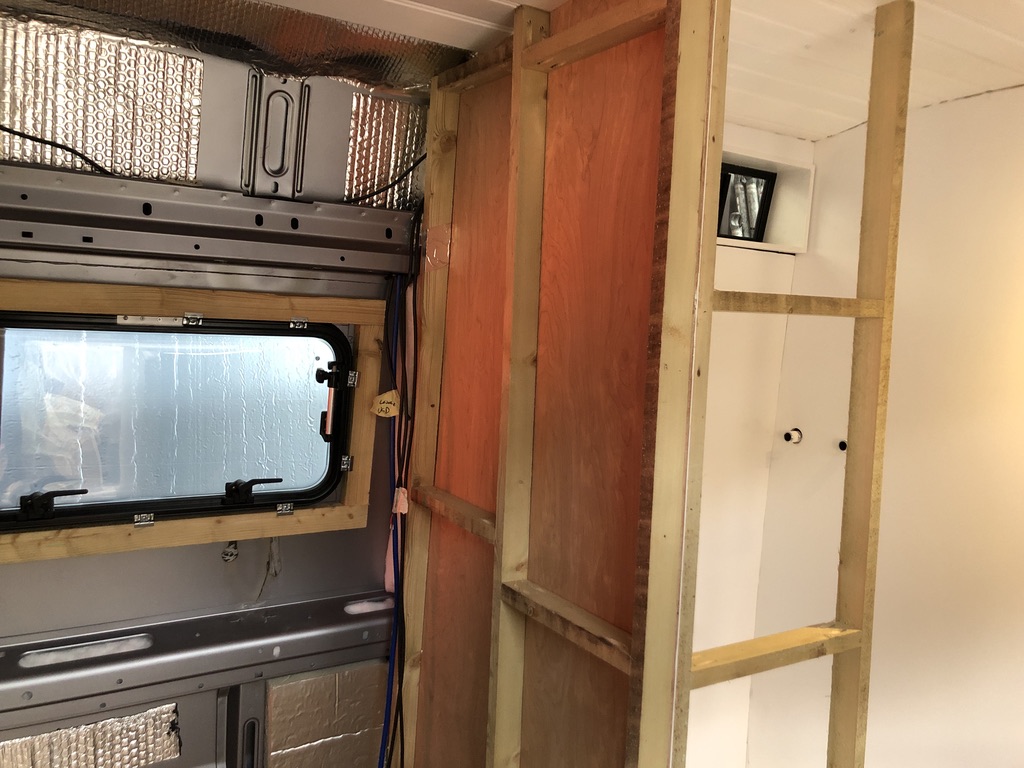
Bathroom window
Time to cut another hole in the van! Instead of an extractor fan we opted to fit a tinted side slider window for our bathroom. We had it custom made (350mm x 180mm) by Caldwells Windows.
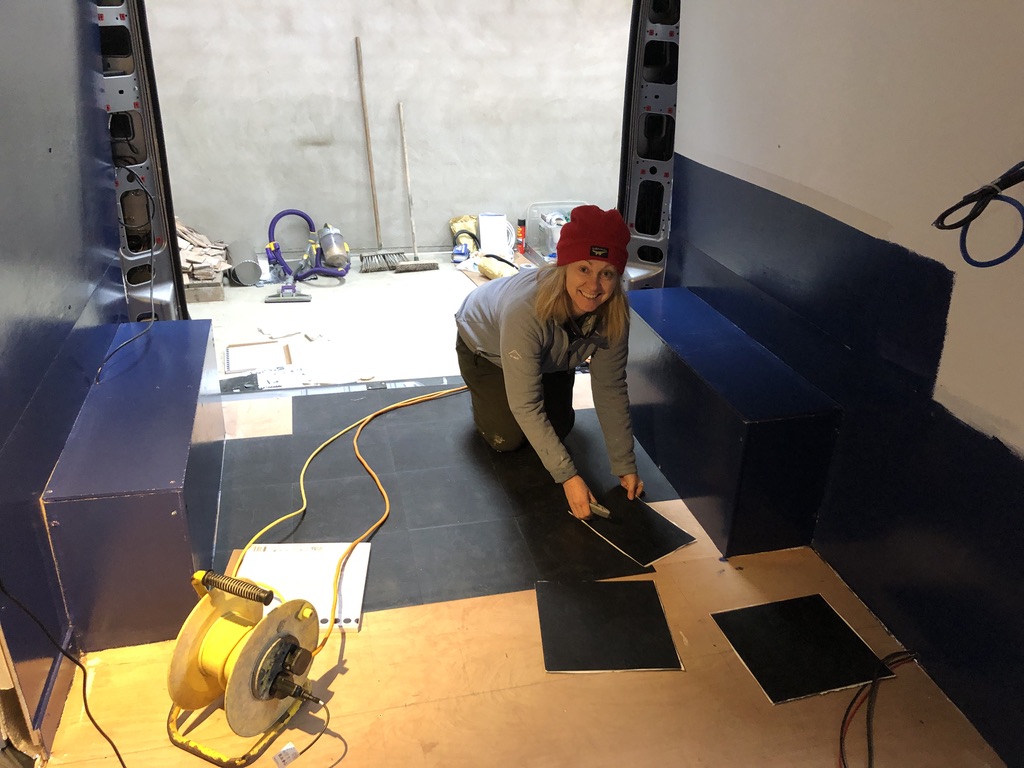
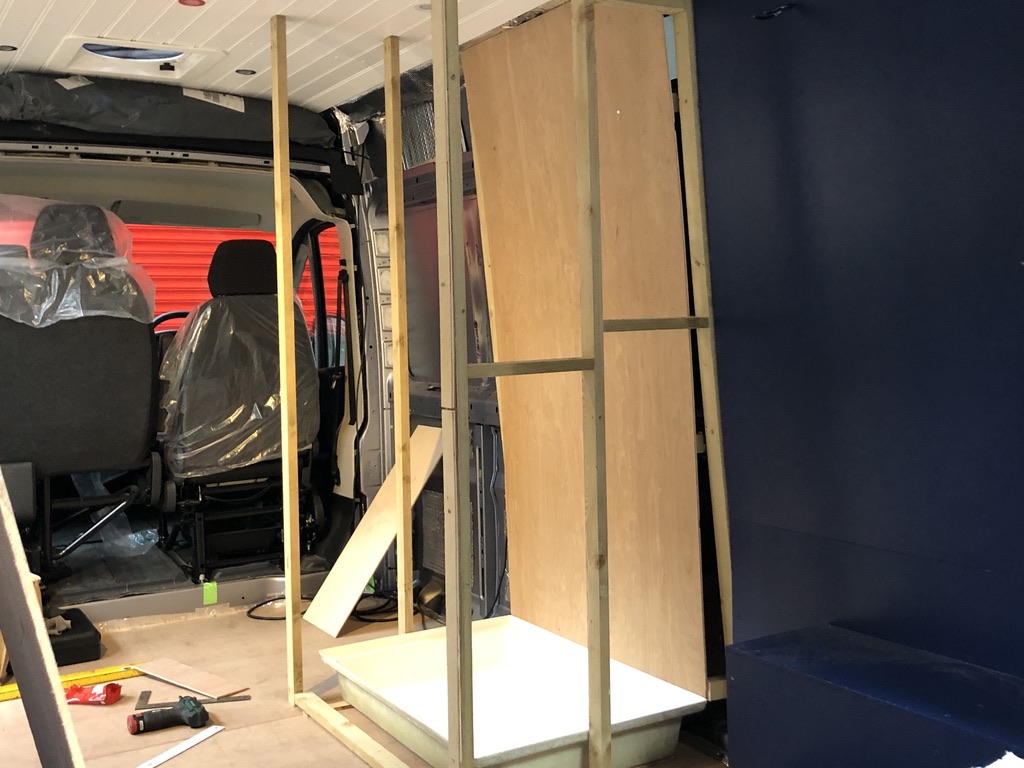
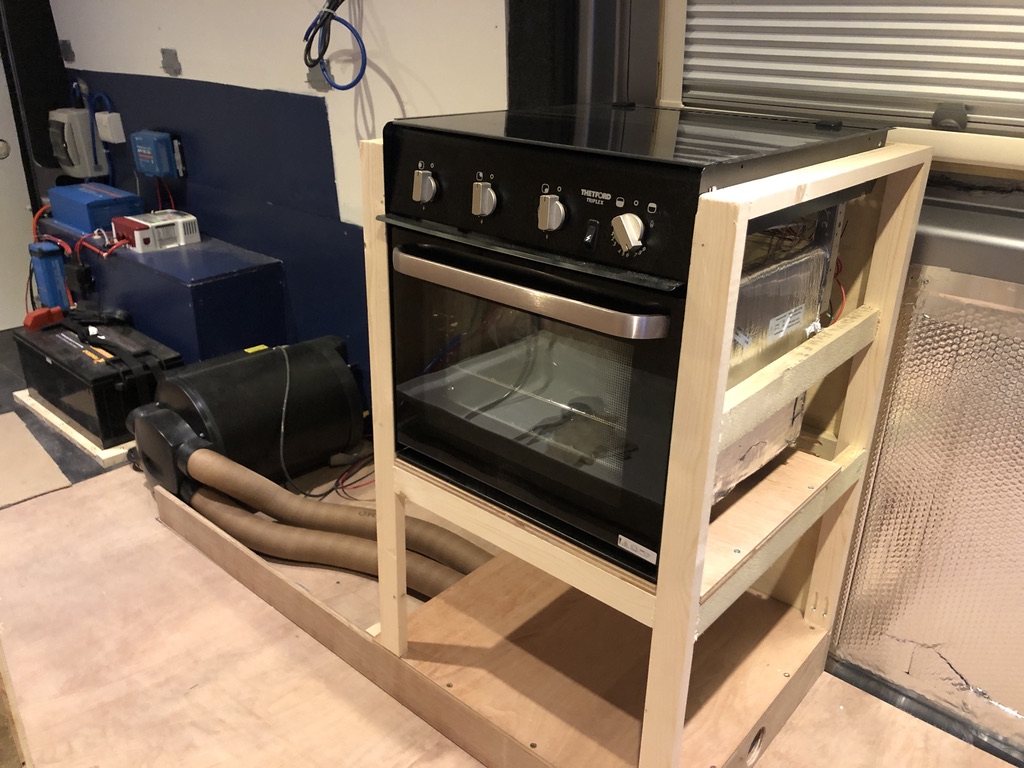
Garage
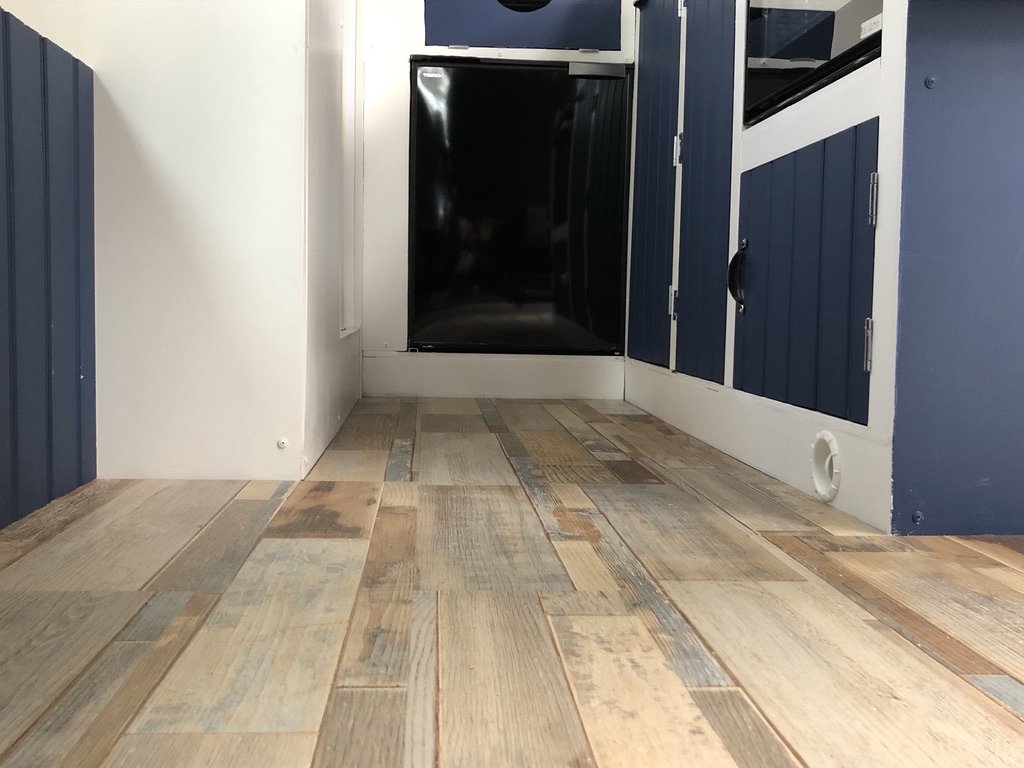
We laid the top floor in the garage (the storage area under the bed) using vinyl peel and stick tiles from B&Q. Every millimetre is important when it comes to your van build and these tiles were as thin and practical as we could find.
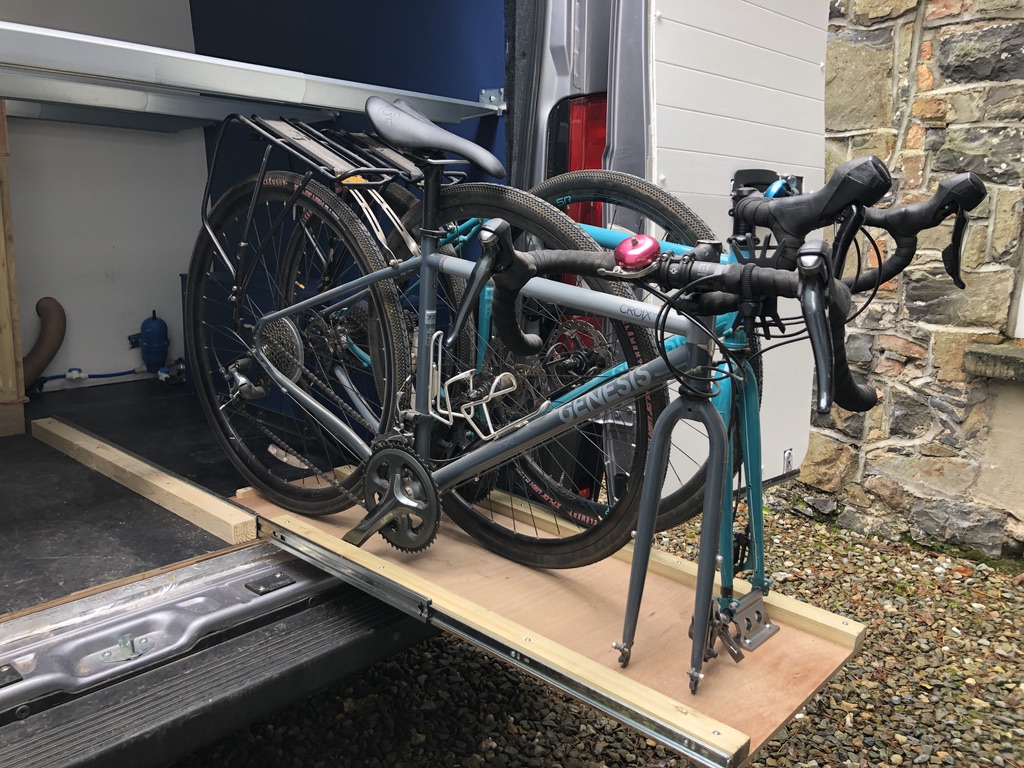
One of our essential requirements for the van build was that our bikes were stored inside the van for security & protection, but be easily accessible. At a later stage of the build we would add a slide out tray in the garage for the bikes.
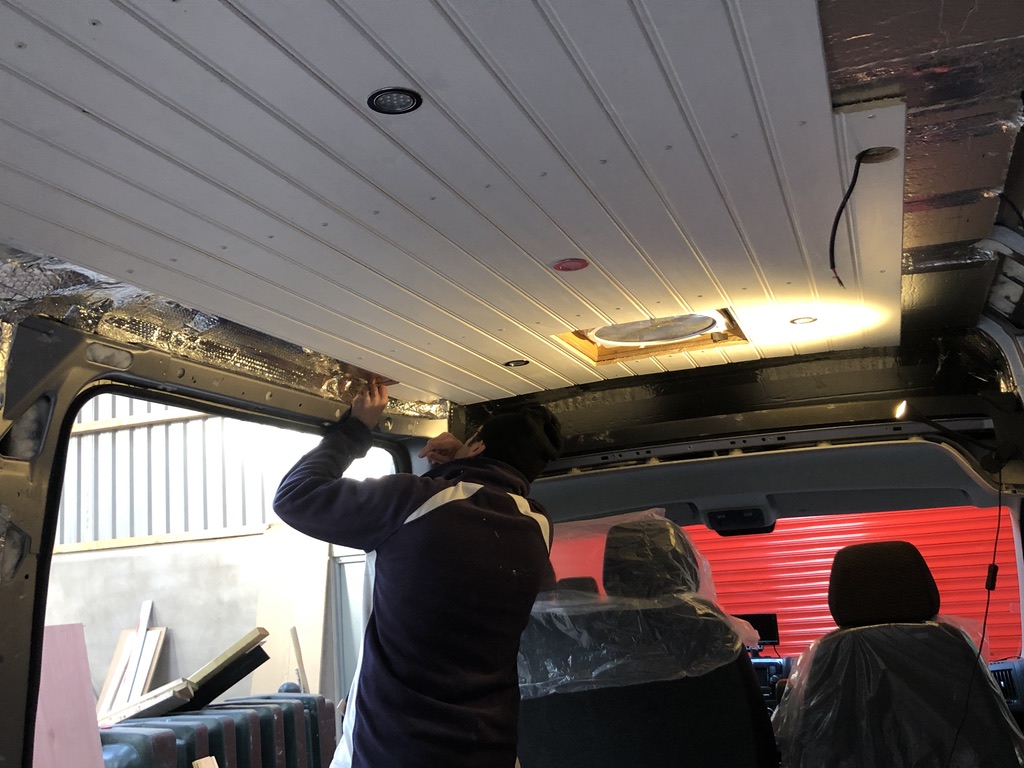
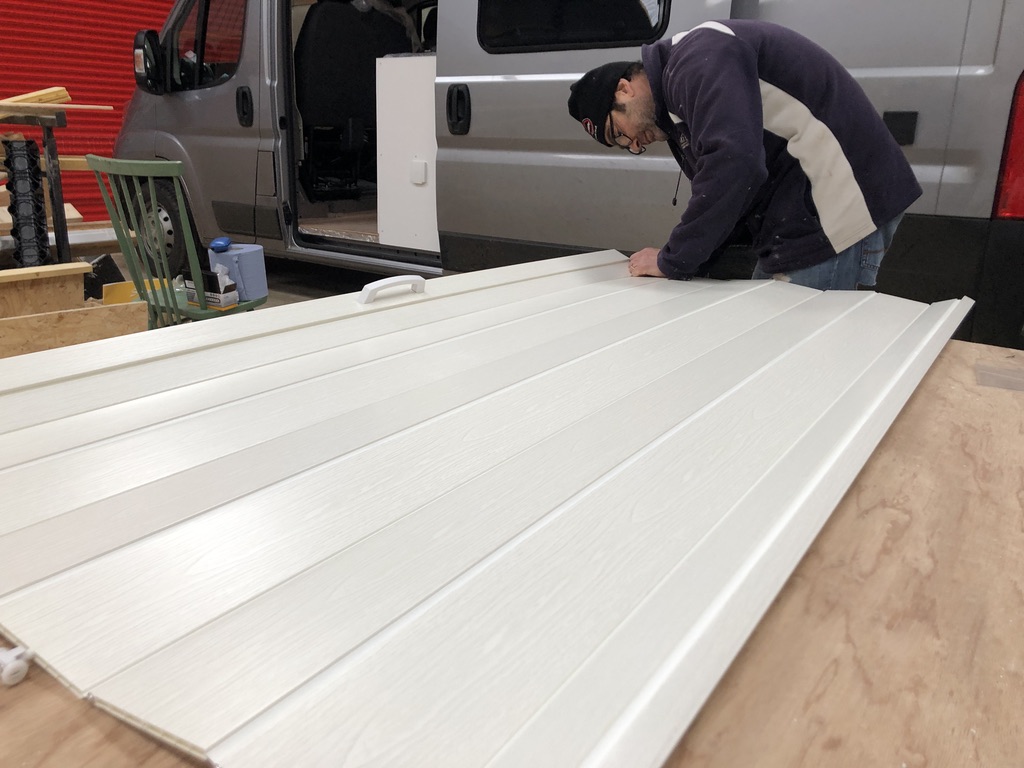
Ceiling cladding
We’d prepared the tongue and groove boards by sanding, priming and painting them earlier in the build process. It was much easier to do this in the large open space of the shed rather than try and do it after fitting them. Doing it once they were fitted would’ve meant so much dust in the van and a lot or arm and shoulder ache from working above your head! Finding the right size white head screws for fitting the T&G was another task that took hours trawling online. Once the cladding was secured we were able to fit the covers and trims to the roof fan and sky light.
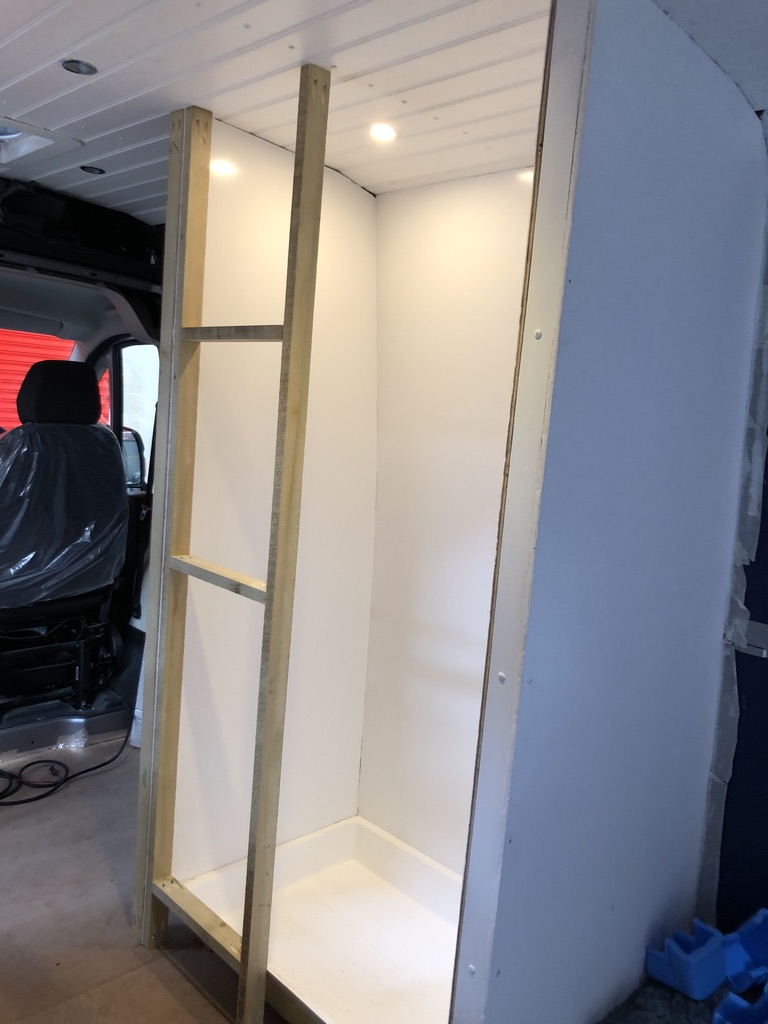
Lighting
We fitted seven touch sensitive recessed 12v LED lights in the ceiling (3 in the lounge area, 3 in the kitchen and 1 in the bedroom) that we sourced online from Vanwurks. Plus two 12v LED flexible reading lights above the bed area.
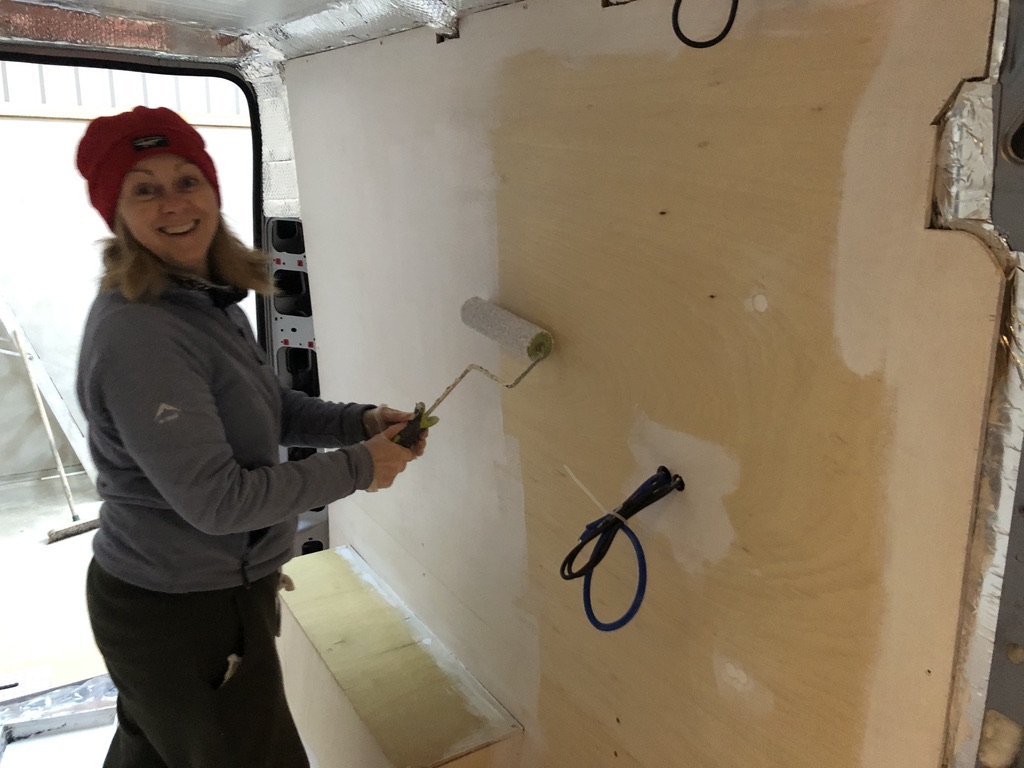
Painting
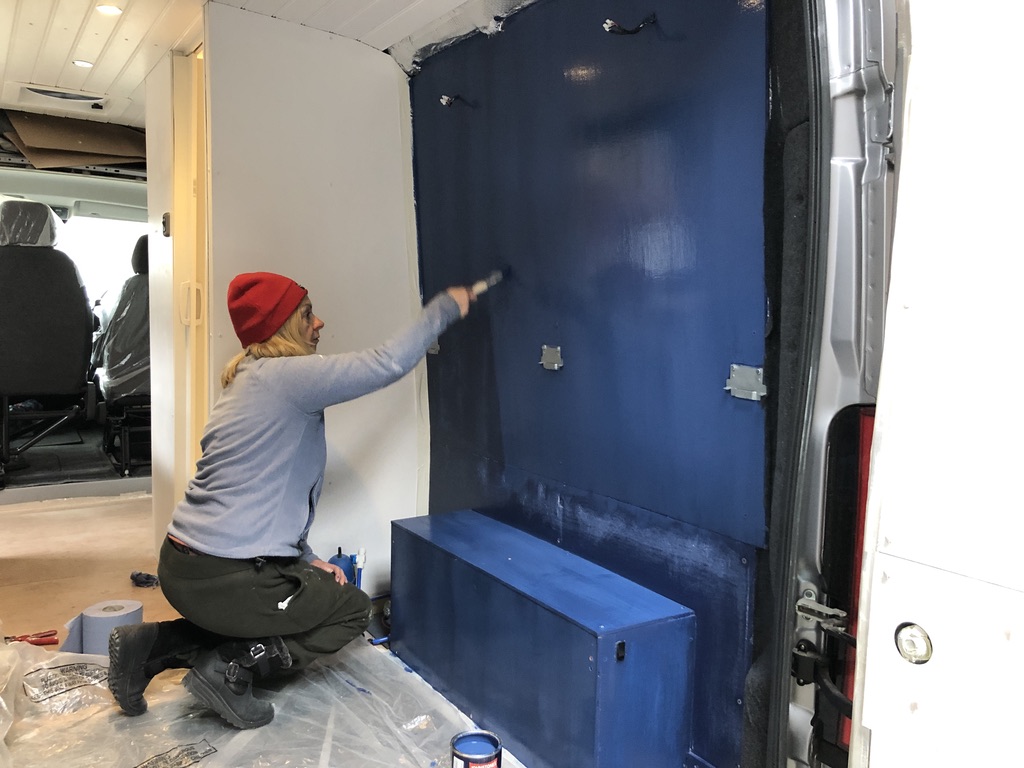
This first painting stage gave the van a new lease of life. We used brilliant white on the walls and ceiling, and Dulux Sapphire Salute as a feature colour on the bed head.
Electrical System – wiring
By week 8 of the build we, or rather Dave, was ready to wire up the 12v and 240v electrical system. Our system components, housed in the garage area, included a 200 amp hours lithium battery, a Victron MPPT solar charger controller, a Sterling battery to battery charger, the 230v hook up, a consumer unit/fuse board, a Victron Blue power battery charger, and a Victron Energy 1200W Inverter. Plus we had the Longi 370W split cell solar panel already bolted to the roof.
For peace of mind we had a local professional electrician complete a check up and reassure us it was all safe.
Plumbing & Heating
The next step was to get the plumbing and heating system in place. Earlier in our design process we had made the decision to go for underslung water tanks in order to save as much space on board as possible. We knew it was a long waiting list to get the custom made plastic tanks (82 litres fresh water tank and 63 litres waste water tank) from the very helpful Shaun at Barratts Tanks.
We ordered in October 2020 and had we been able to travel to England we could have had the tanks fitted in the December. We couldn’t travel due to Covid restrictions. Instead we had no choice but to have them delivered to us in Northern Ireland at the end of February 2021. We fitted them ourselves with full instructions from Shaun.
Before the tanks arrived we fitted the water pump, filter and accumulator, and installed the kitchen and bathroom water pipes and shower tap fitting.
At this point we also needed to finalise the positioning of our Truma Combi 4E gas boiler which we would use for space and water heating. We had changed our minds several times on the boiler position, eventually settling on the only really viable option which was under the sink. We positioned each of the heating vents – one in the bathroom, one in the lounge, one in the kitchen, and one under the bed in the garage.
Bathroom
At only 610mm x 915mm the bathroom is not a big space, but a very tricky job to do!
The first stage was to build the wooden framework for the walls, followed by cutting and shaping 6mm plywood panels for the internal walls, and 9mm panels for the external walls.
Once the frame was in place we installed the fibreglass shower tray we sourced from Wesley Marine. The first pilot hole we drilled for the shower waste was not in the most accessible location, so after resealing that we had to drill another before we could connect the waste water pipe.
We covered the walls in white gloss PVC panels, made and fitted the window frame, and installed a waterproof ceiling light we found on E-bay. Fitting the PVC to the ceiling was a job that tested both of us to our limits. There are no such things as straight lines in a panel van!
We designed and built a simple separating compost toilet to fit on the shower tray using a wooden box framework with a regular toilet seat on top. We attached a we-pee urine separator to the underside of the toilet seat. Inside the box was a bucket for the solids and a 5-litre container for the pee. We covered the box framework with the same gloss PVC panels as the walls.
The final piece of the bathroom build was cutting the folding door to size.
Bedroom
A fixed bed was our number one priority for the van. The size of the bed was dictated by the size of our bicycles which we wanted to store underneath the bed, hence we have a high and wide bed! We fixed six Ikea Skorva brackets and three bed beams to the timber wall battens and added the Ikea Luroy king size slatted bed base (we had to remove a couple of the slats to make it fit).
We both prefer a firm mattress and opted for a supportive reflex foam mattress from Custom Size Beds – the size is 146cm wide x 179cm long x 7cm deep, somewhere in between a double and a king size!
The next stage was building our kitchen framework. The kitchen design was based around our Thetford Triplex oven, a VitriFrigo 60ltr fridge/freezer, and a decent size kitchen sink! We’d seen so many camper vans with sinks you can barely fit a plate in.
We built the framework using 2×1 battens, and used a mix of leftover 6mm & 9mm plywood for the drawers and cupboards, while the cupboard doors we made from the leftover T&G boards.
For the worktops and table we recycled some old oak floor boards by sanding them down and finishing with natural wood oil.
Gas installation
Once we had the kitchen carcass in, it was time to get the gas in.
This was the one job we wanted to have professionally done and certified. We took the van to Leisure Technical Solutions in Lisburn who fitted the 25 litre underslung gas tank we purchased from Autogas 2000. They connected our Thetford Triplex oven and our Truma Combi 4E boiler, and fitted an external gas BBQ point. This stage would have taken us at least a couple of days in awkward spaces with limited tools, but out-sourcing this job meant it was completed safely and professionally in less than 24 hours.
Dave designed and built all the overhead storage cupboards with 2×1 frames, and 9mm plywood for the doors. We had just about enough room to squeeze in a bench seat, with storage underneath, in the lounge/dining area. Again this was built with 2×1 frames and fronted with leftover T&G boards. We topped it with a couple of foam cushions recovered and recycled from an old sofa we had.
Finishing Touches
There were lots of these to do! In fact there is no such thing as a finished camper van build – it is a constant work in progress!
After 16 weeks of blood, sweat and tears our van build is practically complete and ready for a trial run. It is full of imperfections, but they are our imperfections, and if anything does go wrong, as it invariably will, we should have a fair idea of how to get to it to fix it!
Building a camper van during a global pandemic and the coldest, darkest months of the year is not something we would recommend, or do again. We started our van build the first week of December 2020 when the days on the North Coast of Ireland are very, very short. There were no electric lights in the shed so we relied solely on natural daylight from the roof skylights. Nor was there any source of heating to speed up the setting process of sealants and adhesives, or the drying of paint. In fact for the first few weeks of our build process we were contending with below freezing temperatures on a daily basis!
What we didn’t add to the process of building a camper van was that at every single stage we spent countless hours either standing in it and just looking at it, or hours lying underneath it trying to work out where everything was going to go!
We learned a lot during the entire process and are very proud of what we accomplished together. We couldn’t have done it without all the fantastic resources we found online, in particular the YouTube videos by Greg Virgoe, The Restoration Couple, VanLife Conversions and CamperVibe.
We will be forever thankful for all the inspiration, advice and motivational support we received from so many great online van build communities. How people ever built their own camper vans before the internet is beyond us!!!
If you read this far, well done! If you want to know any more details on how we built our camper van pop a question in the comments below or drop us a line hello@schindlersontour.com
Disclosure – We are participants in the Amazon Associates Program and as Amazon Associates we earn from qualifying purchases. There are affiliate links in this post which means we may earn a small commission/referral fee if you purchase the product we recommend by clicking on the link. There is no extra cost to you, and be assured that we ONLY ever recommend products that we truly believe in and have tried and tested ourselves. If you use our links, we thank you!
It was after the Olympics finished in Sydney in September 2000 that we started shopping around for a vehicle that would take us not quite the length and breadth of Australia, but at least some of the way around this vast country. Our mission was to drive the west coast, from Darwin to Perth, in time to spend Christmas with friends.
Shopping around for second hand vehicles in those days meant hot-footing it around all the hostel notice boards searching the “for sale” ads, and then finding phone boxes to call the sellers and arrange viewings. No mobile phones for trawling the internet back then!
In early October we found “Spot”, a 17 year old (1983) Nissan Urvan pop-top camper van. Spot had already done a few miles around the clock, and he came complete with pretty much everything we needed for an Aussie road trip. There was a lounge area which doubled up as a bed, a fully equipped kitchen with gas stove, a 3-way fridge, and a microwave. He even had a tiny TV, and a CB radio! He had a 40 litre water tank, and the shower was a portable solar shower bag. The toilet was a shovel for digging a hole! There was a great big lockable box secured on the back of the van to store the awning, the camping table and chairs, and other miscellaneous stuff.
Spot the pop top camper van
We paid a whopping AU$7,000 in hard cash (the equivalent of about £3,000 back then) to a couple of backpackers who’d already had their time in the van touring around Australia.
We christened the van Spot because we picked him up in a place called The Spot in Randwick, an eastern suburb of Sydney, and plus what 17 year old doesn’t know about spots!
We hit the road on the 10th October, and by the 13th the van was in the garage for major repairs having lost the gearbox! Not a great start to our tour down under, but considering that was our only major mechanical issue in an adventure that took us almost 18,000kms (11,250 miles) wasn’t too bad in our opinion. We did get one puncture, and after an incident with a kamikaze kangaroo we suffered a bit of damage to our water tank, but those are stories in their own right!
Replacing the gearbox early doors!
After five months of adventure on some of the most remarkable roads we said goodbye to Spot in Perth in February 2001 when we sold him for around AU$5,000 to a couple from Dublin starting their Aussie road trip.
Spot next to a mining truck in Western Australia
Van Life Lessons
We learned a lot about van life and van travel in those five months in Australia:
A fixed bed is an essential for us. Despite taking only 5 minutes twice a day to put the bed up and take it down, it becomes the most detested chore! Not only do you have to find space for the bedding, but if one of you wants to go to bed and the other doesn’t then you have a stand-off!
Even with a pop-up top it is difficult for anyone 6ft or more to stand up straight.
Having the ability to survive off-grid and be self-sufficient opens up so many more places to you. It takes a bit of planning though especially when there are no services for miles and miles.
Water is the most precious natural resource. Always carry more than you think you’ll need.
Digging your daily toilet hole wears thin! Much easier to have a waterless or chemical free loo on-board that doesn’t need emptying daily.
Air conditioning is pointless as once you switch it off it is a lot harder to acclimatise. Keep the windows down and feel the wind in your hair!
A 3-way fridge will not work in very hot climates no matter what the power source!
There is no such thing as mosquito nets that work – there will always be at least one that finds its way through.
Hi, we're Sharon & Dave an active and adventurous Irish & English couple who've been travelling together for more than 20 years. These posts are our travel stories and personal journeys. Follow our adventures to see where we've been and where we're going next!
Pin It on Pinterest
Loading Comments...
We use cookies to ensure that we give you the best experience on our website. If you continue to use this site we will assume that you are happy with it.